AWS SES
Sending Emails
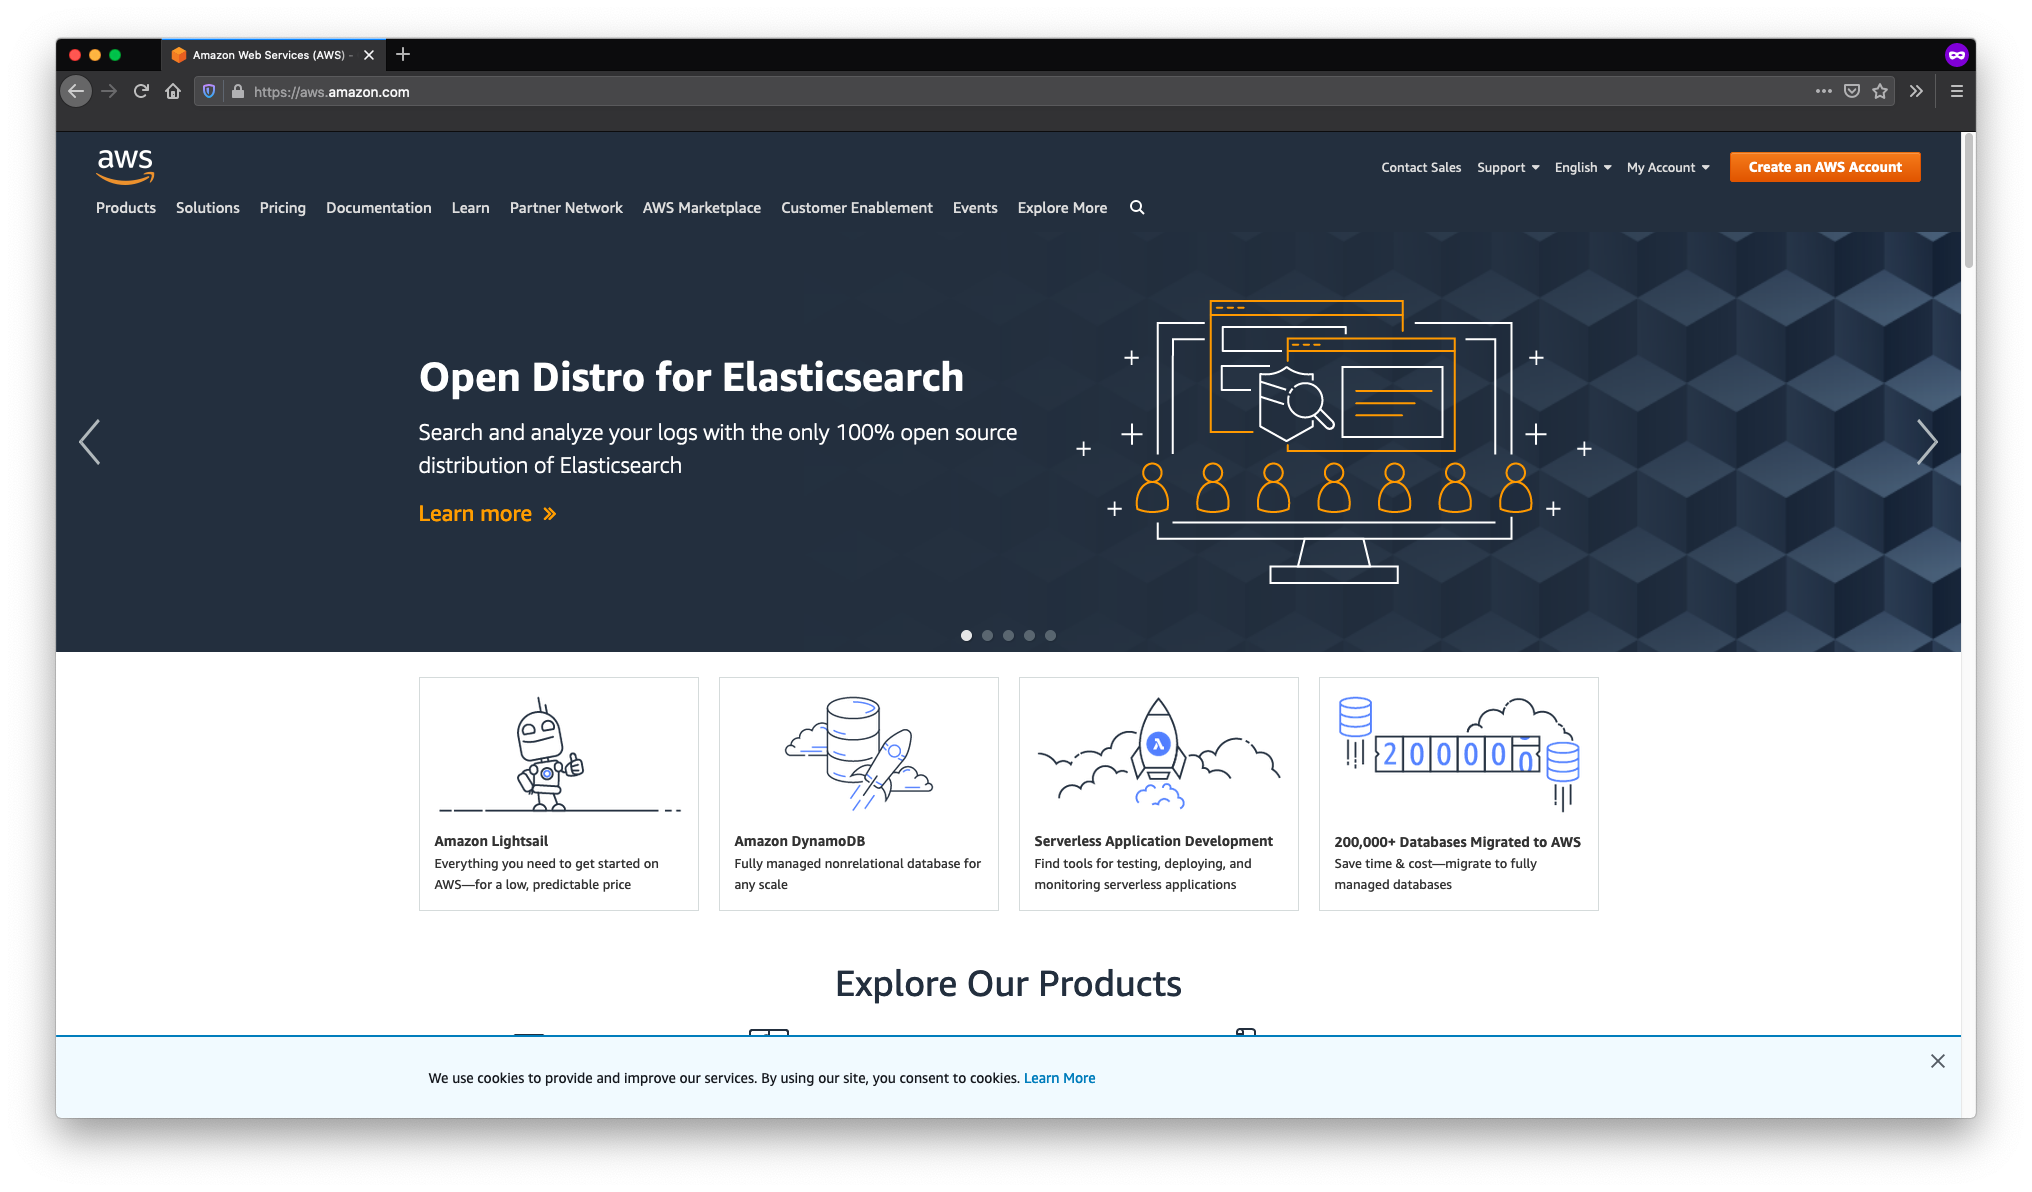
To send e-mails using the Amazon SES provider, you will need an AWS account. If you don't already have an account, visit the AWS website and click the Create an AWS Account button in the top right corner of the screen.
Be aware that you'll need to provide credit card details, even if you only intend to make use of the free tier.
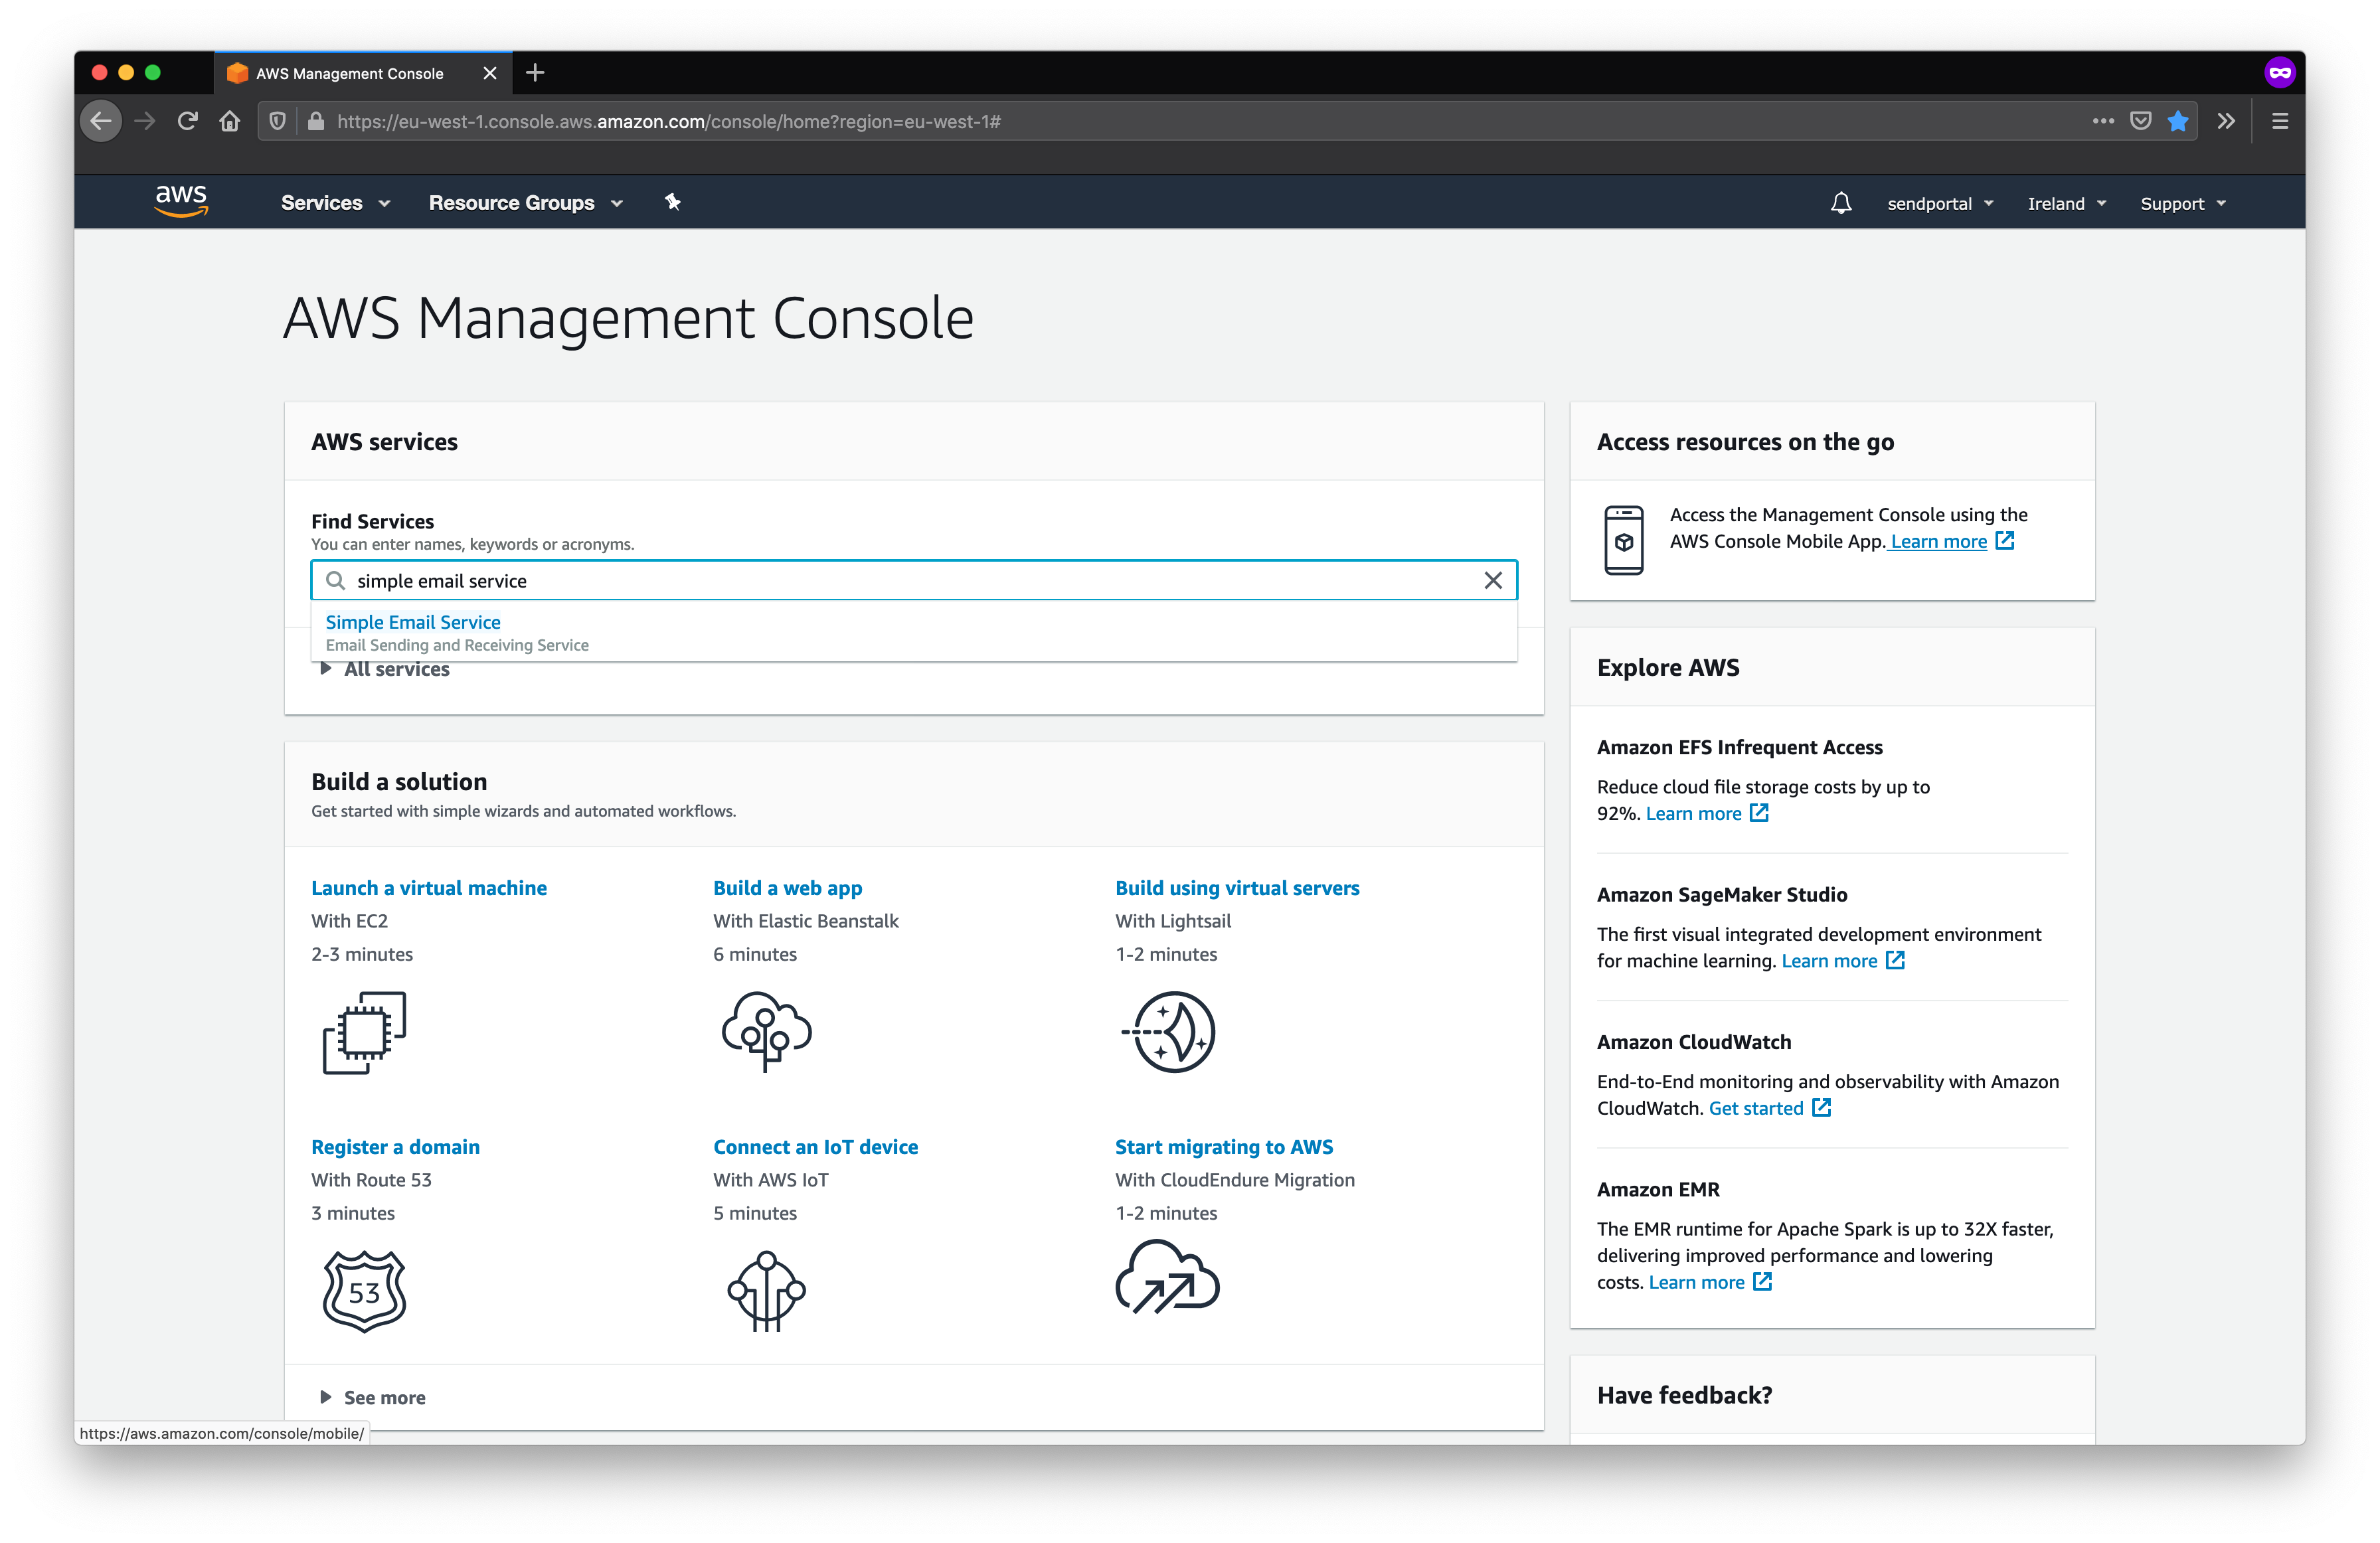
Once you've created an account, navigate to the SES (Simple Email Service) control panel by typing "simple email service" into the Find Services input on the AWS Management Console and clicking on the relevant option in the dropdown.
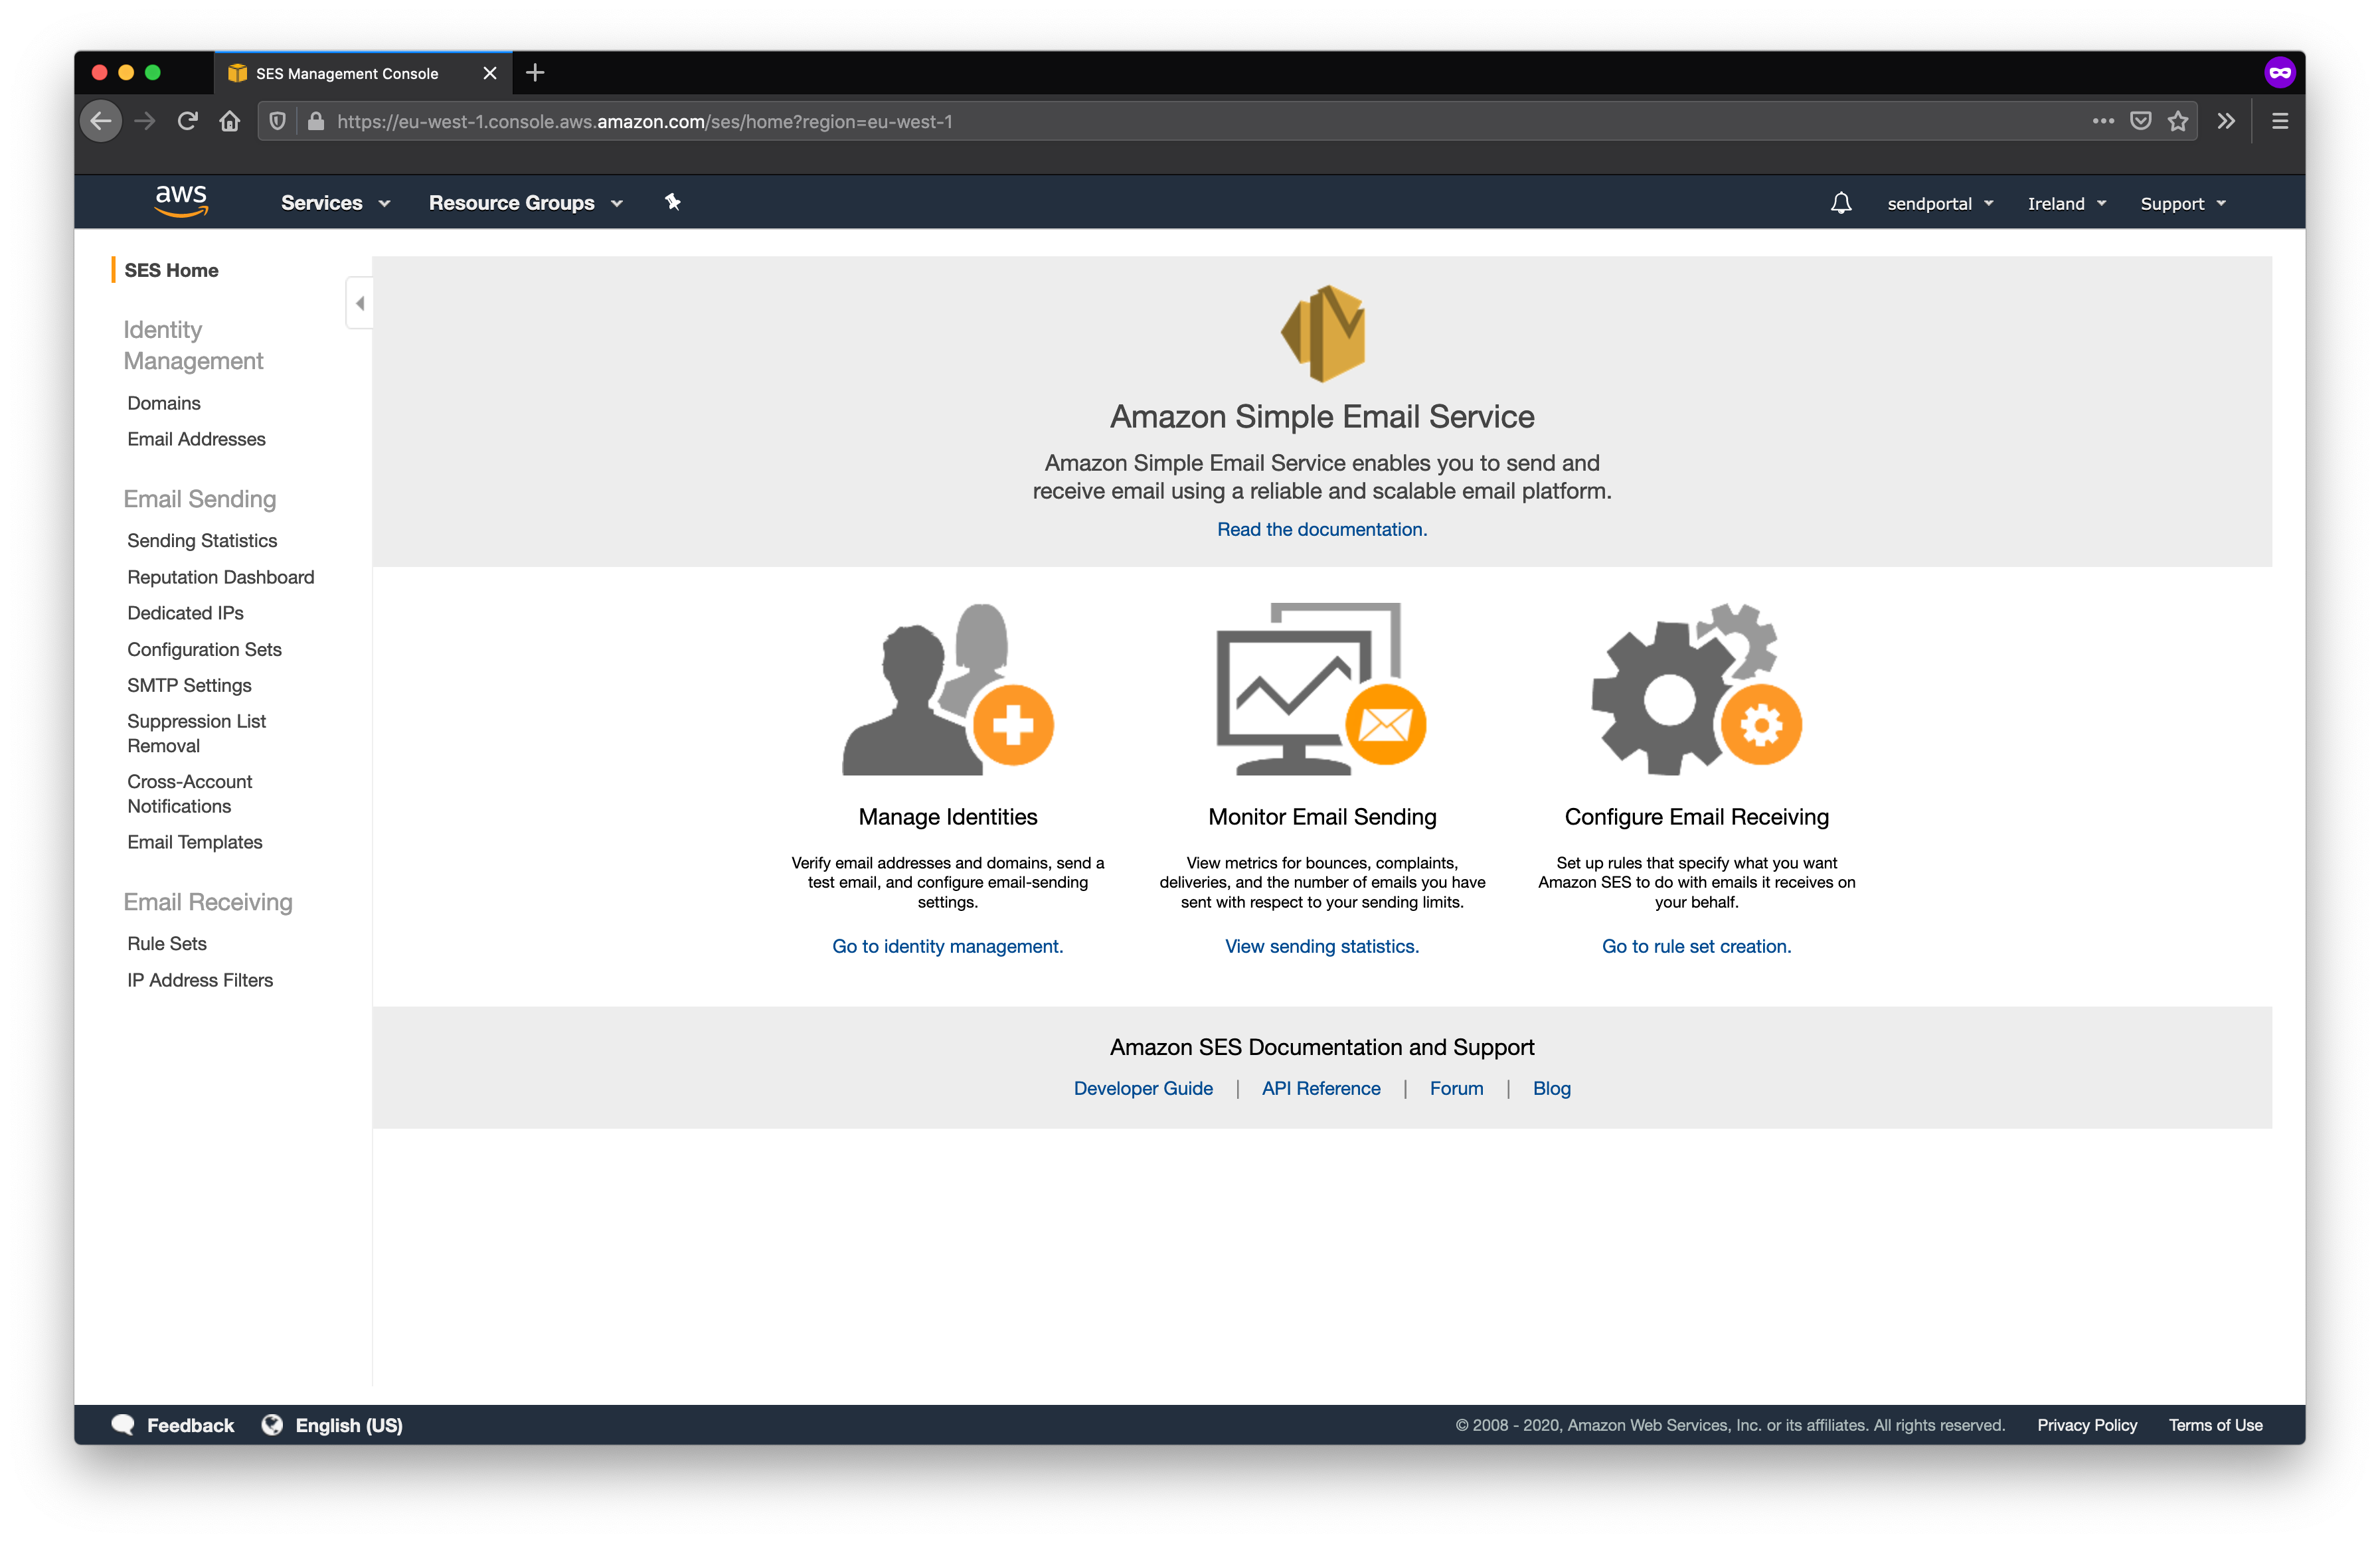
Click Go to identity management;
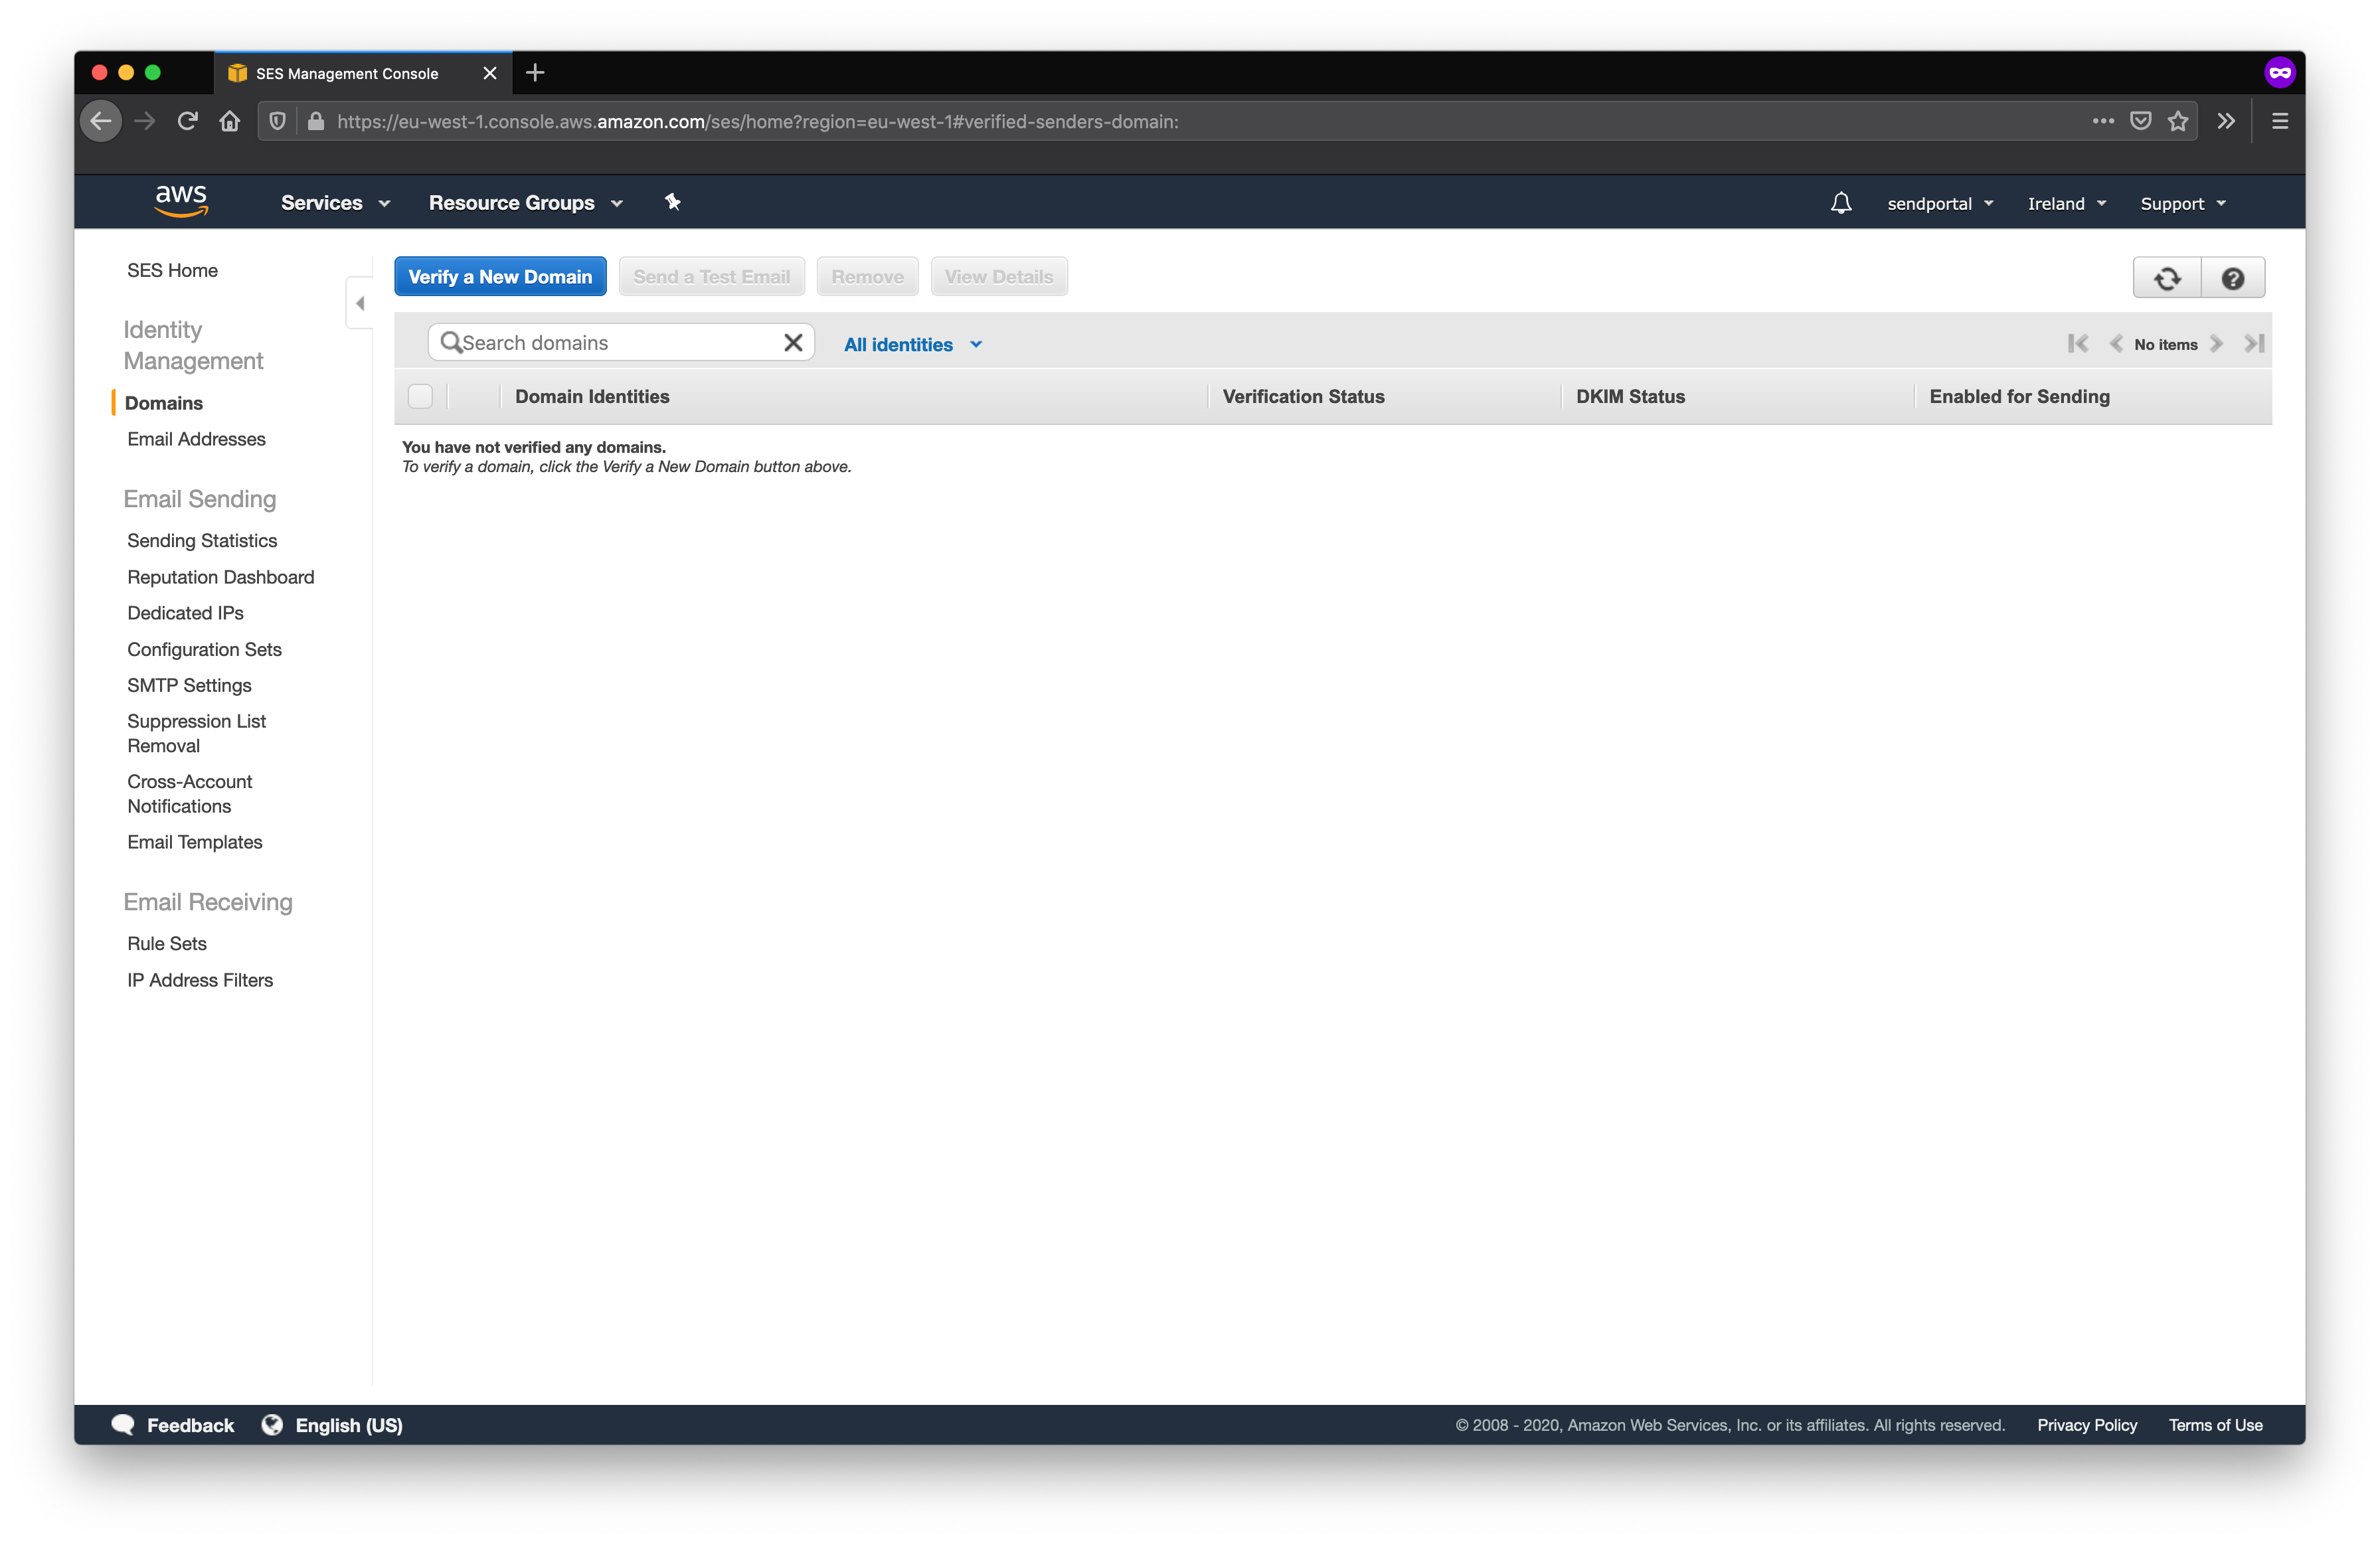
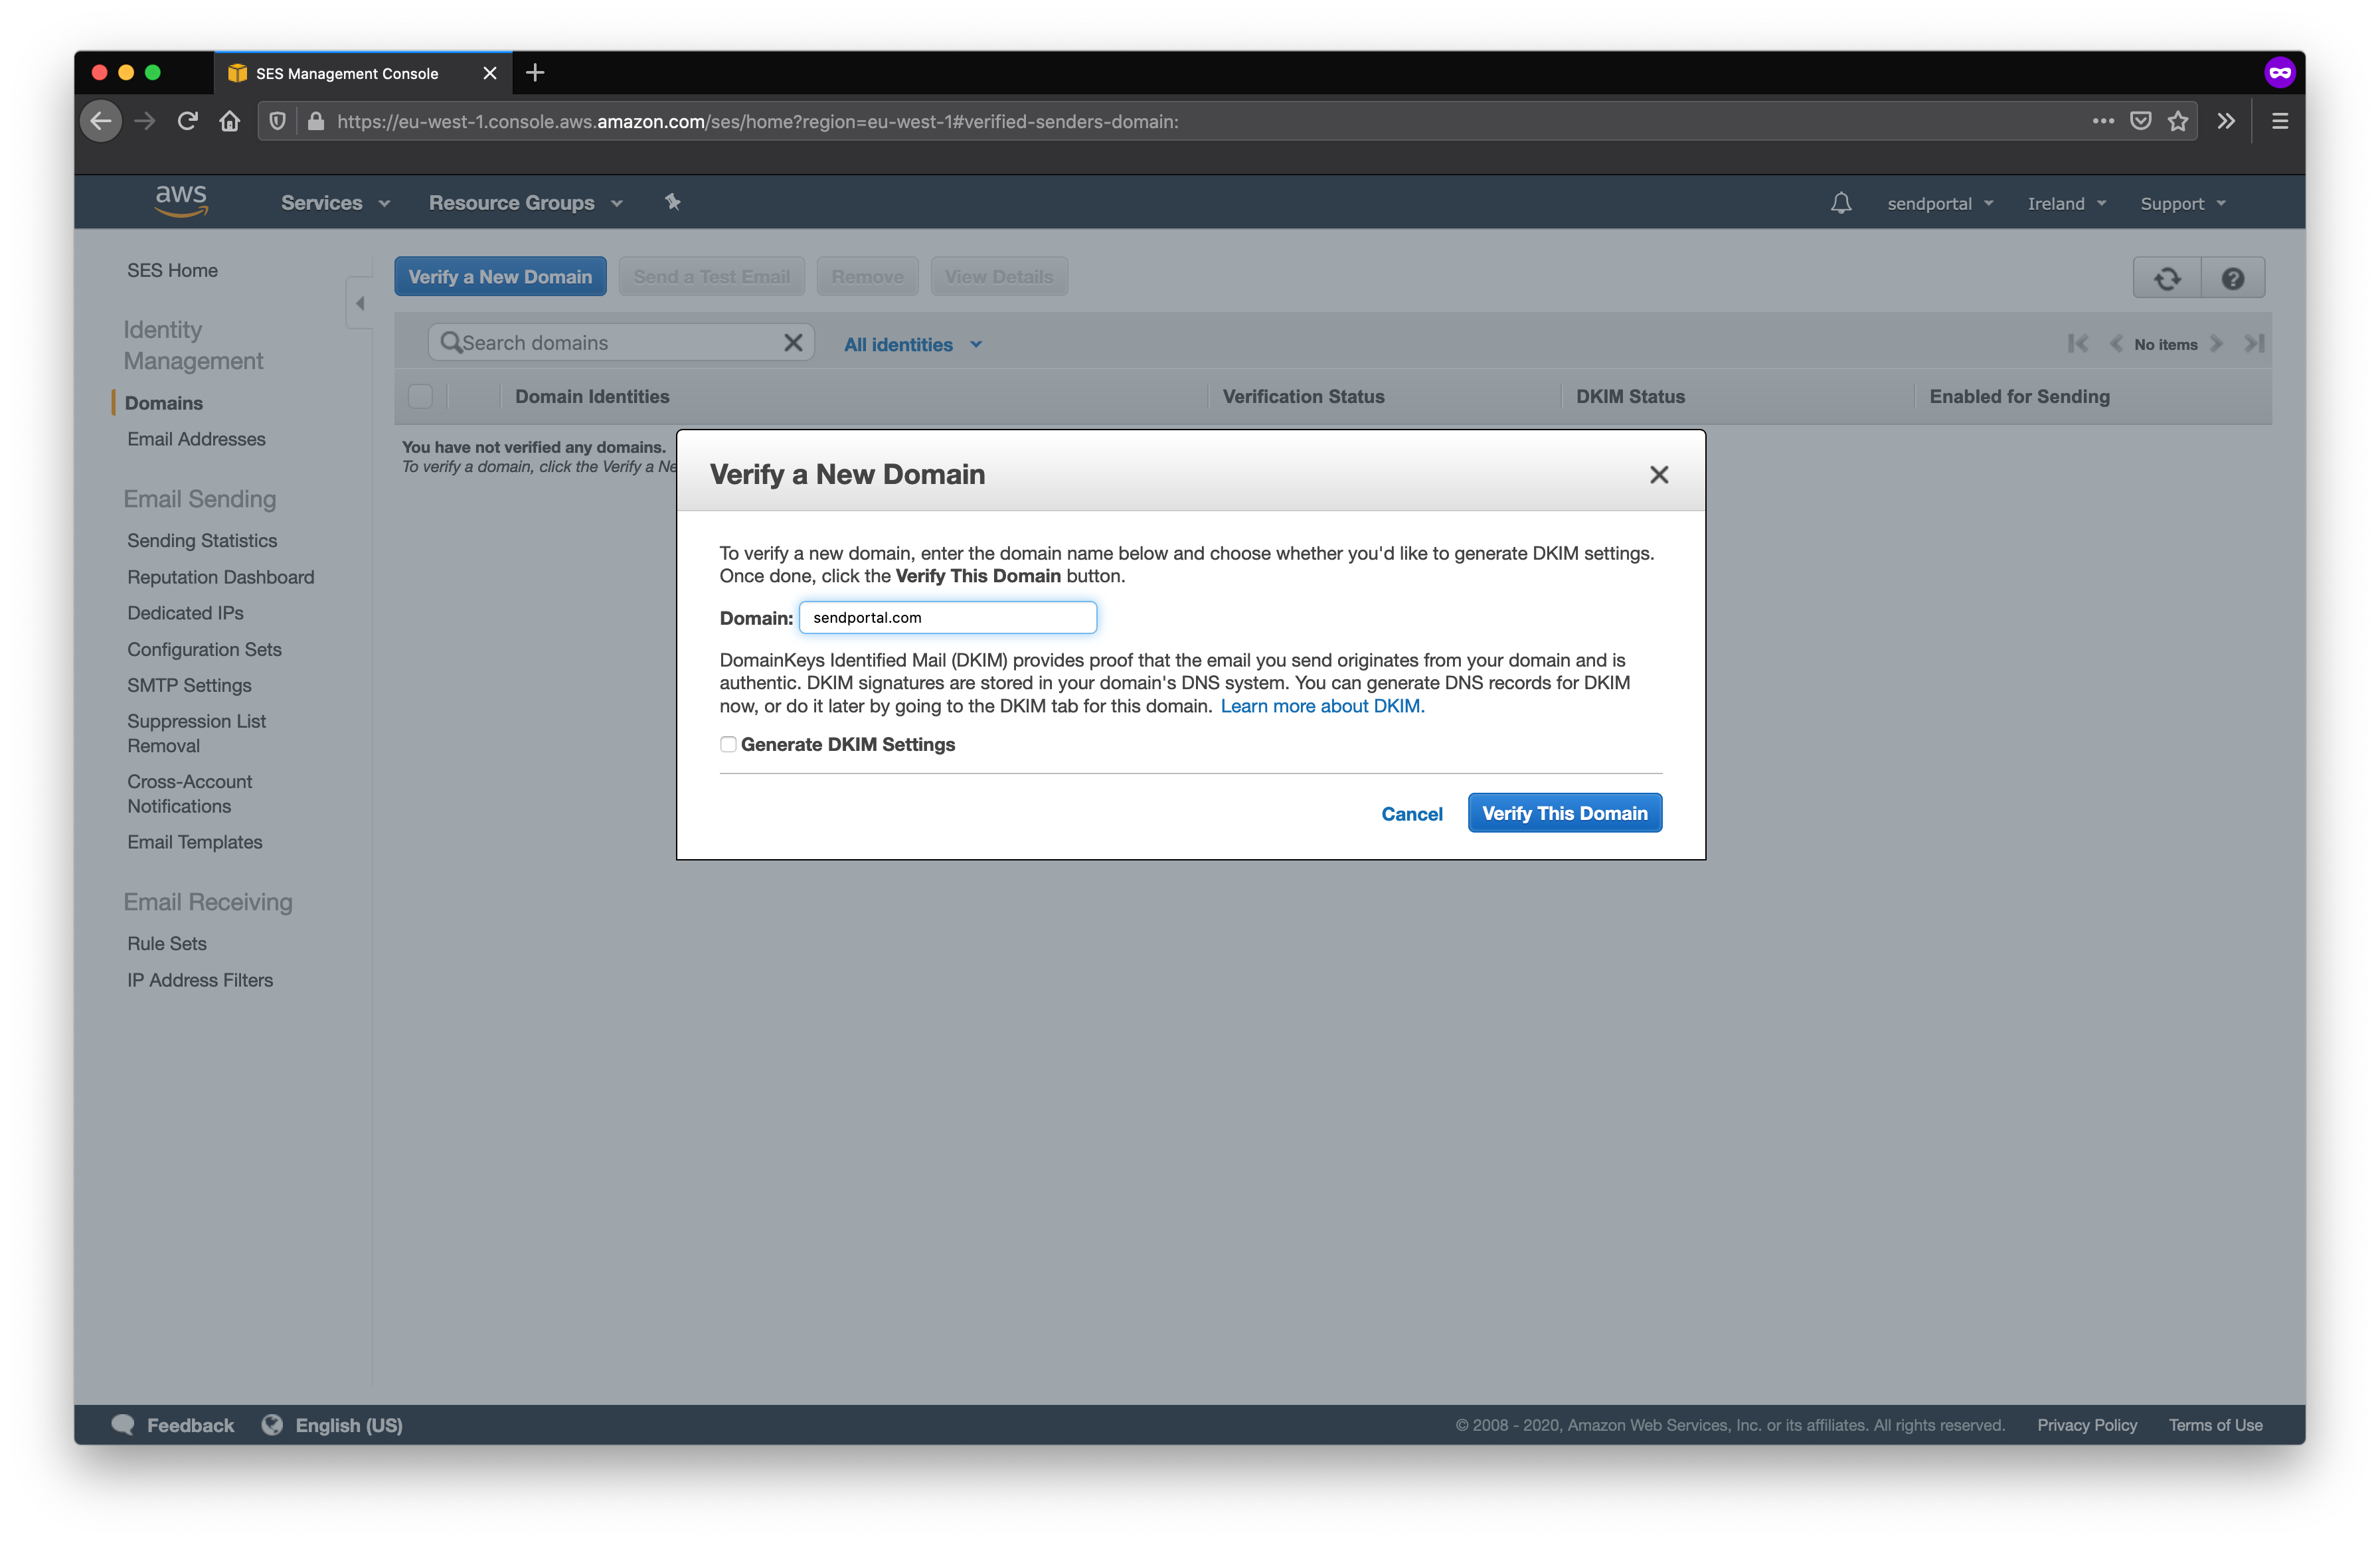
You'll need to verify the domain from which you want to send all your e-mails, so click Verify a New Domain.
At this stage we're not going to generate the DKIM settings, but this is worth doing once you move to a production environment, as it will reduce the risk of any messages you send being marked as spam.
Once you click Verify This Domain you'll be provided with a domain verification record;
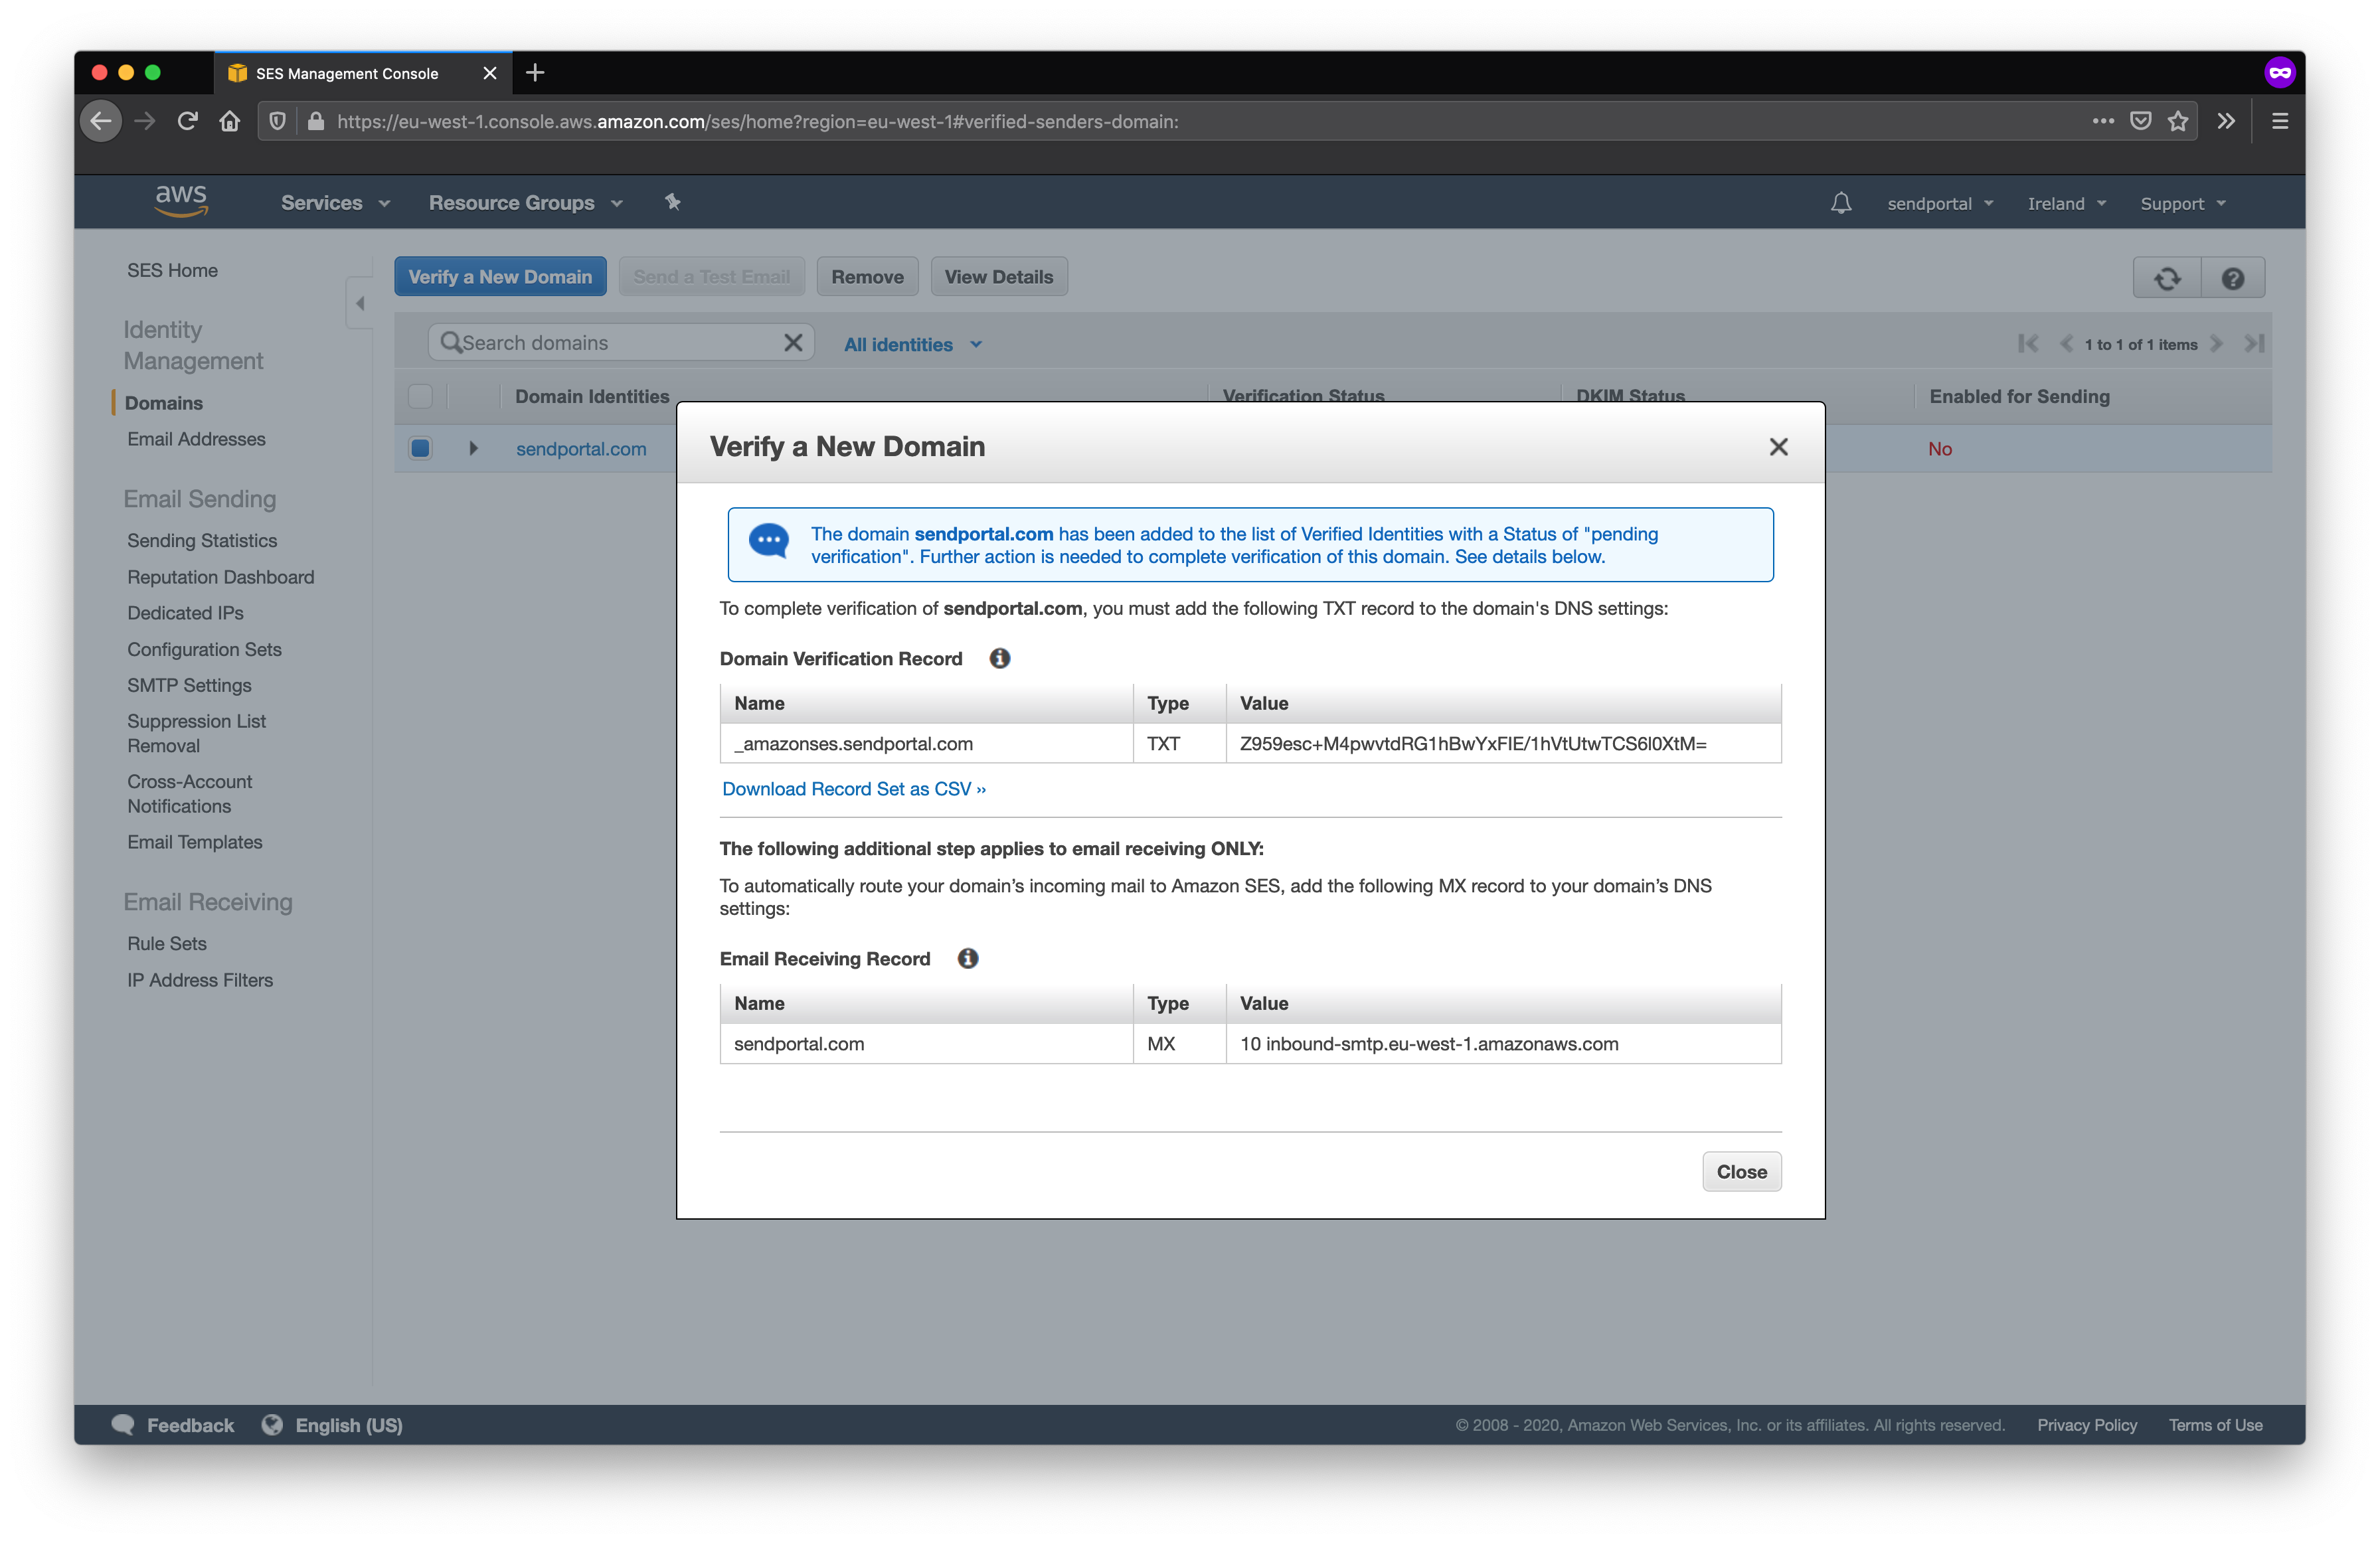
You'll now need to visit the site that you use to manage DNS for the domain provided (usually the domain registrar). The steps to do this are beyond the scope of this documentation as they vary from provider to provider, but you will need to create a TXT entry for the relevant domain and paste in the strings from the Name and Value columns.
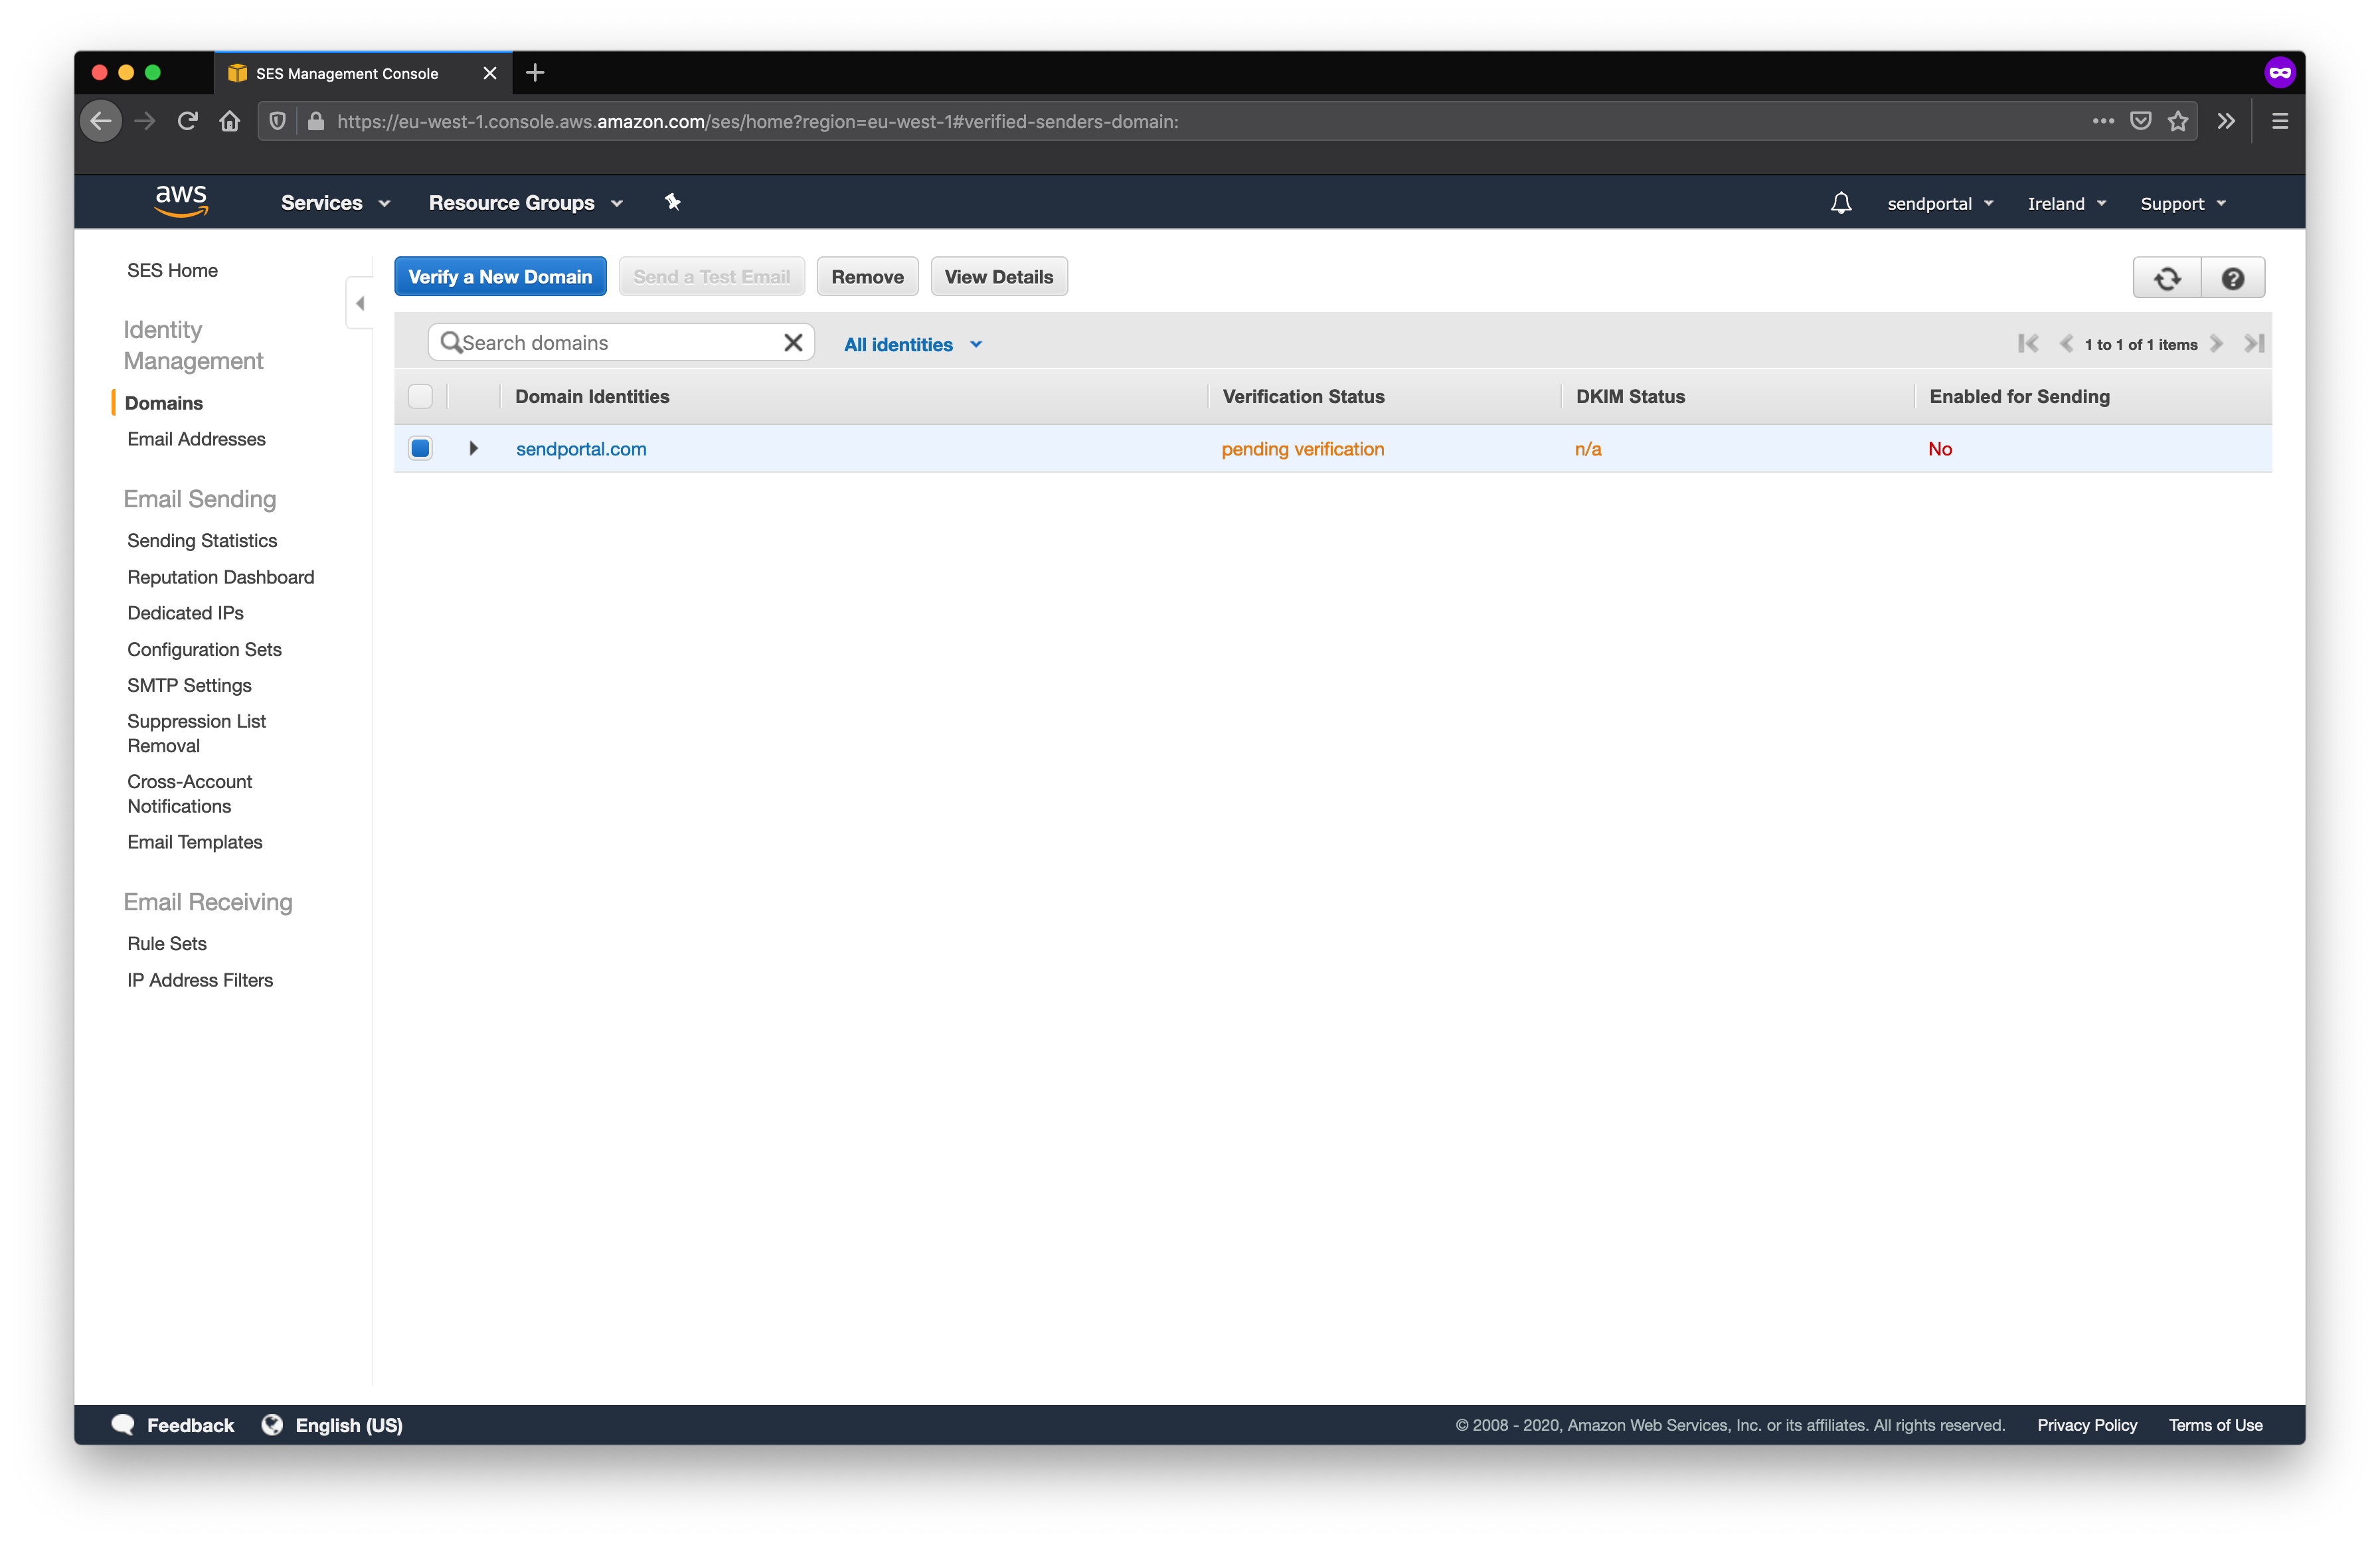
Once you've completed this step, click Close. At first the Verification status will be pending verification and Enabled for sending will be No.
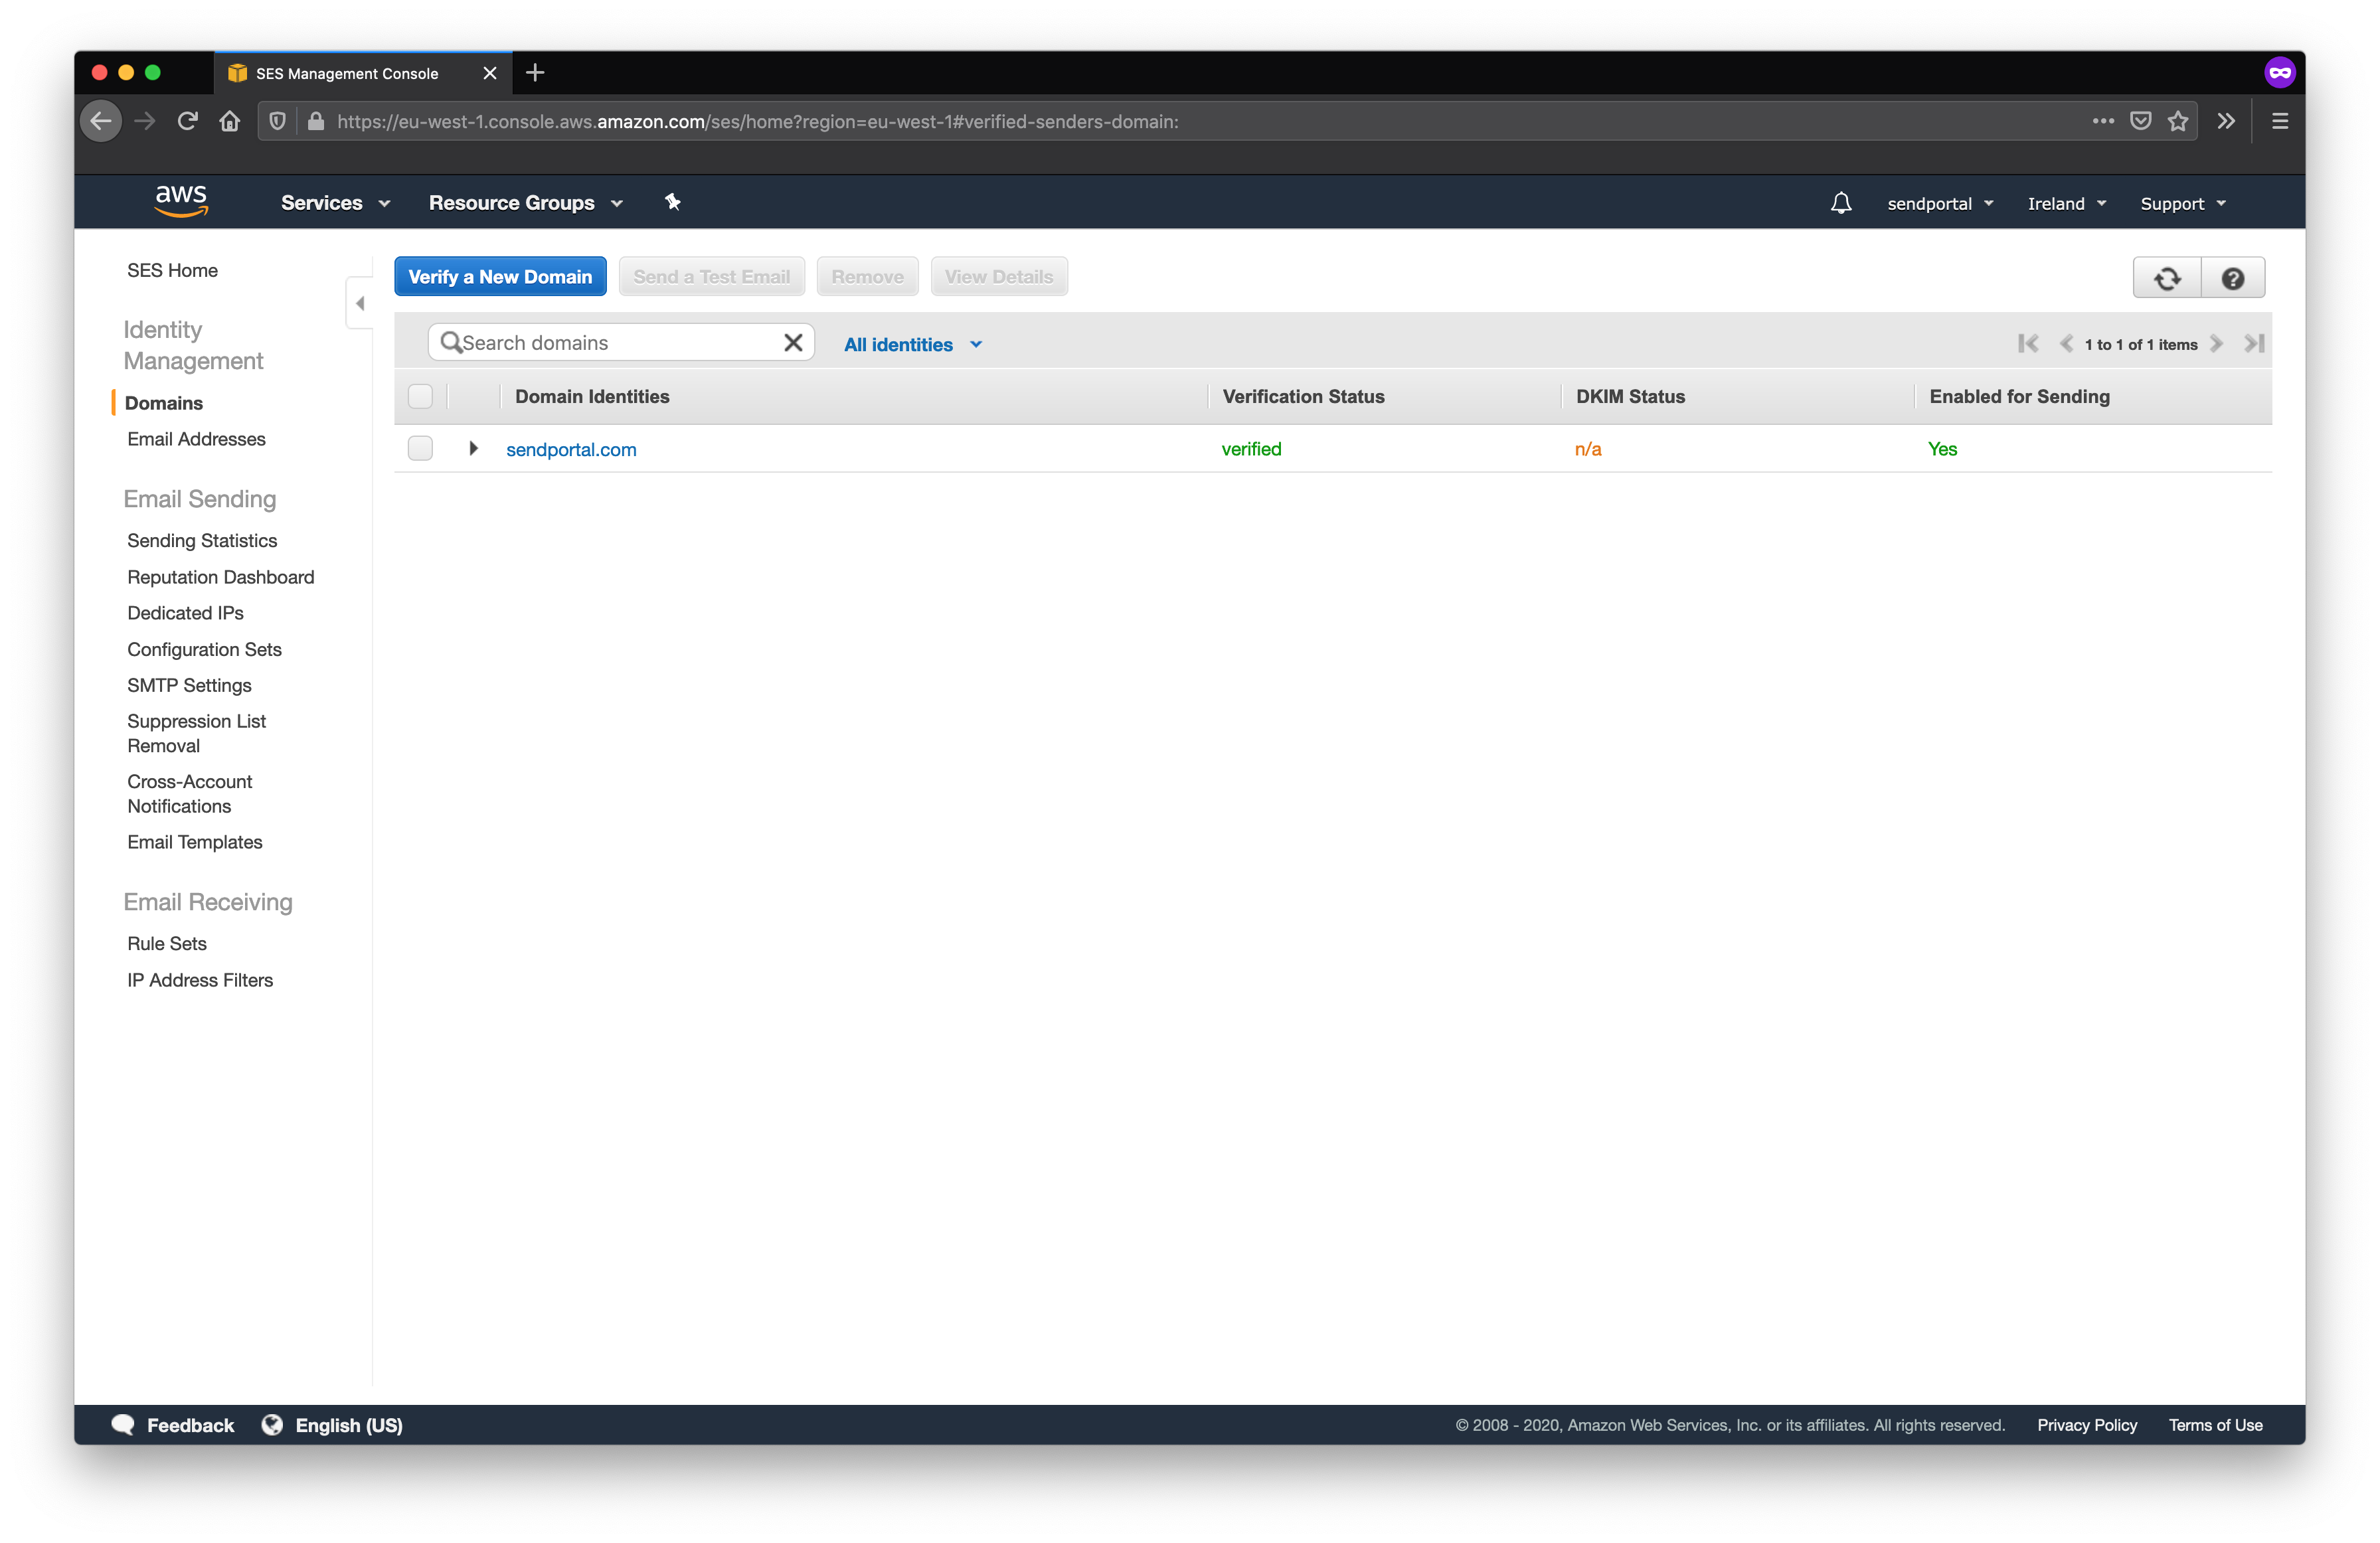
As long as you have set the DNS entry correctly, the Verification status will transition to verified and Enabled for Sending will show Yes. You should also receive a notification via e-mail to say that the domain has been successfully verified.
It can take some time to make this transition, but if it doesn't work ensure you didn't accidentally copy and paste any whitespace at the beginning or end of either string.
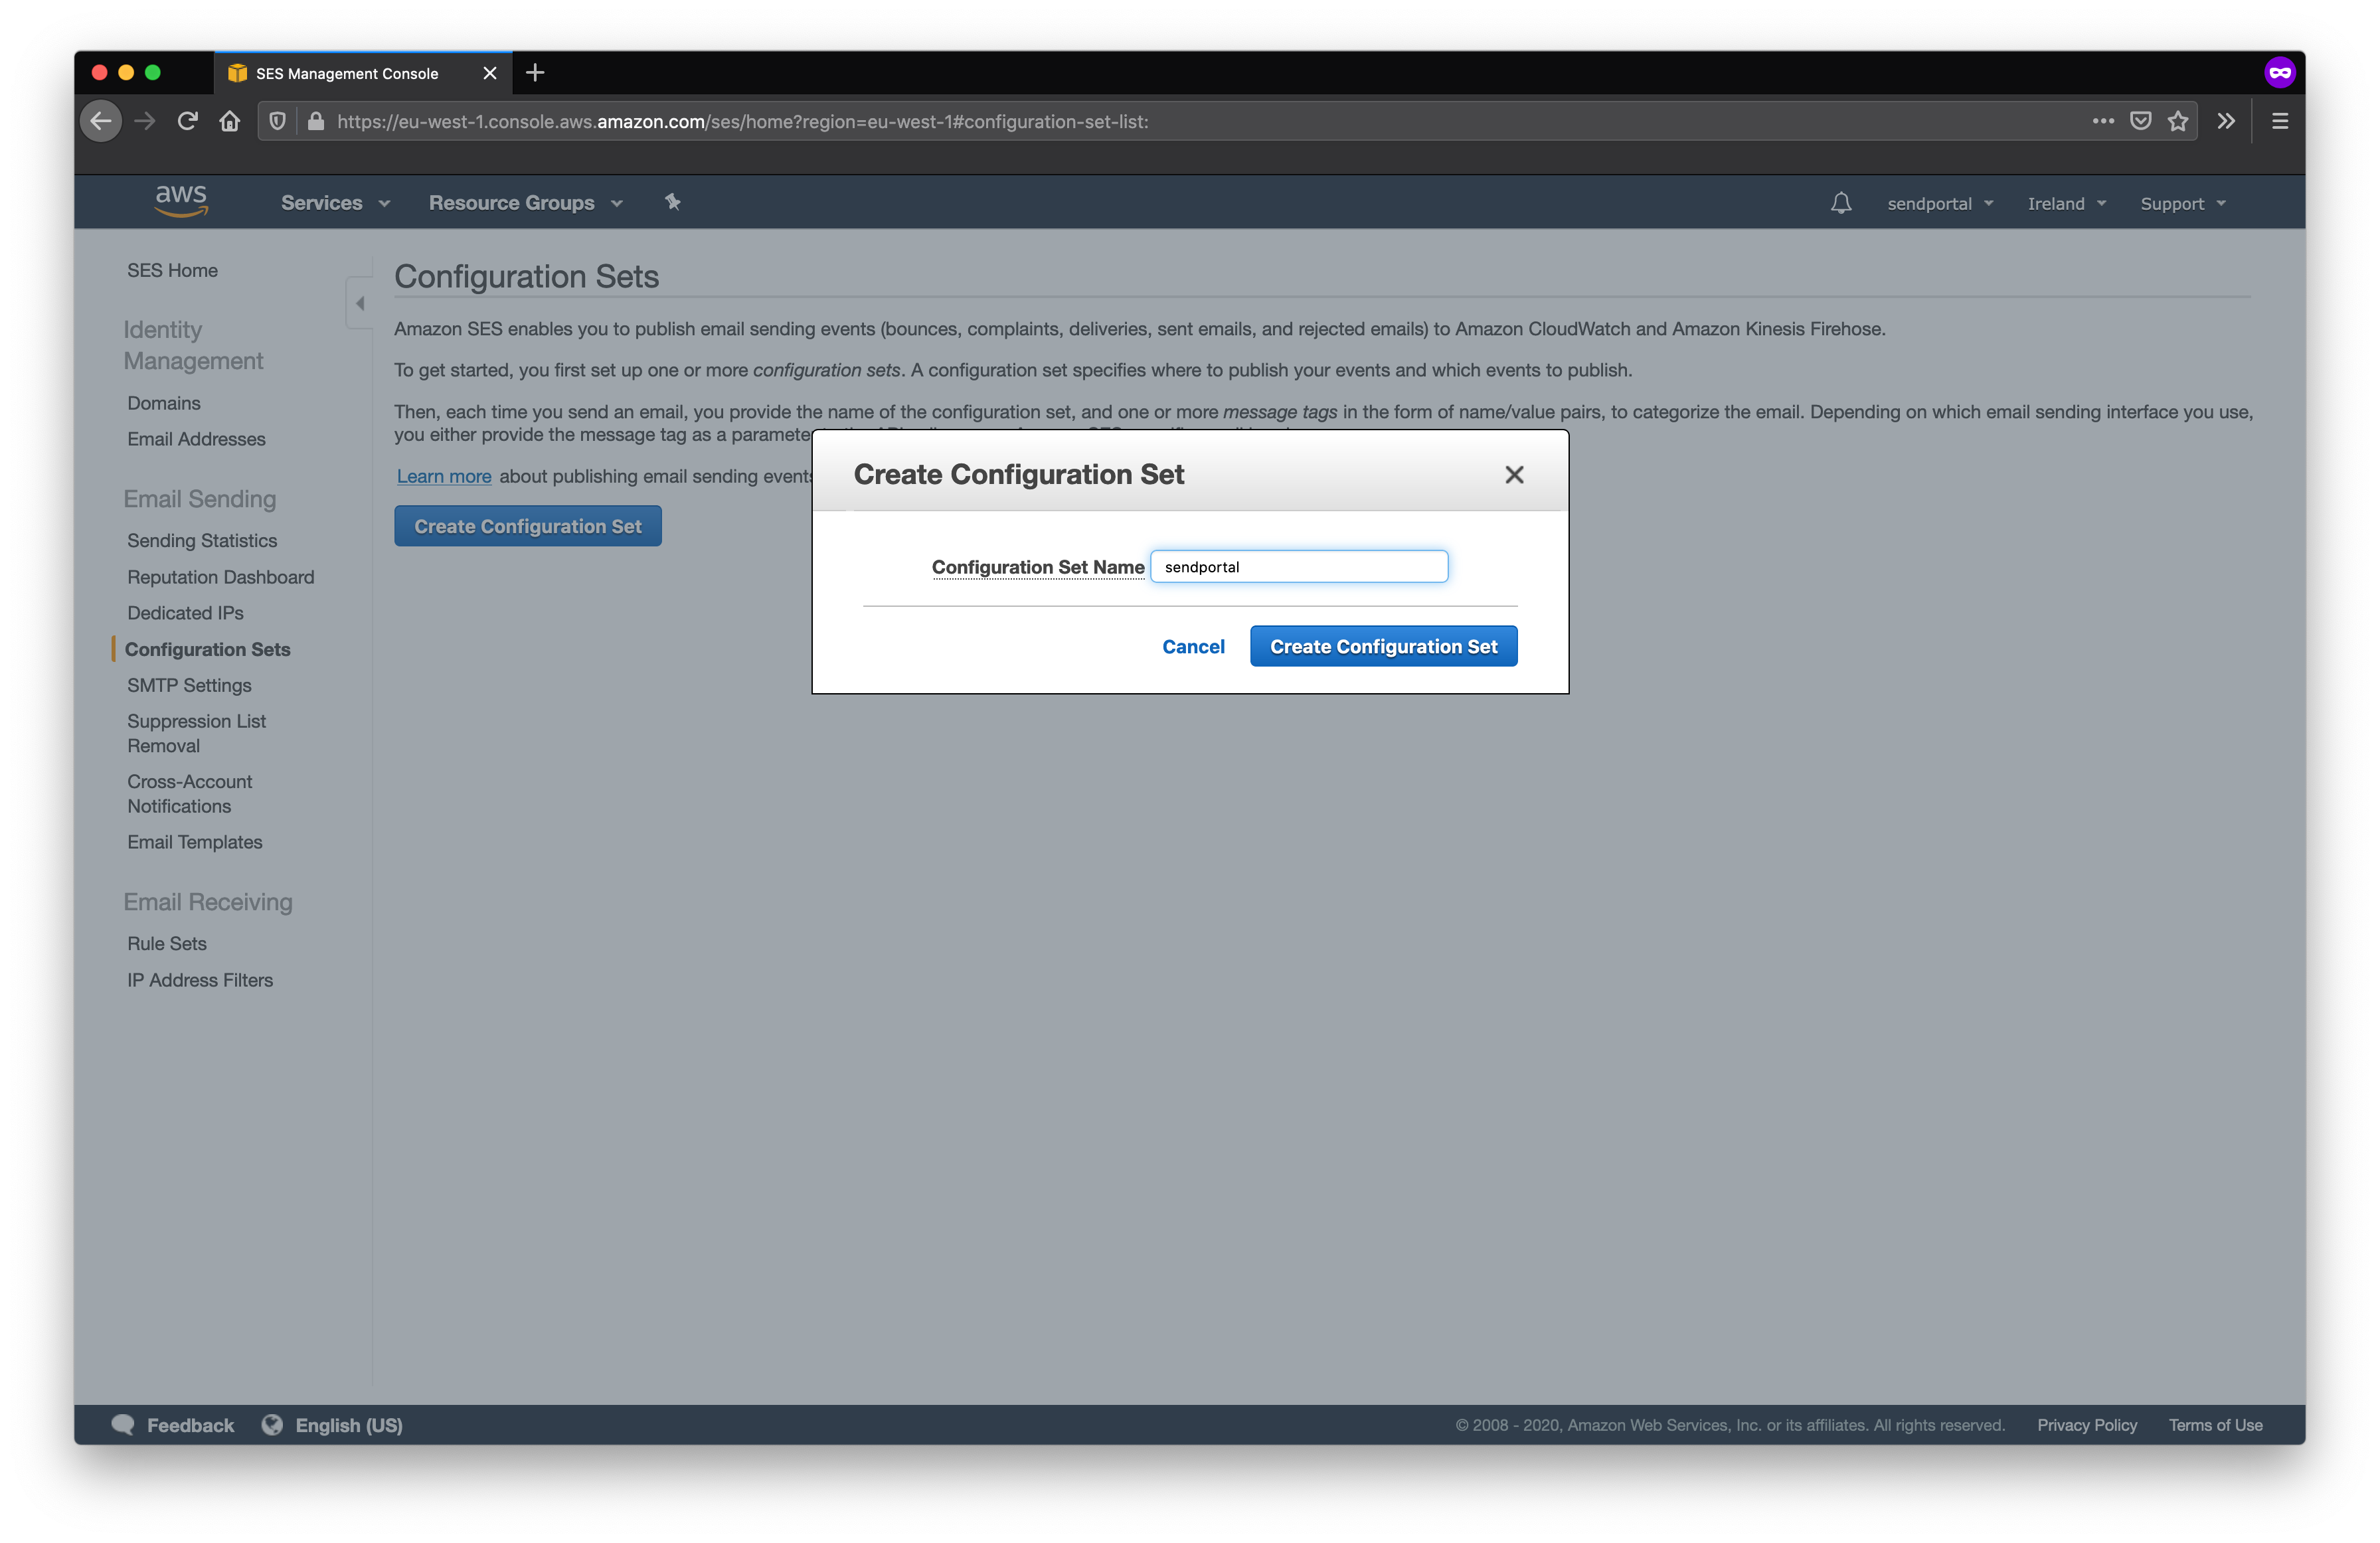
We also need to create a "configuration set". In order to do that, select the Configuration Sets option from the side menu of the SES panel.
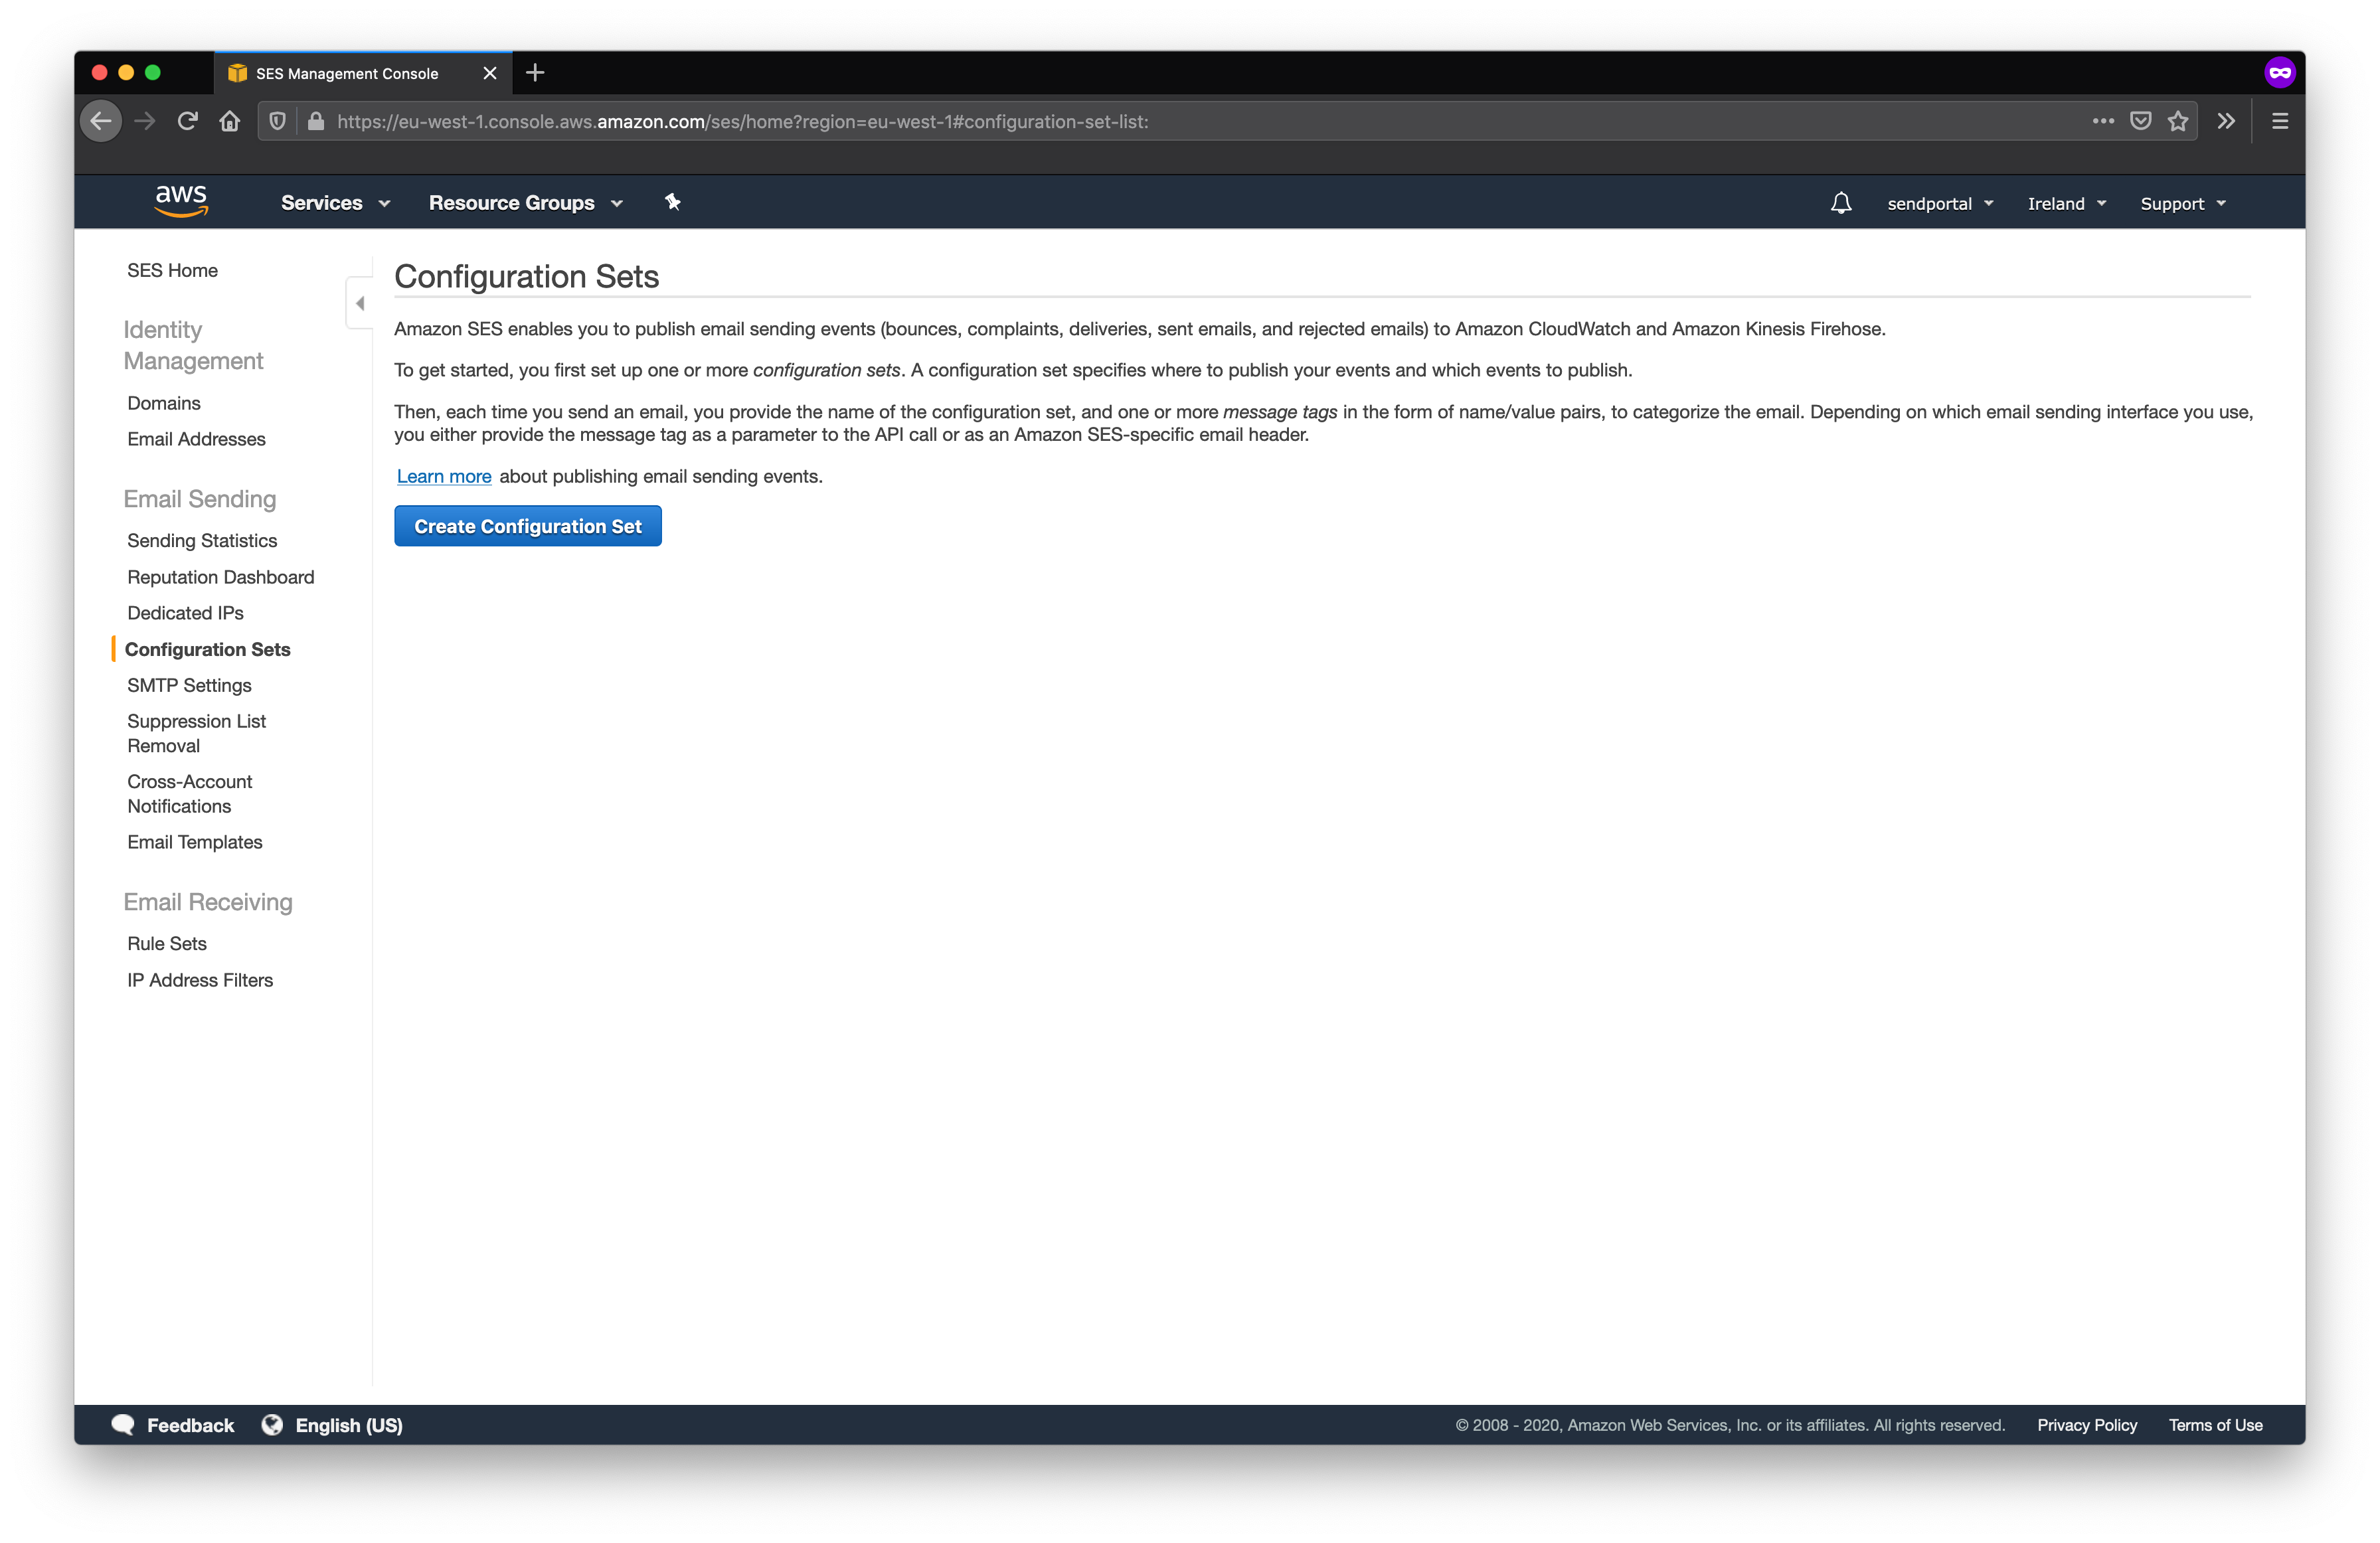
If you don't require e-mail tracking (delivery, opens etc) you only need to create the configuration set.
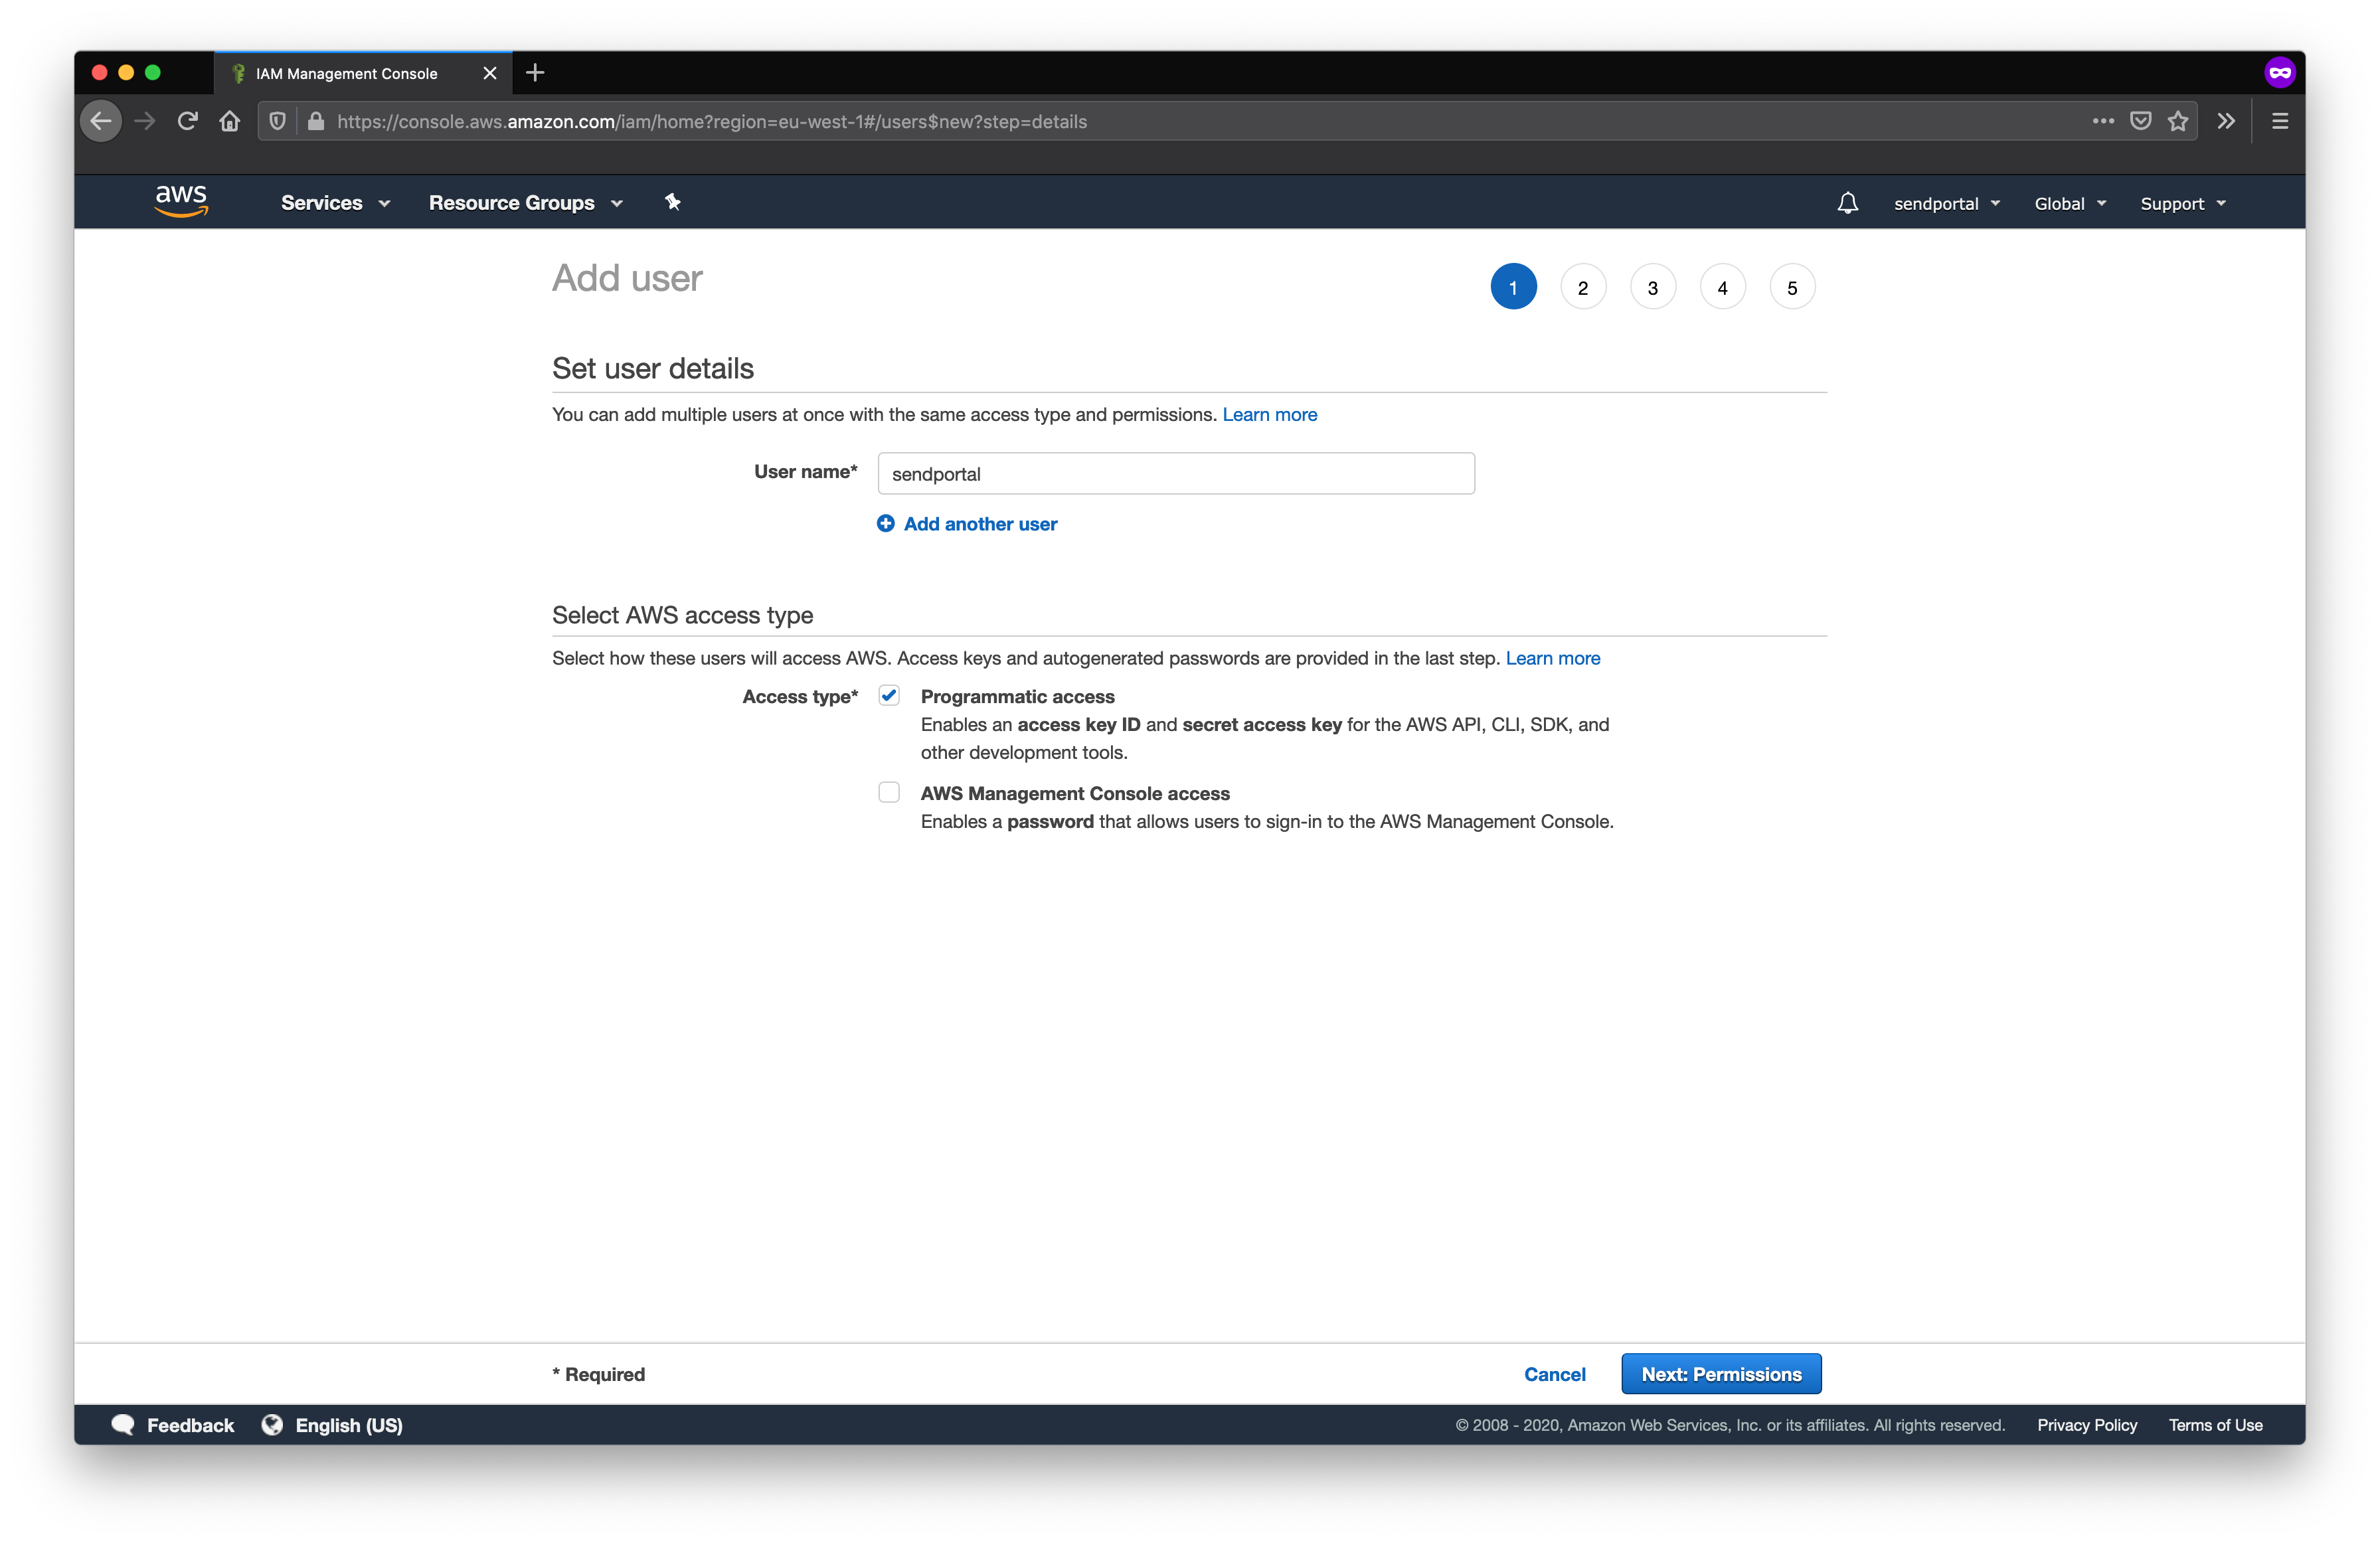
Next we need to generate an access key pair. To do this you'll need to visit the IAM (Identity and Access Management) module of AWS.
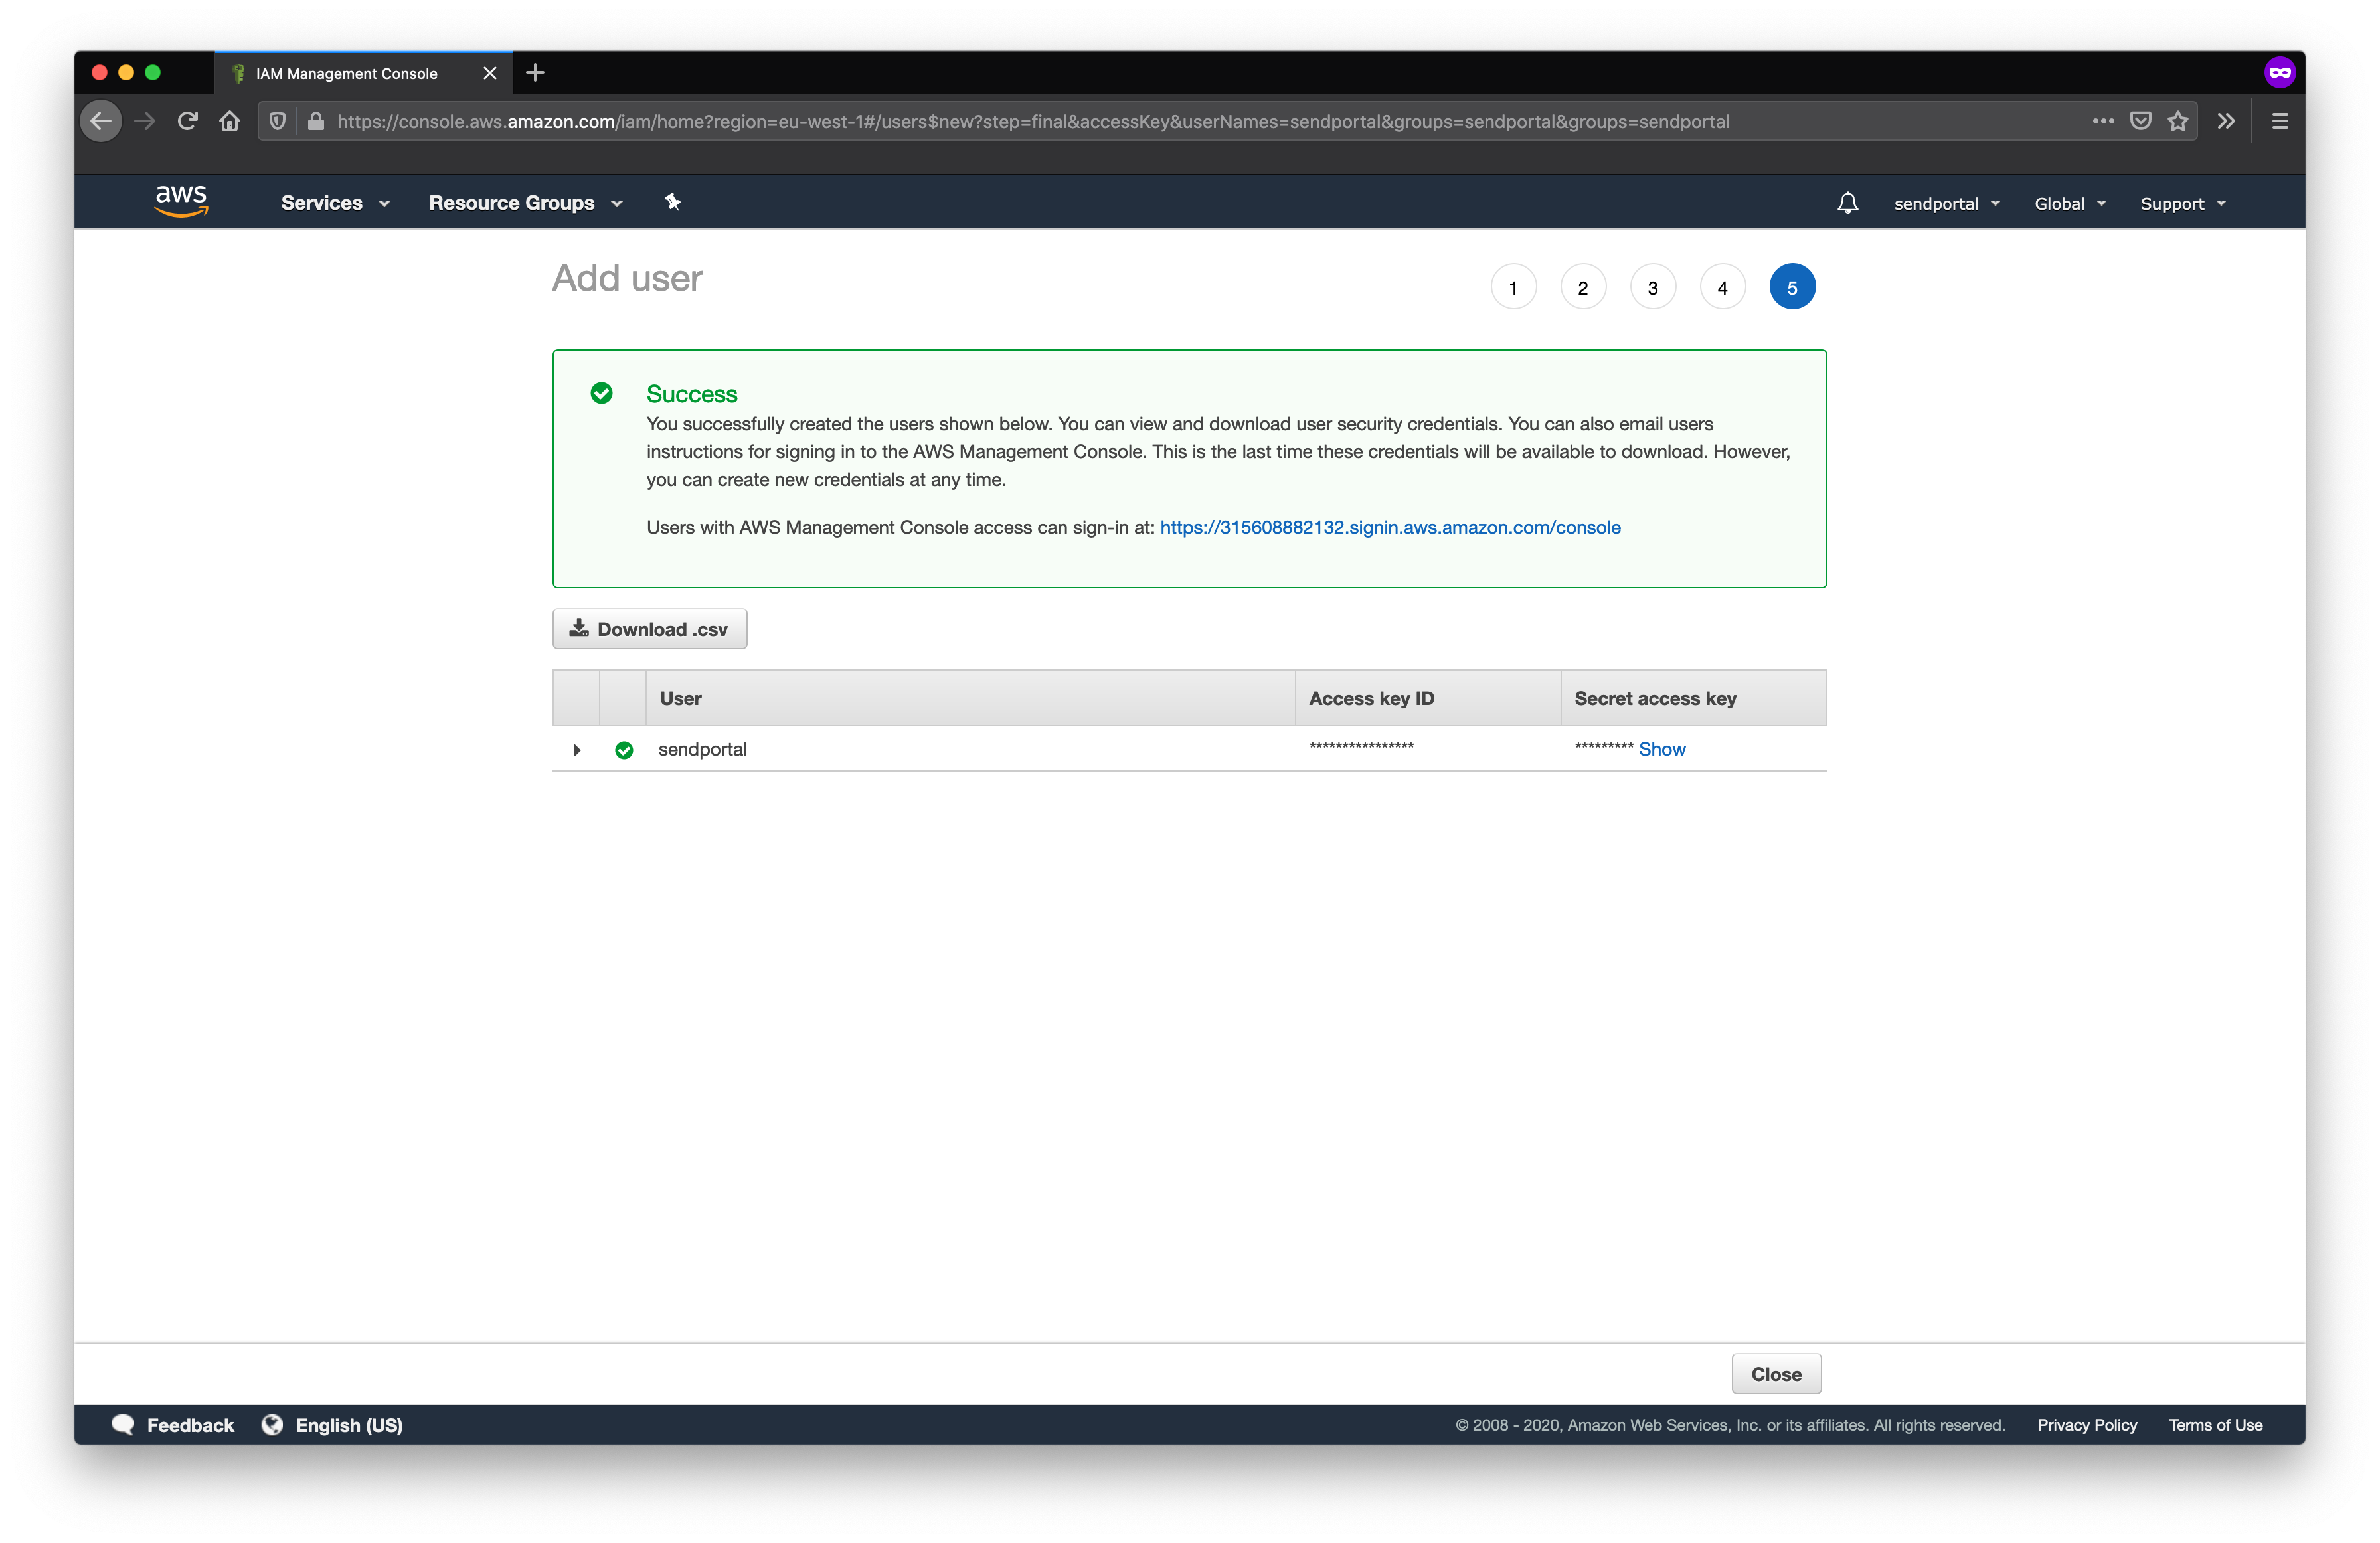
It's best to create a new IAM user, so click Users and Add user. You can create the key pair using your root user account, but as this allows unrestricted access to the AWS console, it's a security risk if the credentials are ever compromised.
As the user doesn't need access to the management console, you can just select the Programmatic access option.
If you don't already have any groups configured, you'll need to create one at the next step. If you only want the account to be able to send e-mails then select the AmazonSESFullAccess policy.
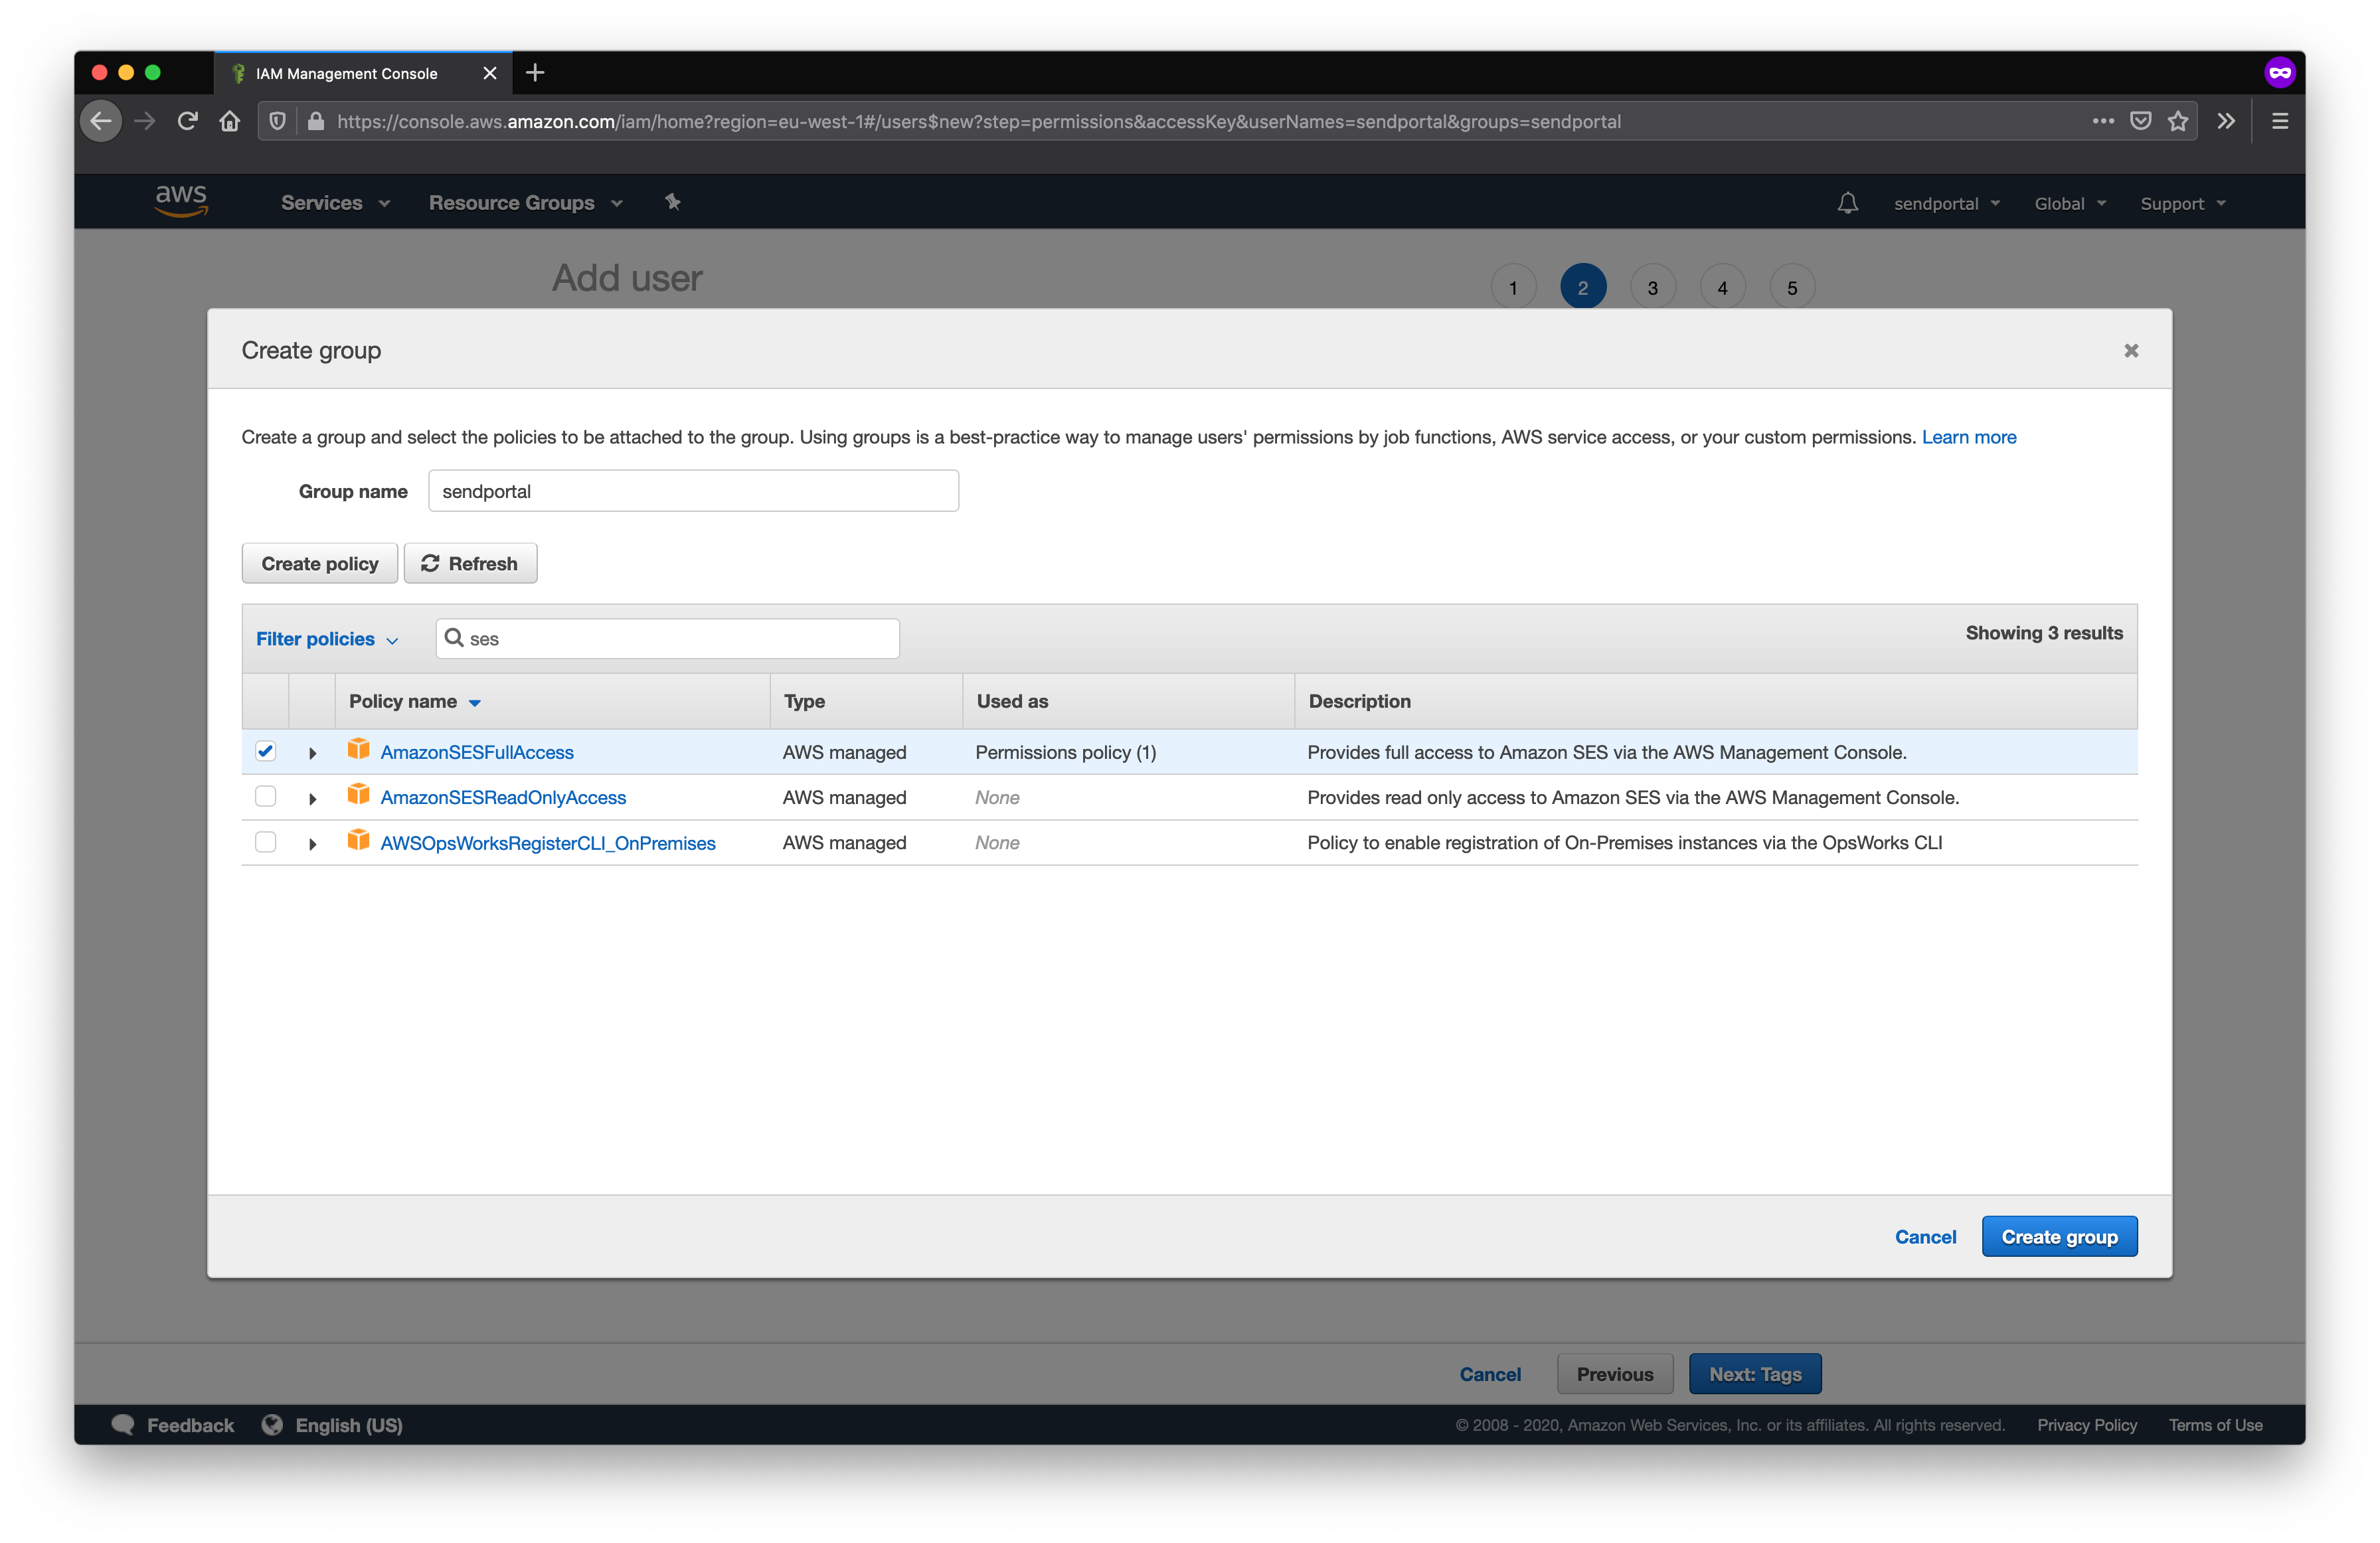
If you also want to enable e-mail tracking, you'll need to add the AmazonSNSFullAccess policy.

Selecting tags for the user is optional, so we're not going to enter any at this stage. Once the user has been created you should now be able to copy and paste the access key and secret access key to the SendPortal provider configuration.
We're now ready to configure the provider with SendPortal.
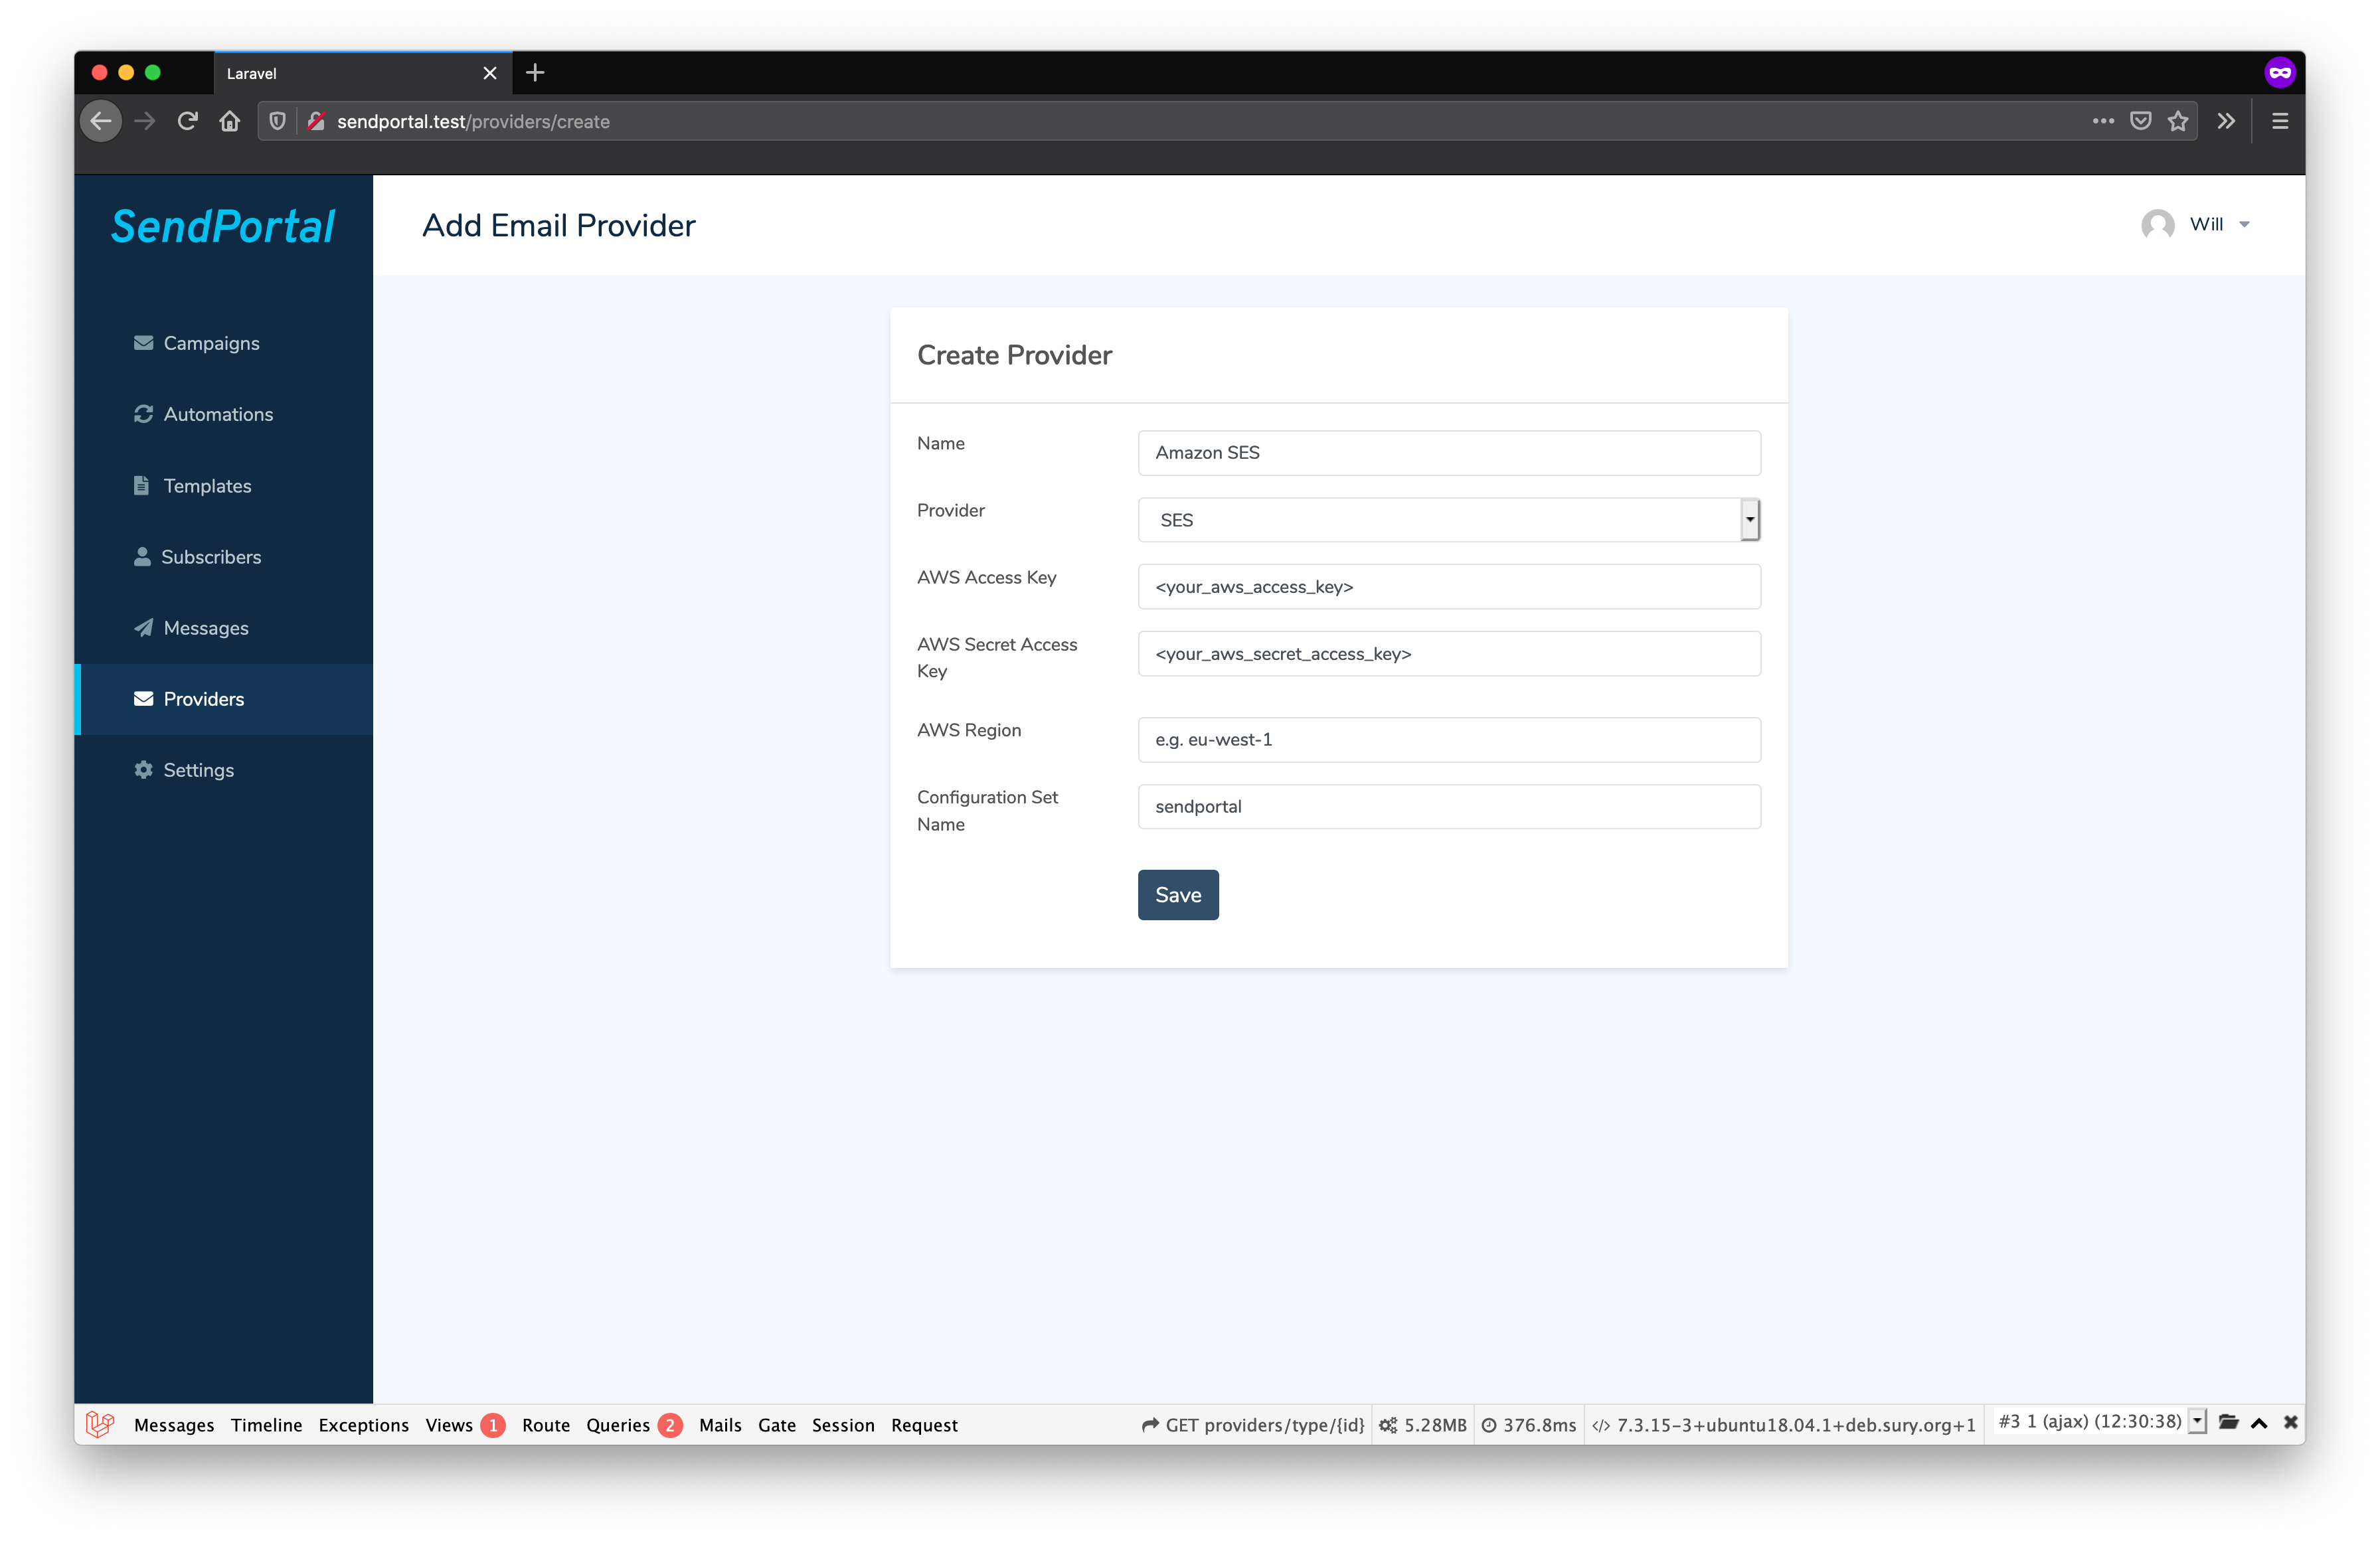
Congratulations! You can now send e-mails using Amazon SES.
If you require any more information about SES, check the official Amazon SES documentation.
Tracking
If you want to enable tracking for e-mails that you send through SES, then there are a few additional steps we need to complete.
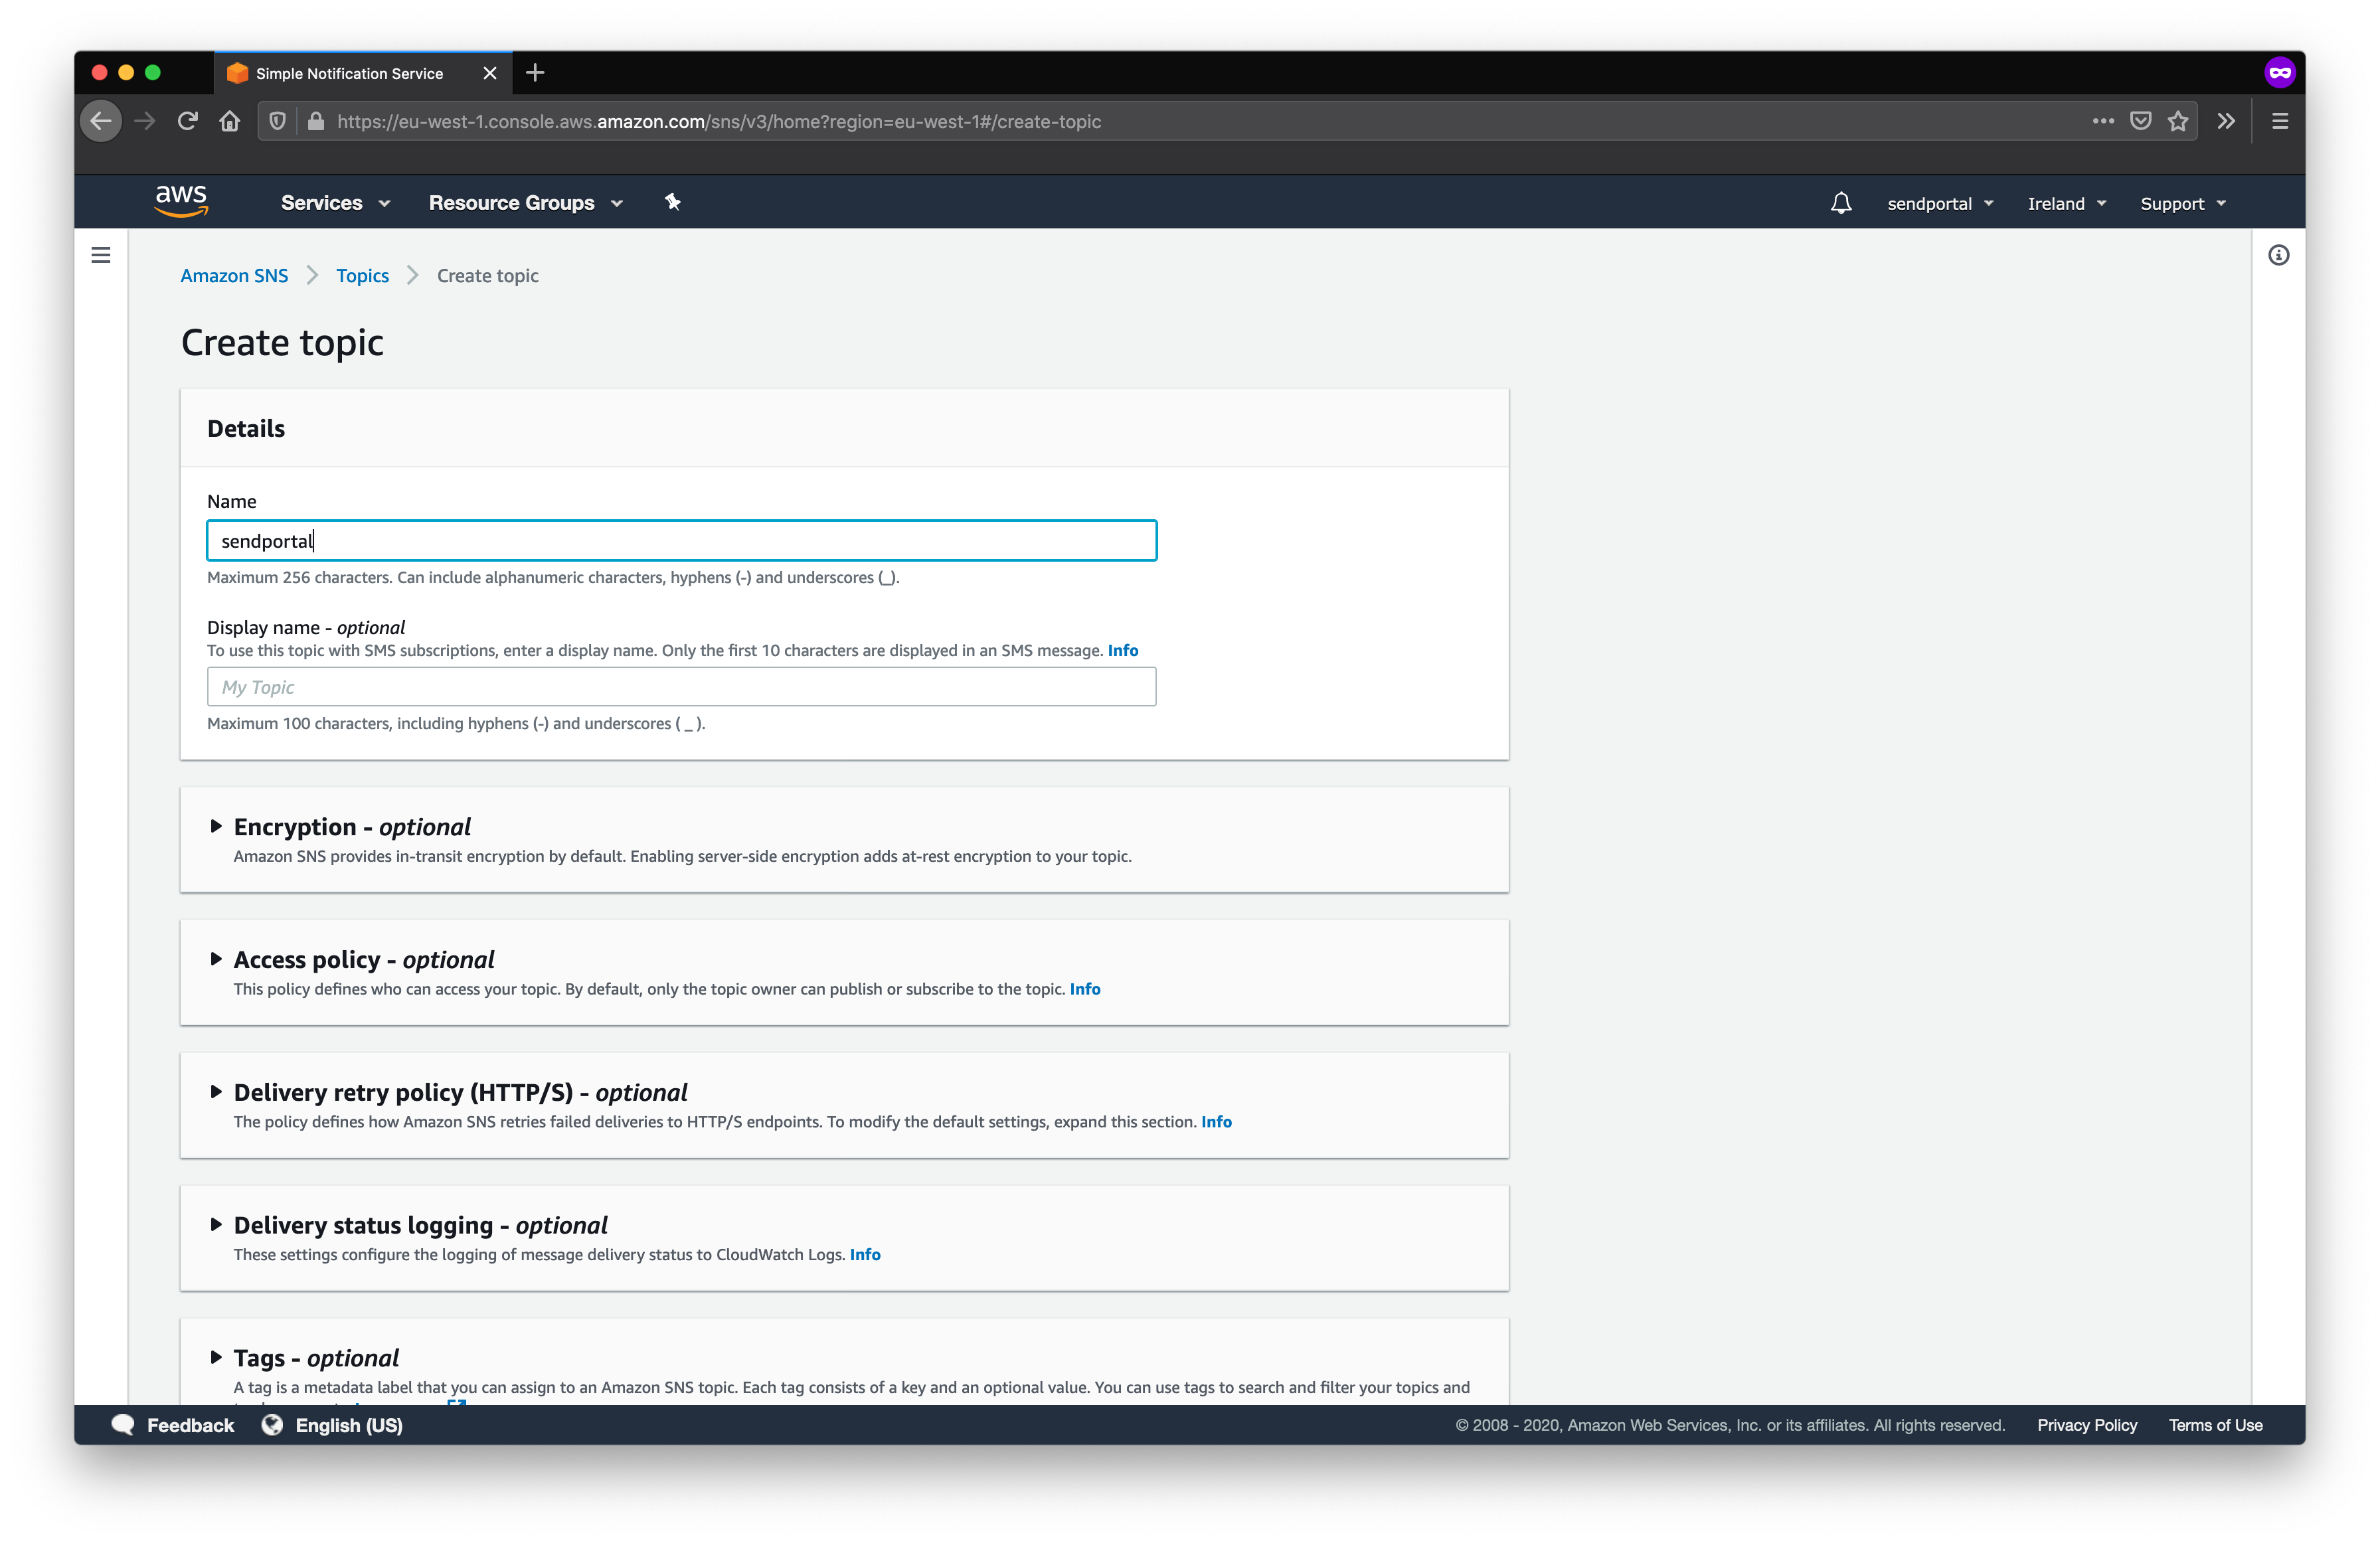
You'll need to configure Amazon's SNS (Simple Notification Service) in order for it to send the required webhooks to SendPortal, so navigate to the SNS page from the AWS Management Console.
Begin by creating a topic. Select Topics from the menu and click Create topic. Everything other than a name is optional at this time.
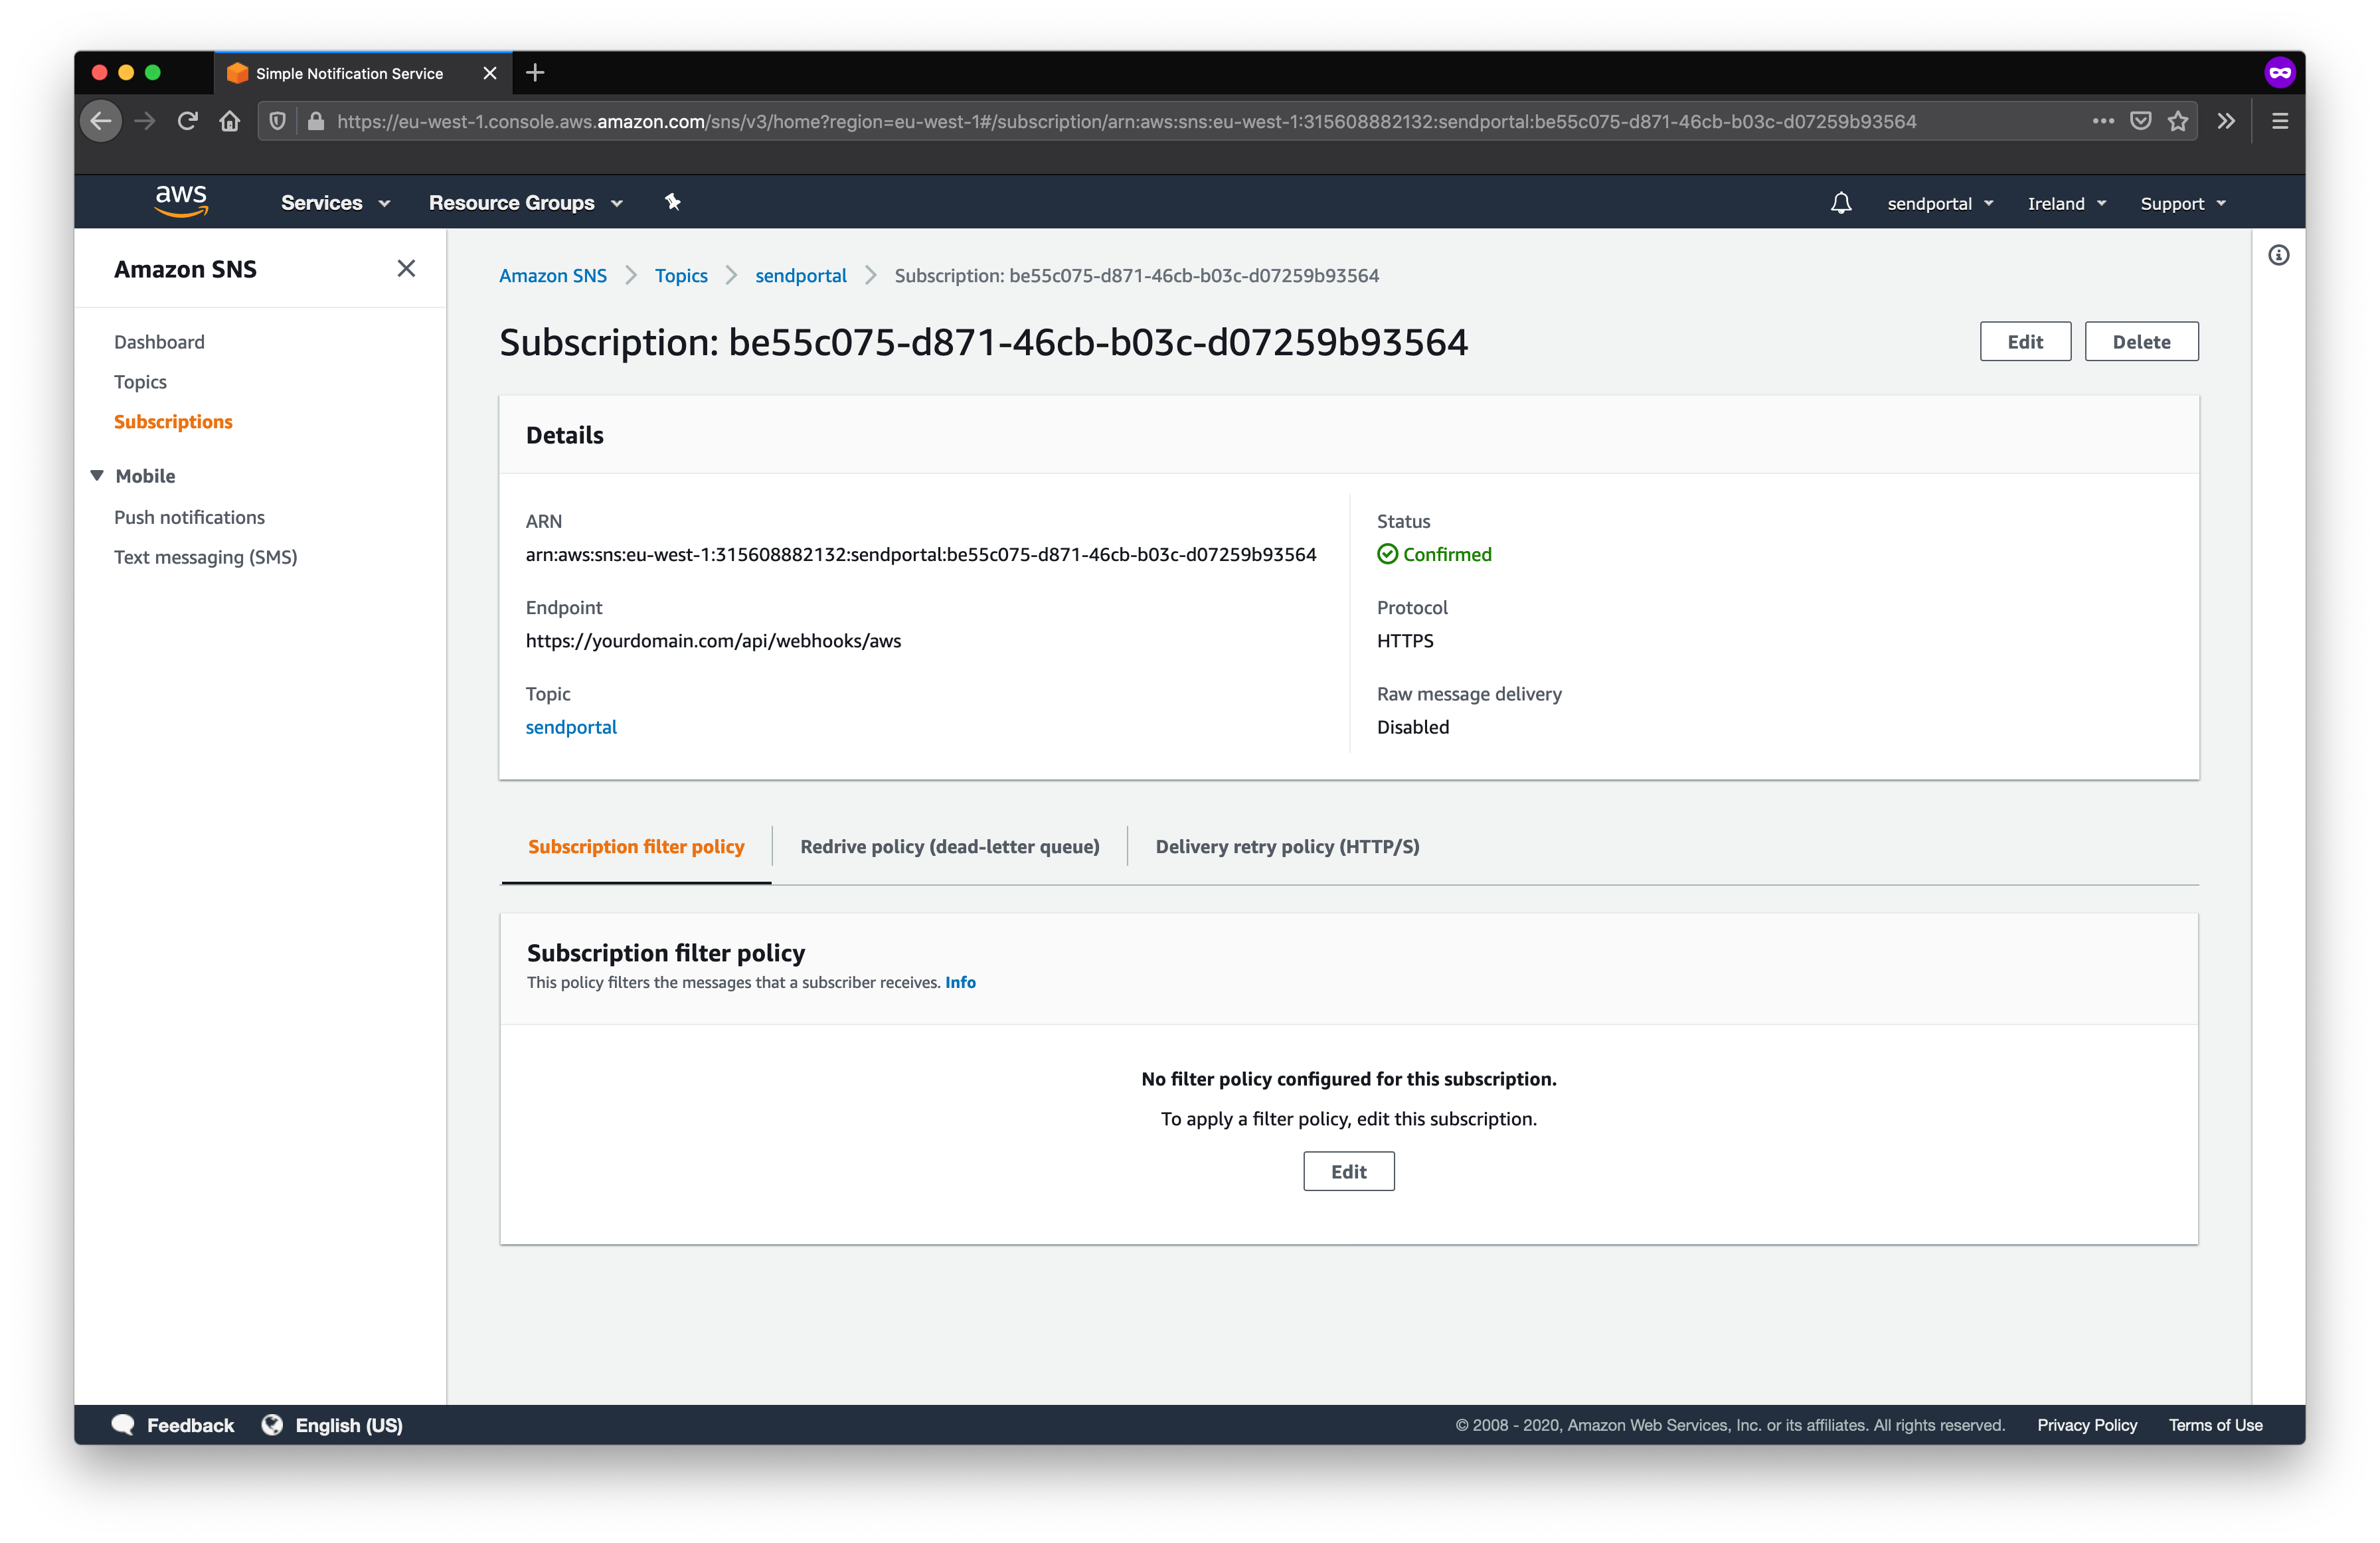
We also need to create a subscription to go along with our topic. For the Topic ARN, select the topic that you just created and select HTTPS as the protocol. The Endpoint will depend on your domain, but must end with /api/v1/webhooks/aws. For example, if SendPortal is installed at https://campaigns.marketing.com, then each webhook should point to https://campaigns.marketing.com/api/v1/webhooks/aws.
Do not enable raw message delivery, otherwise the webhooks will not be handled correctly.
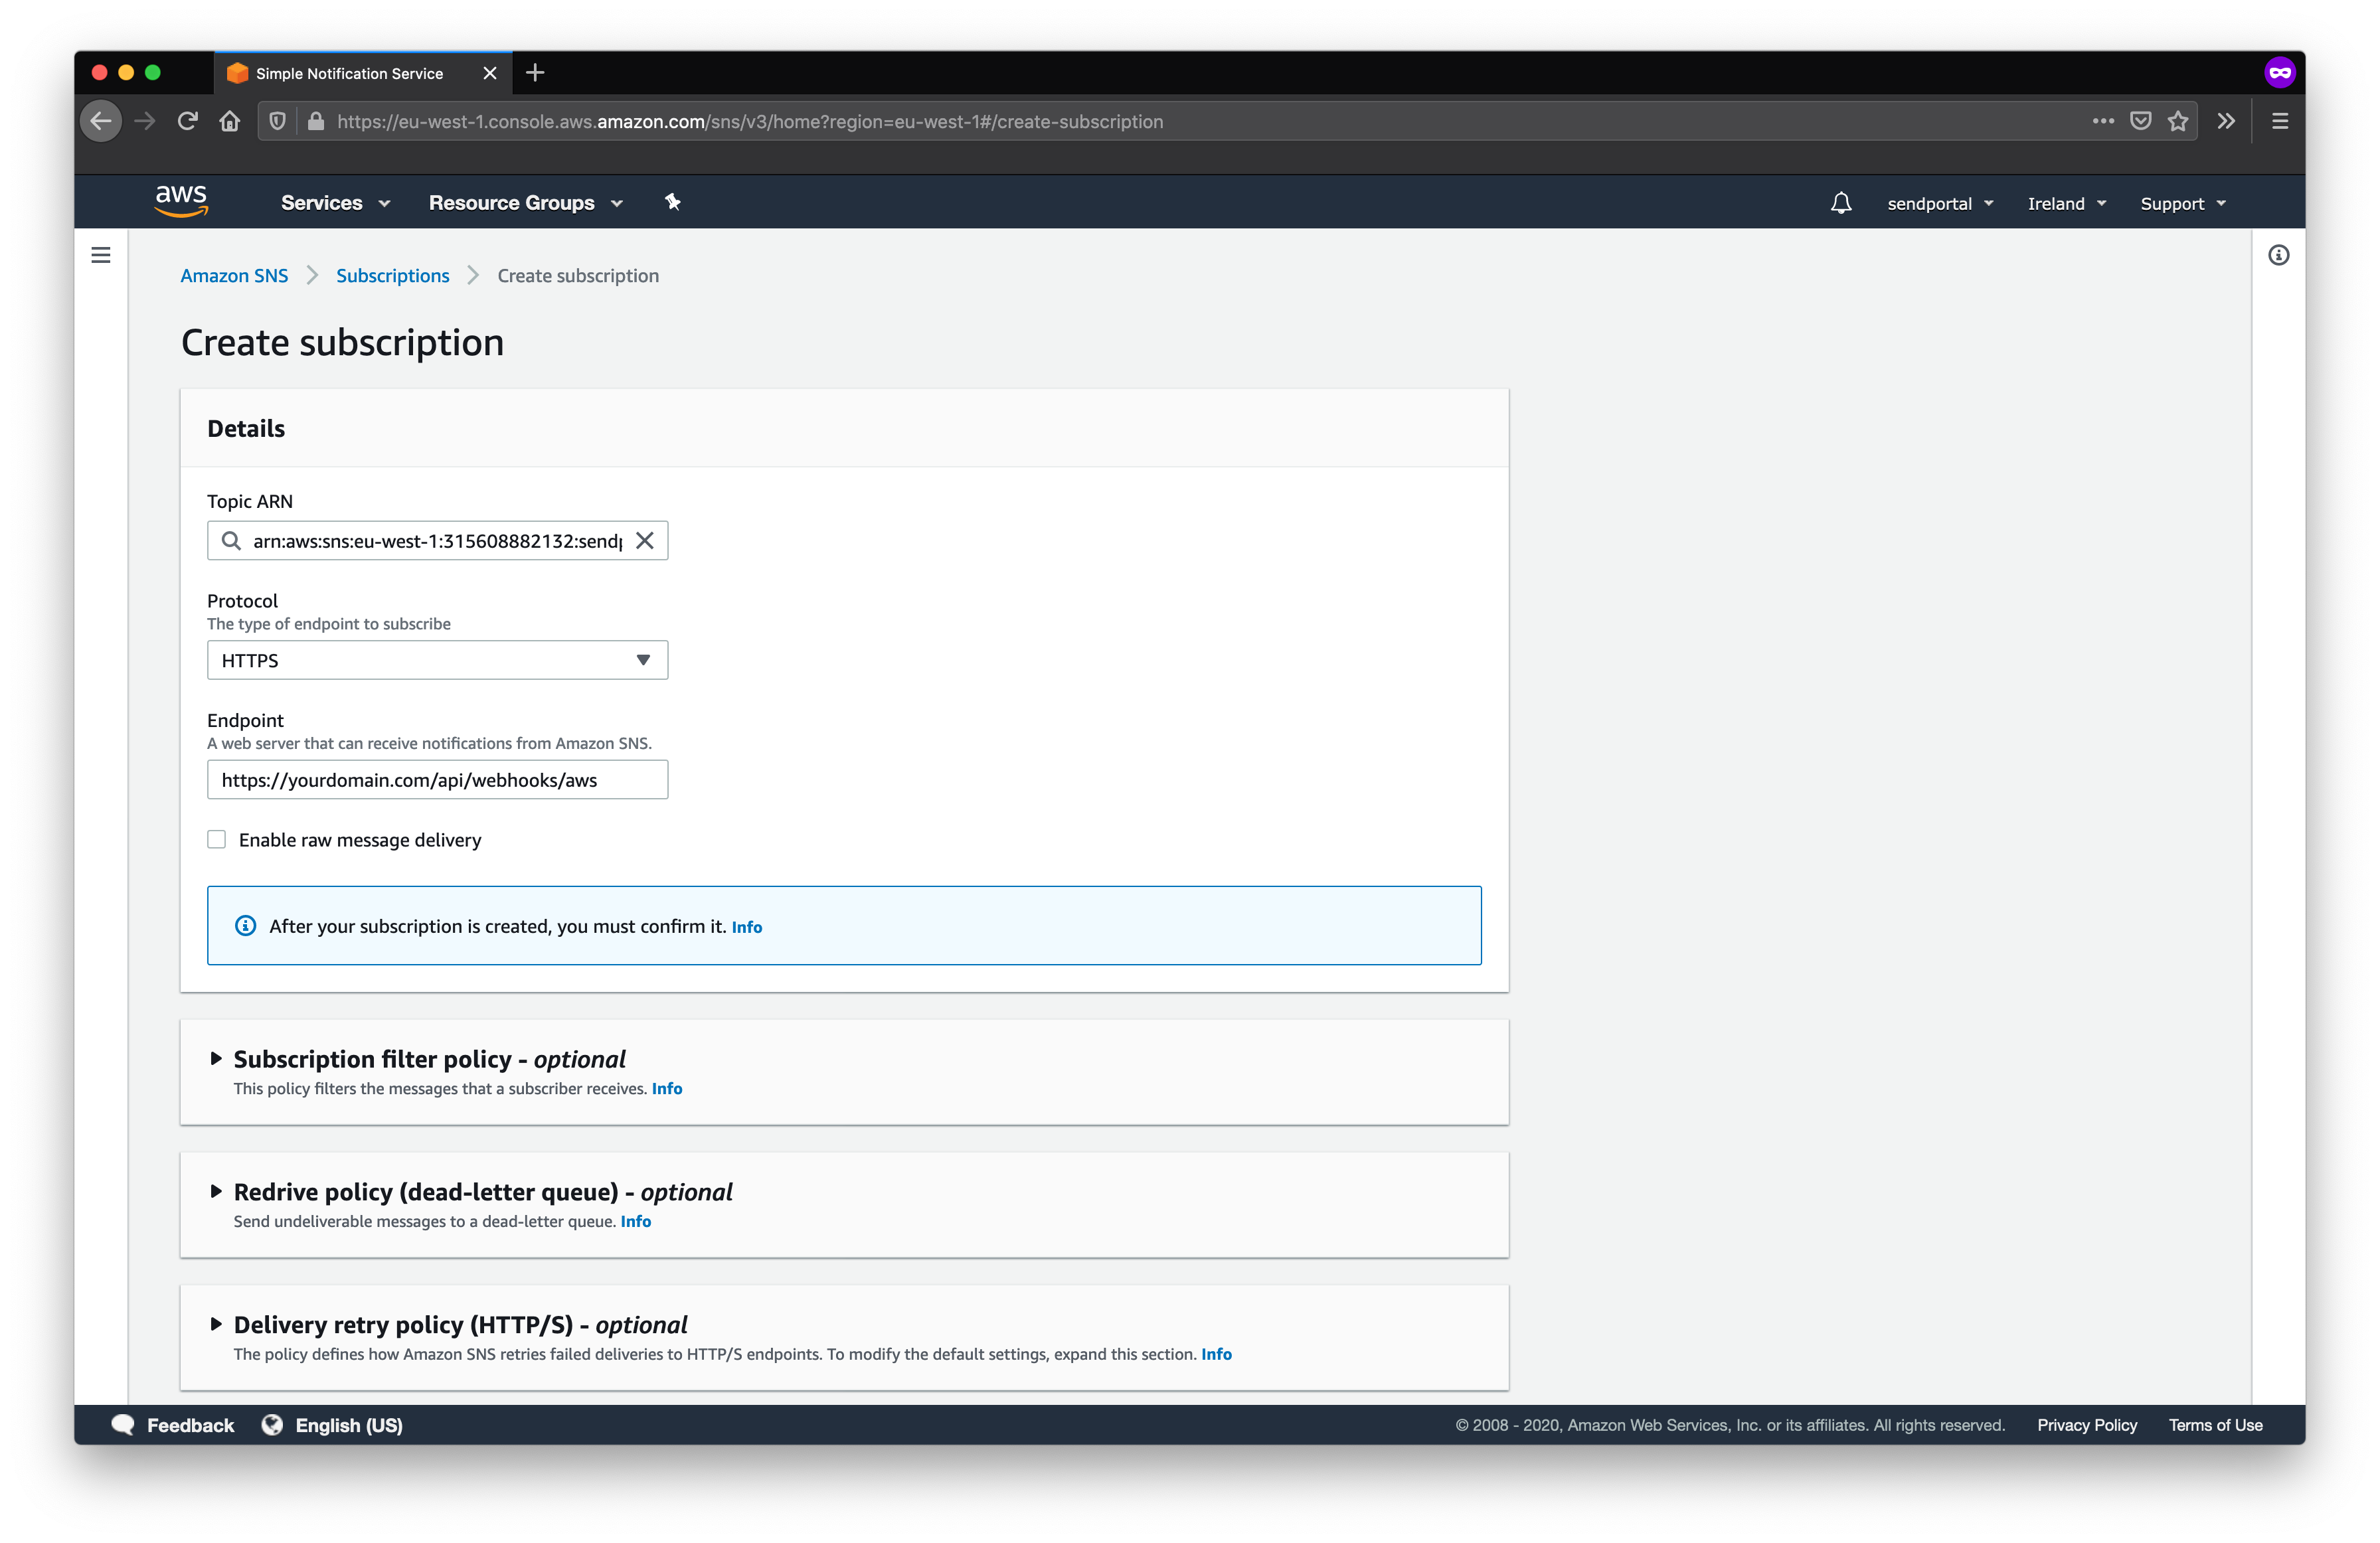
The subscription needs to be confirmed before we can use it, but if you've supplied the correct URL for your SendPortal instance, and it's already available to the outside world, we'll do that automatically for you. You should see Status transition to Confirmed.
We now need to tell SES to send any e-mail tracking webhooks to this endpoint so navigate back to the SES panel (we're almost there now...).
Select the domain that you already configured from Domains and open the section titled Notifications.
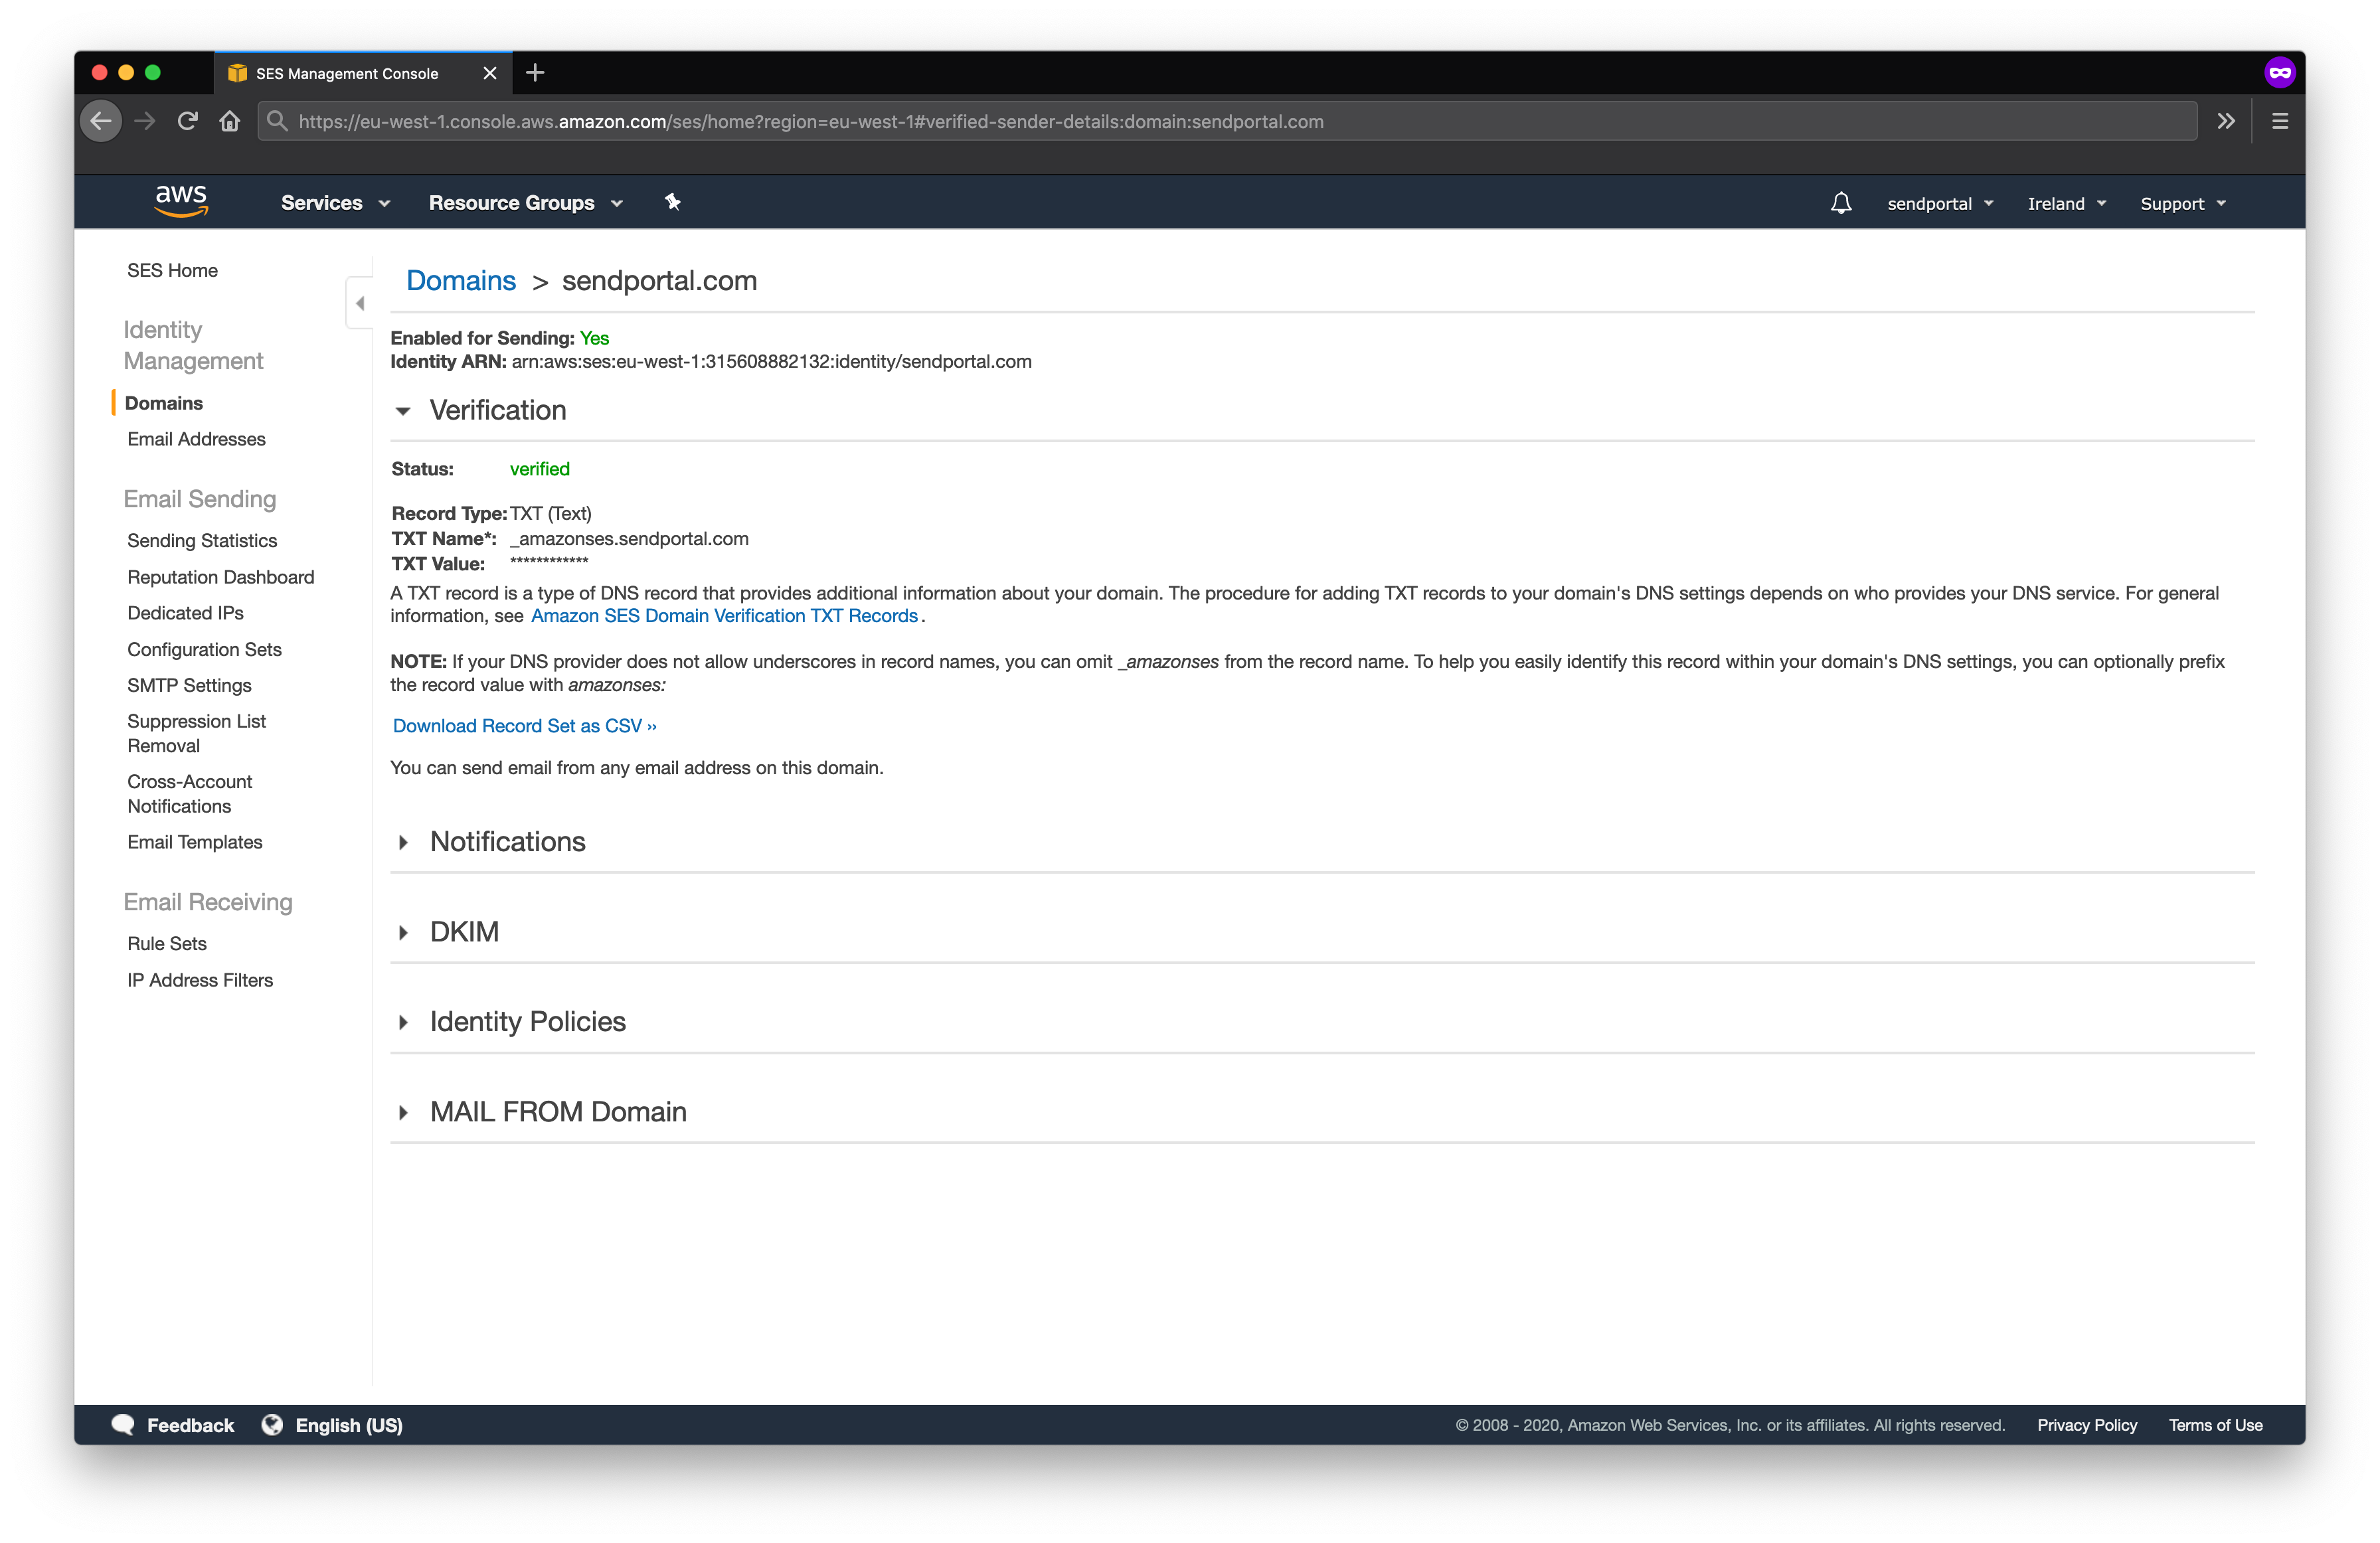
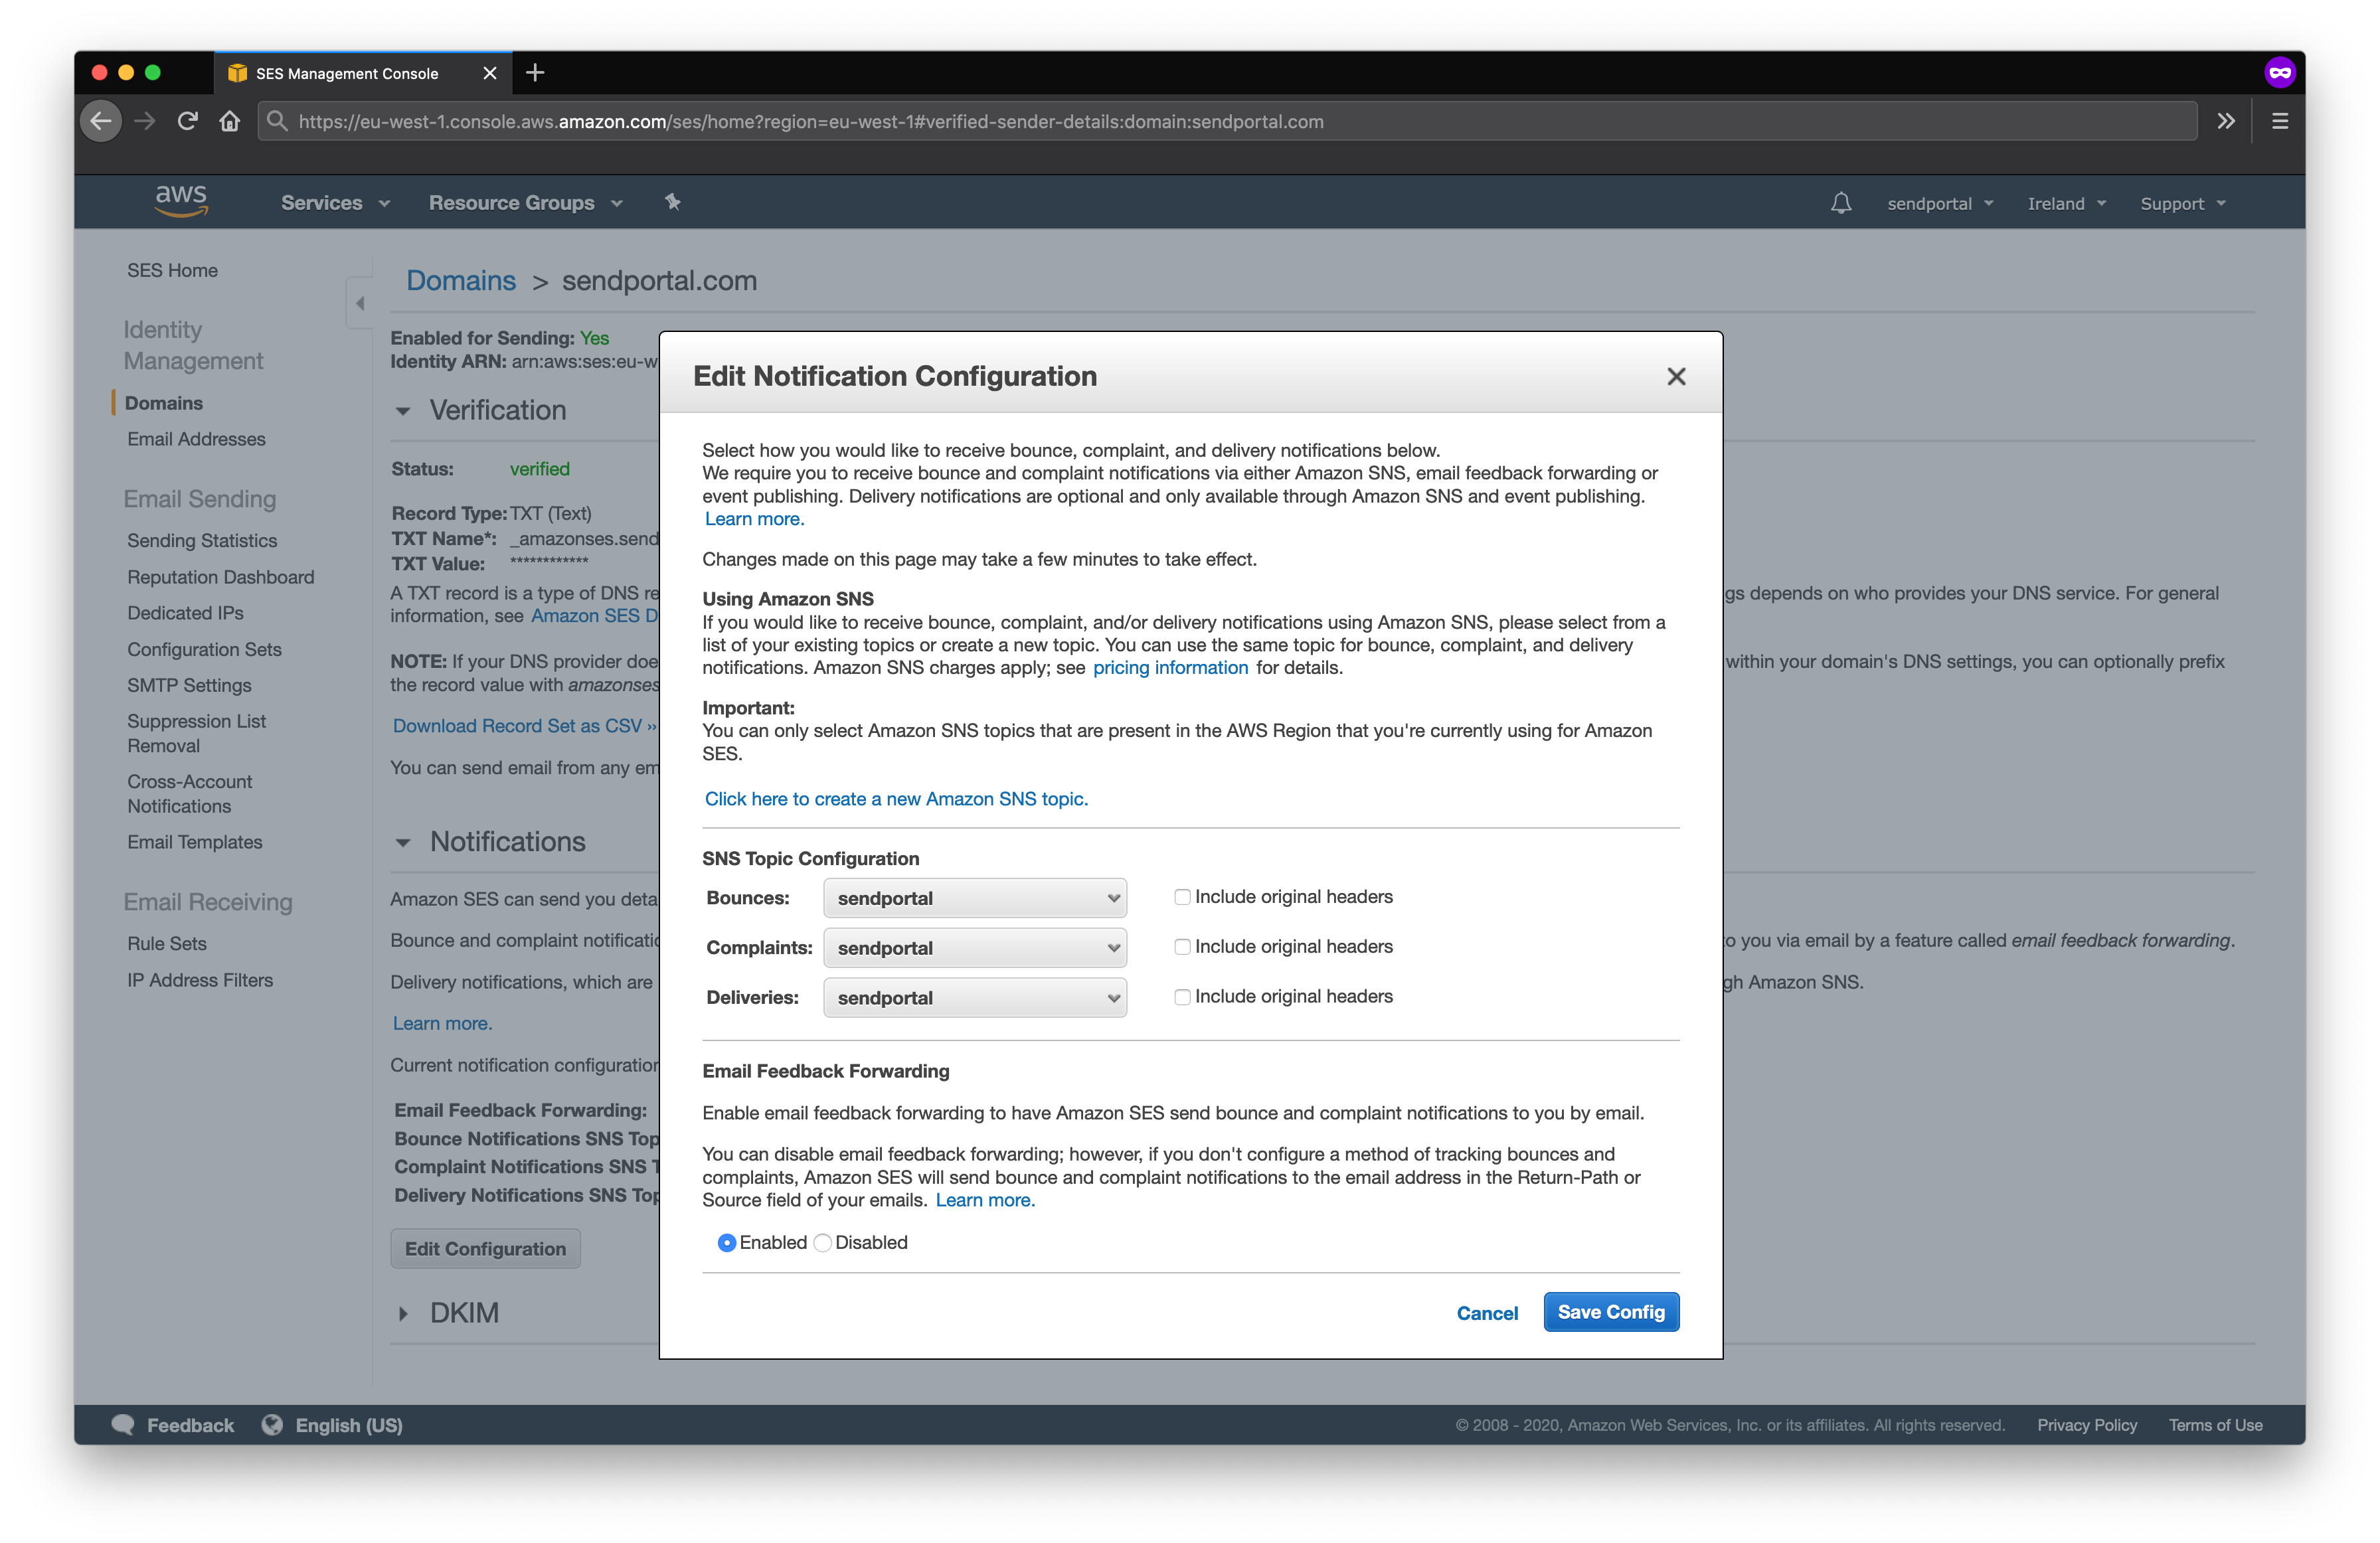
Click Edit Configuration and select the SNS topic that you created from the dropdown for each of the notification types.
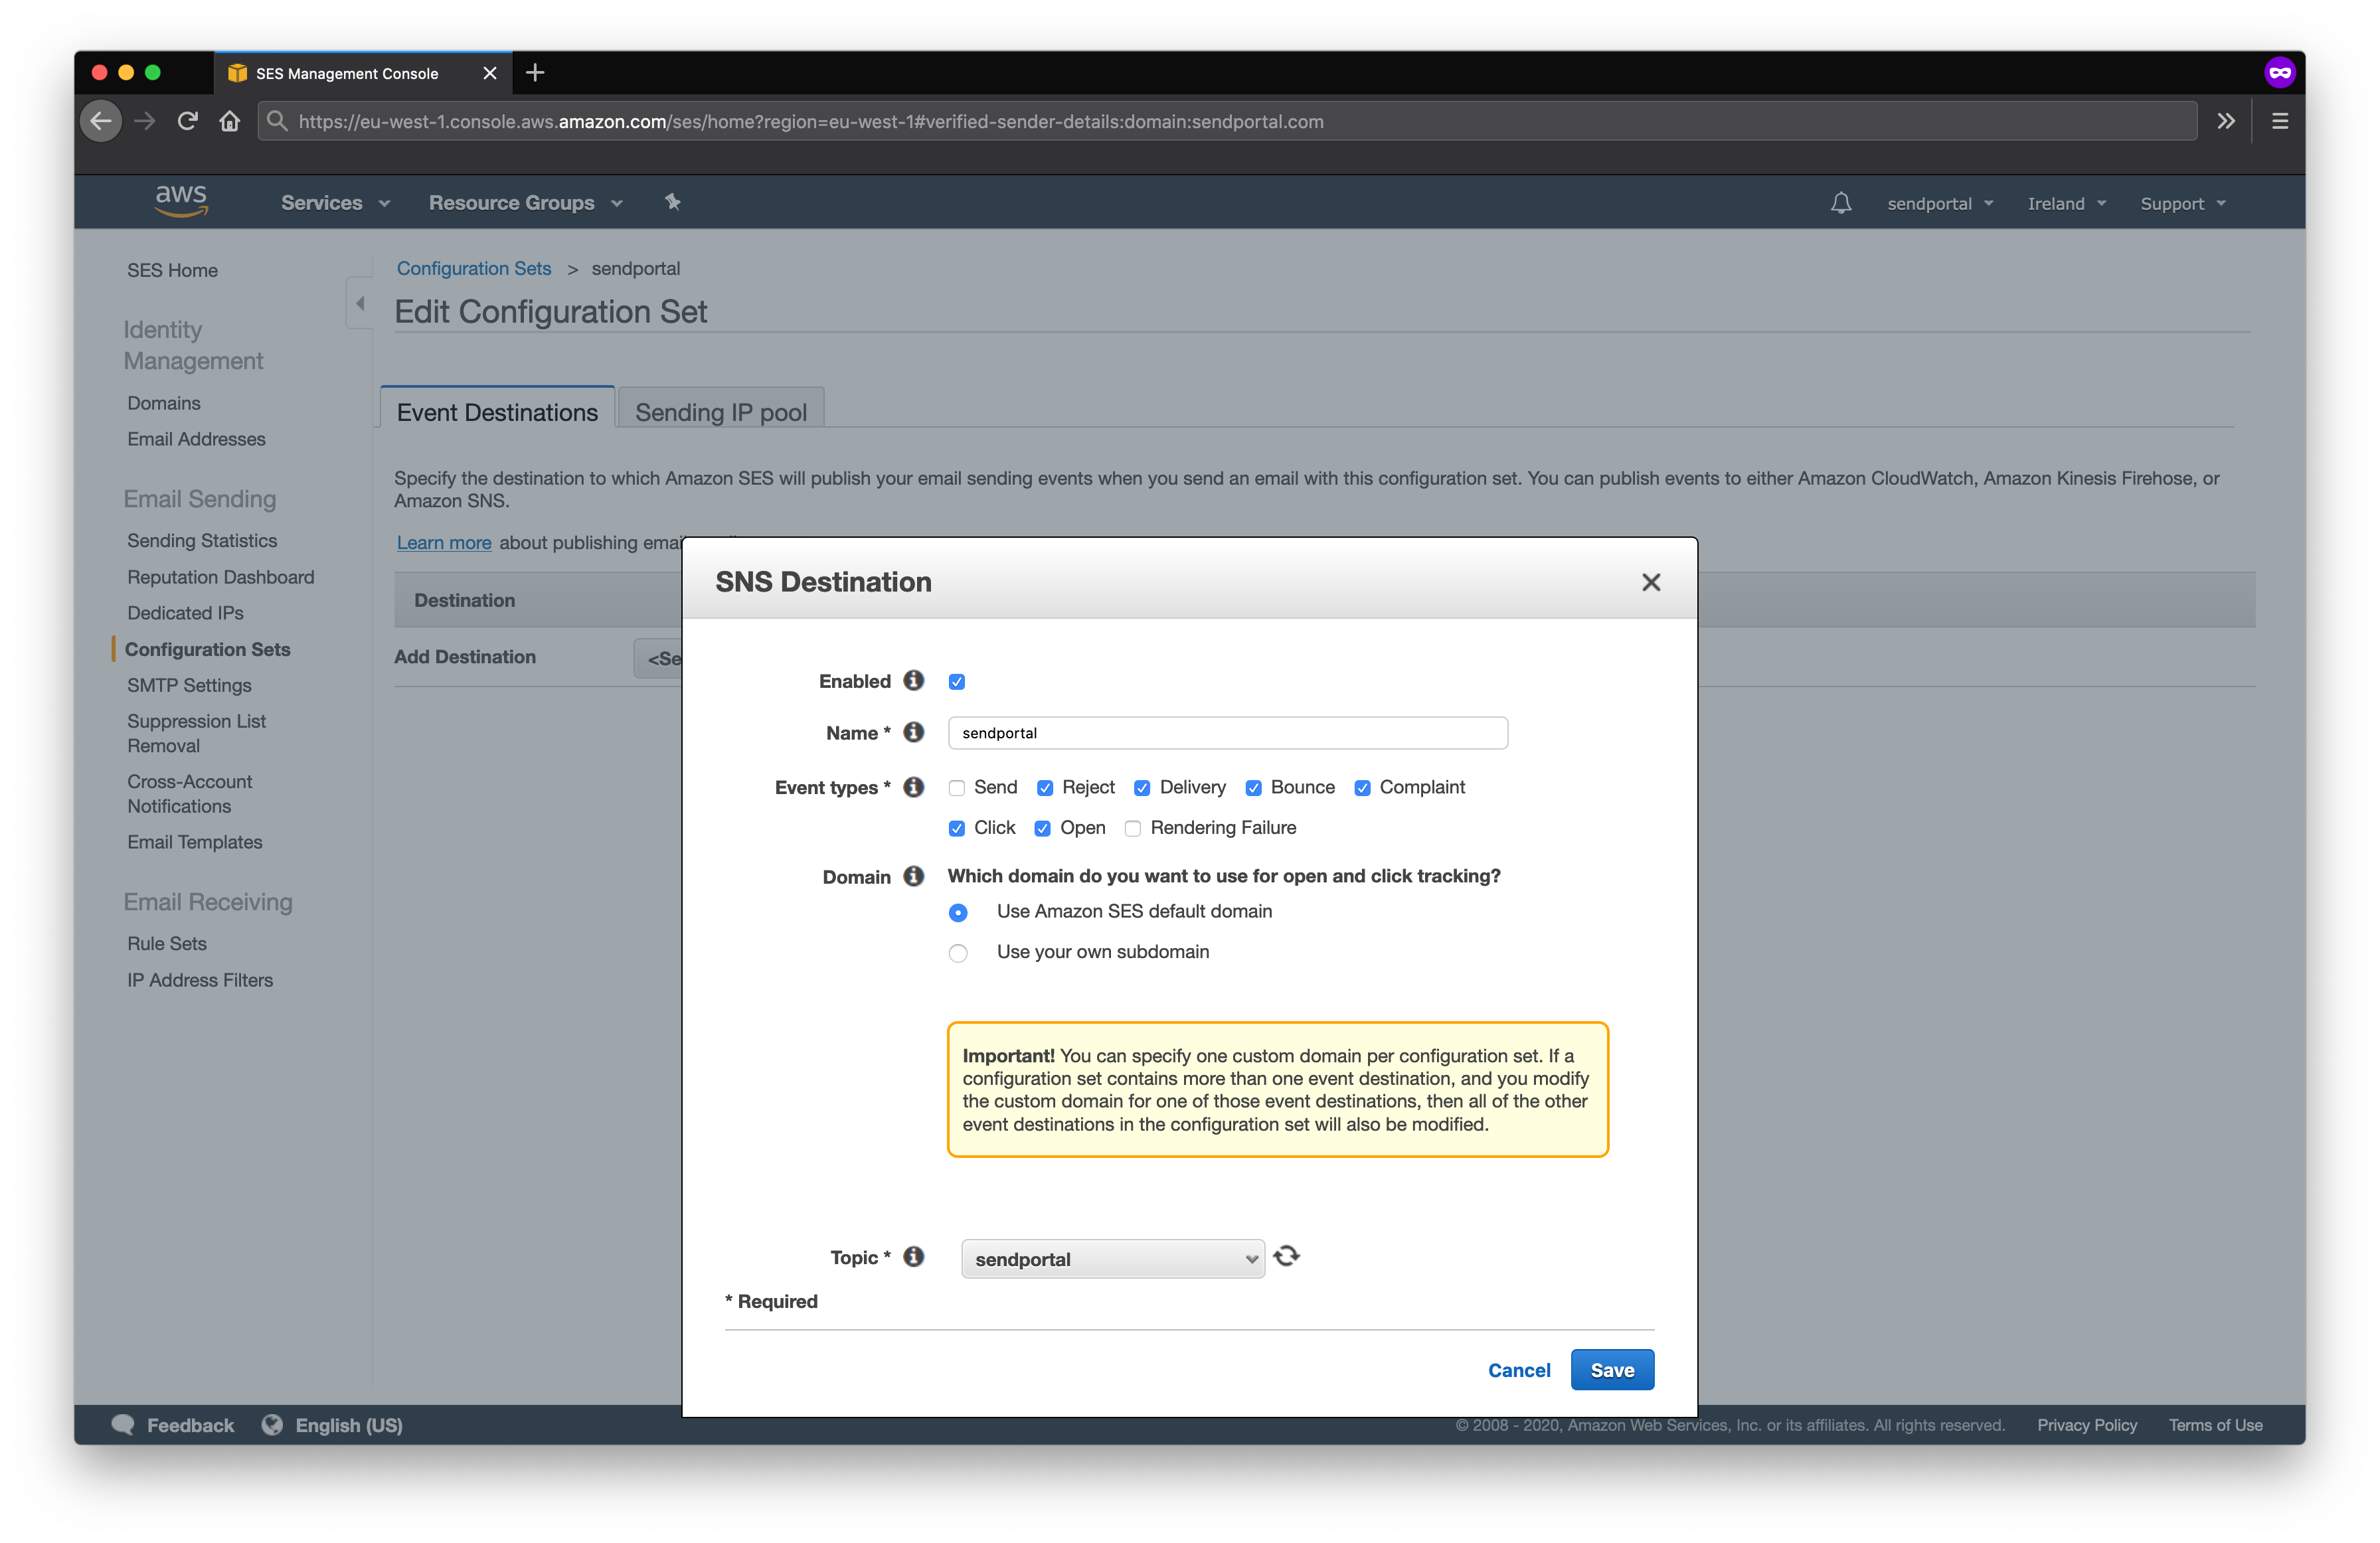
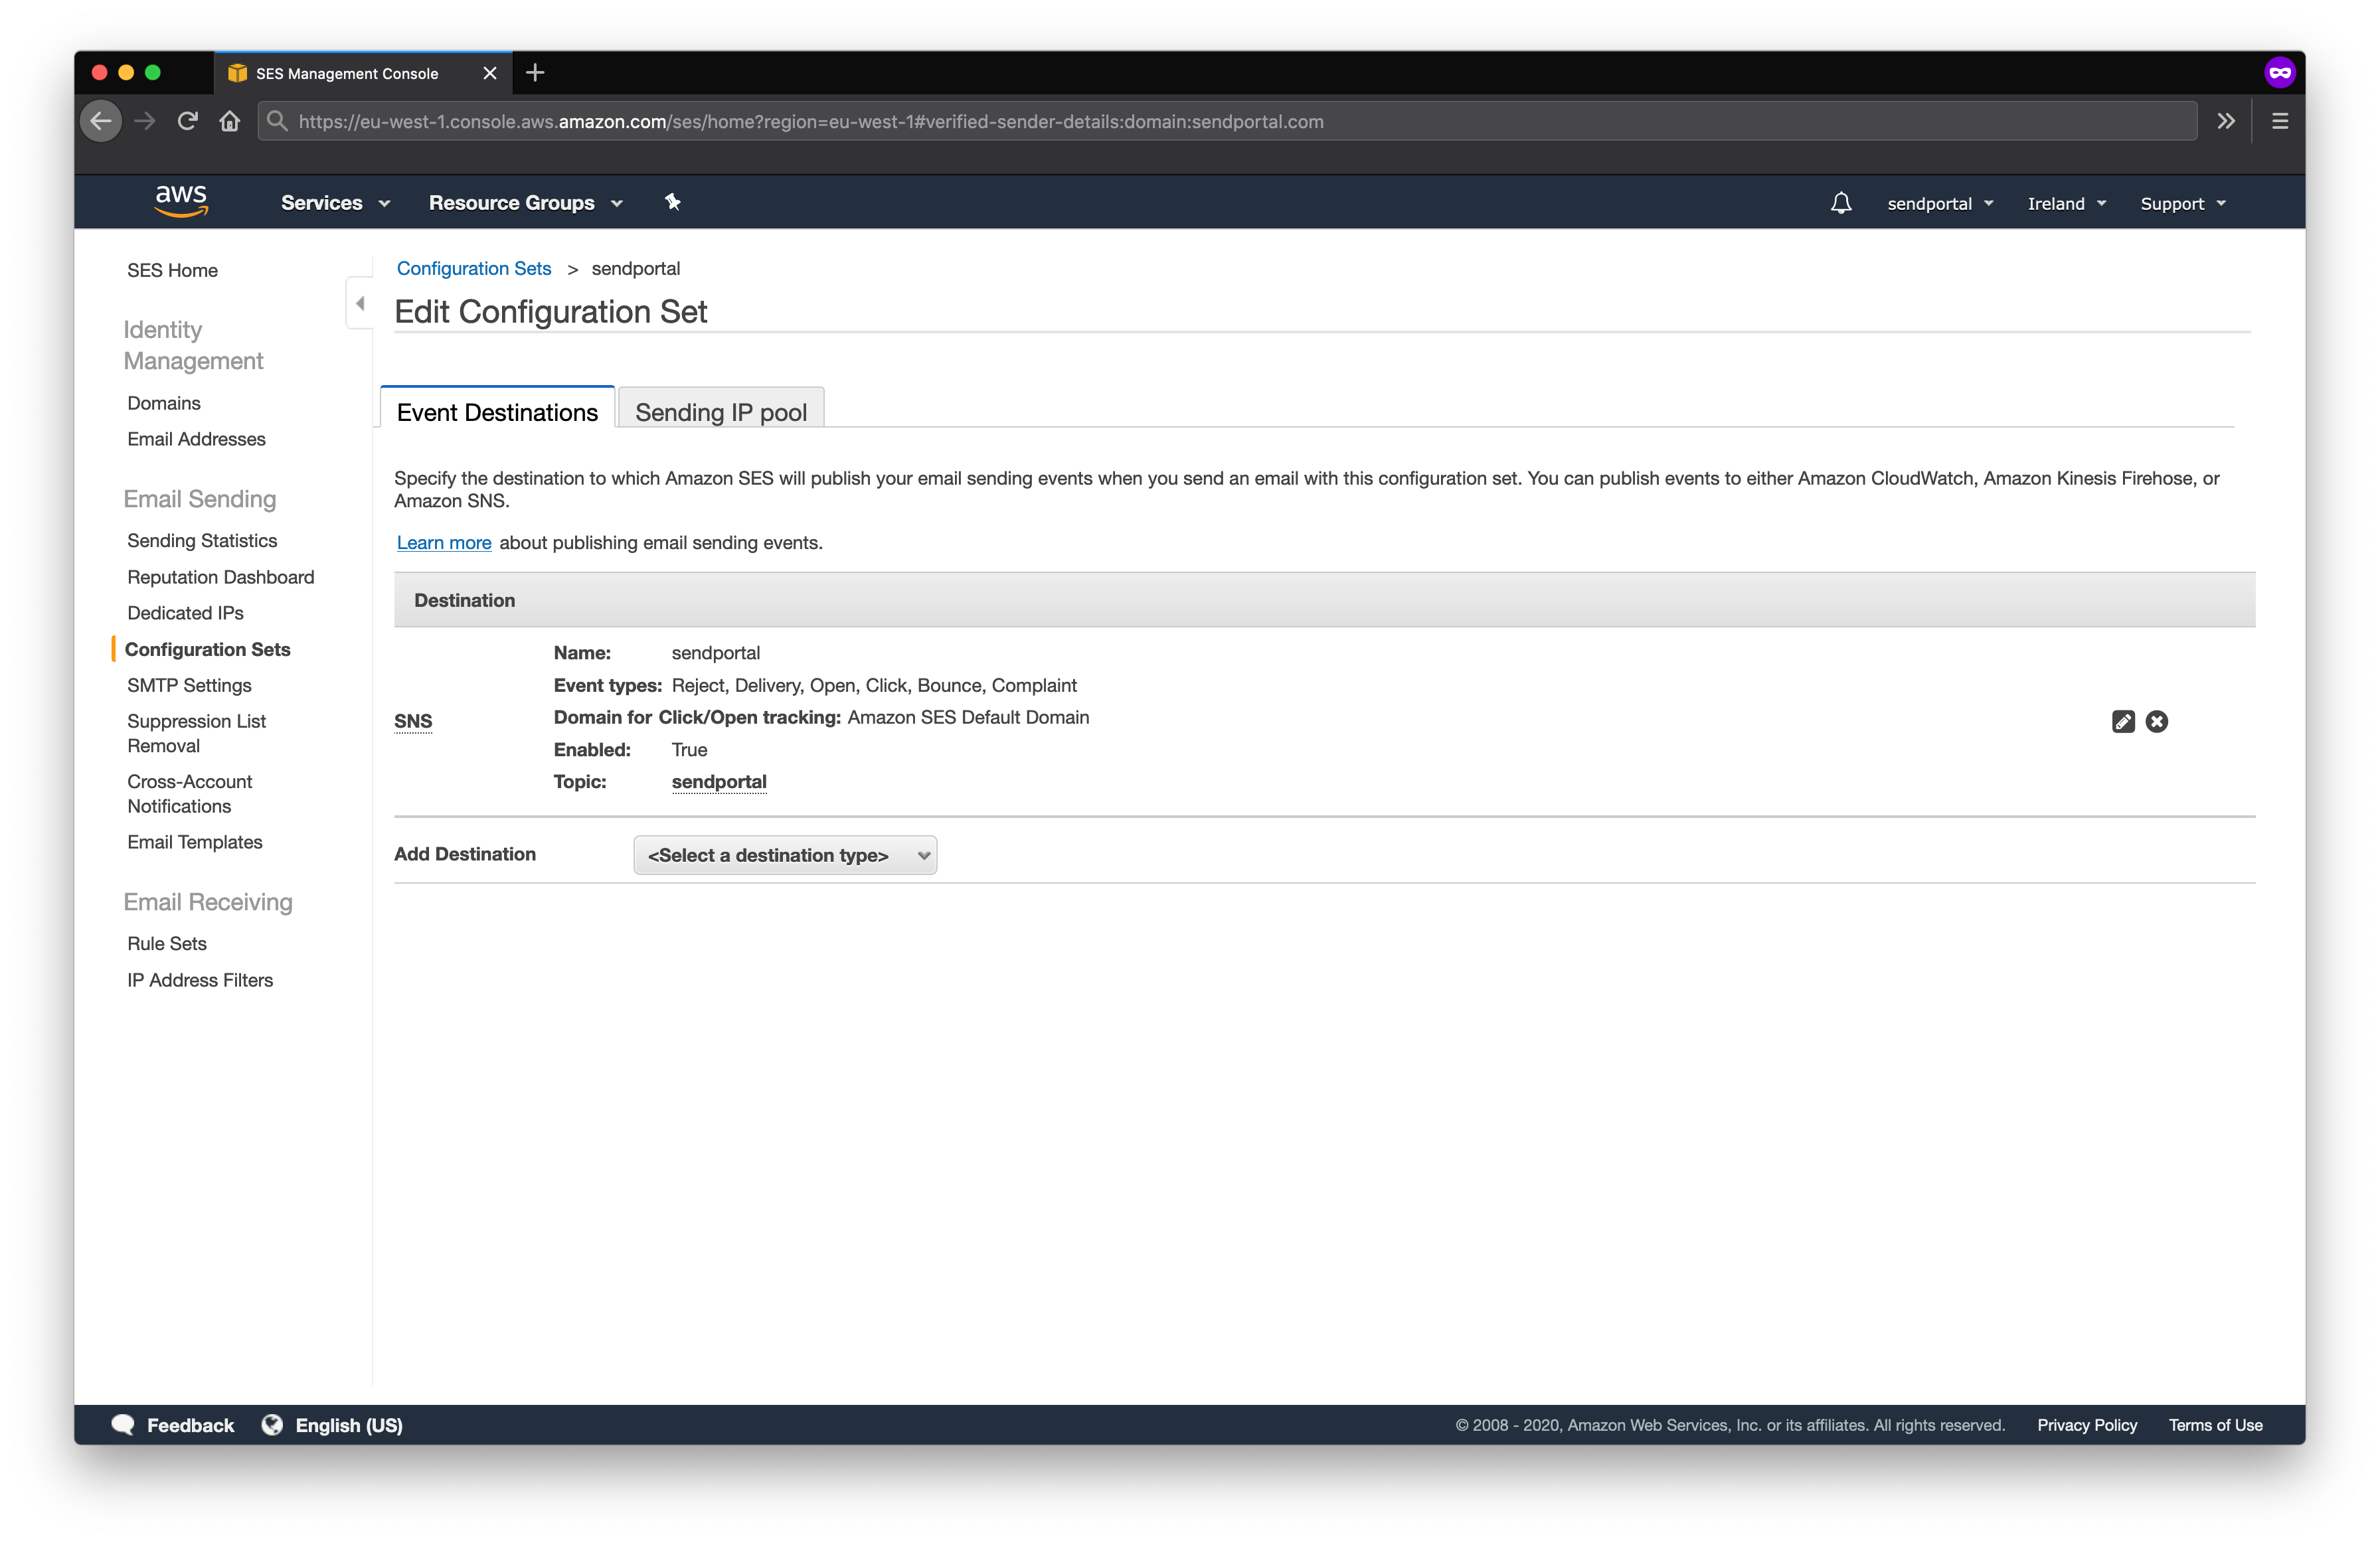
Finally, we need to enable the notification types for the configuration step that we created. Select the configuration set from the list and select SNS from the dropdown next to Add Destination.
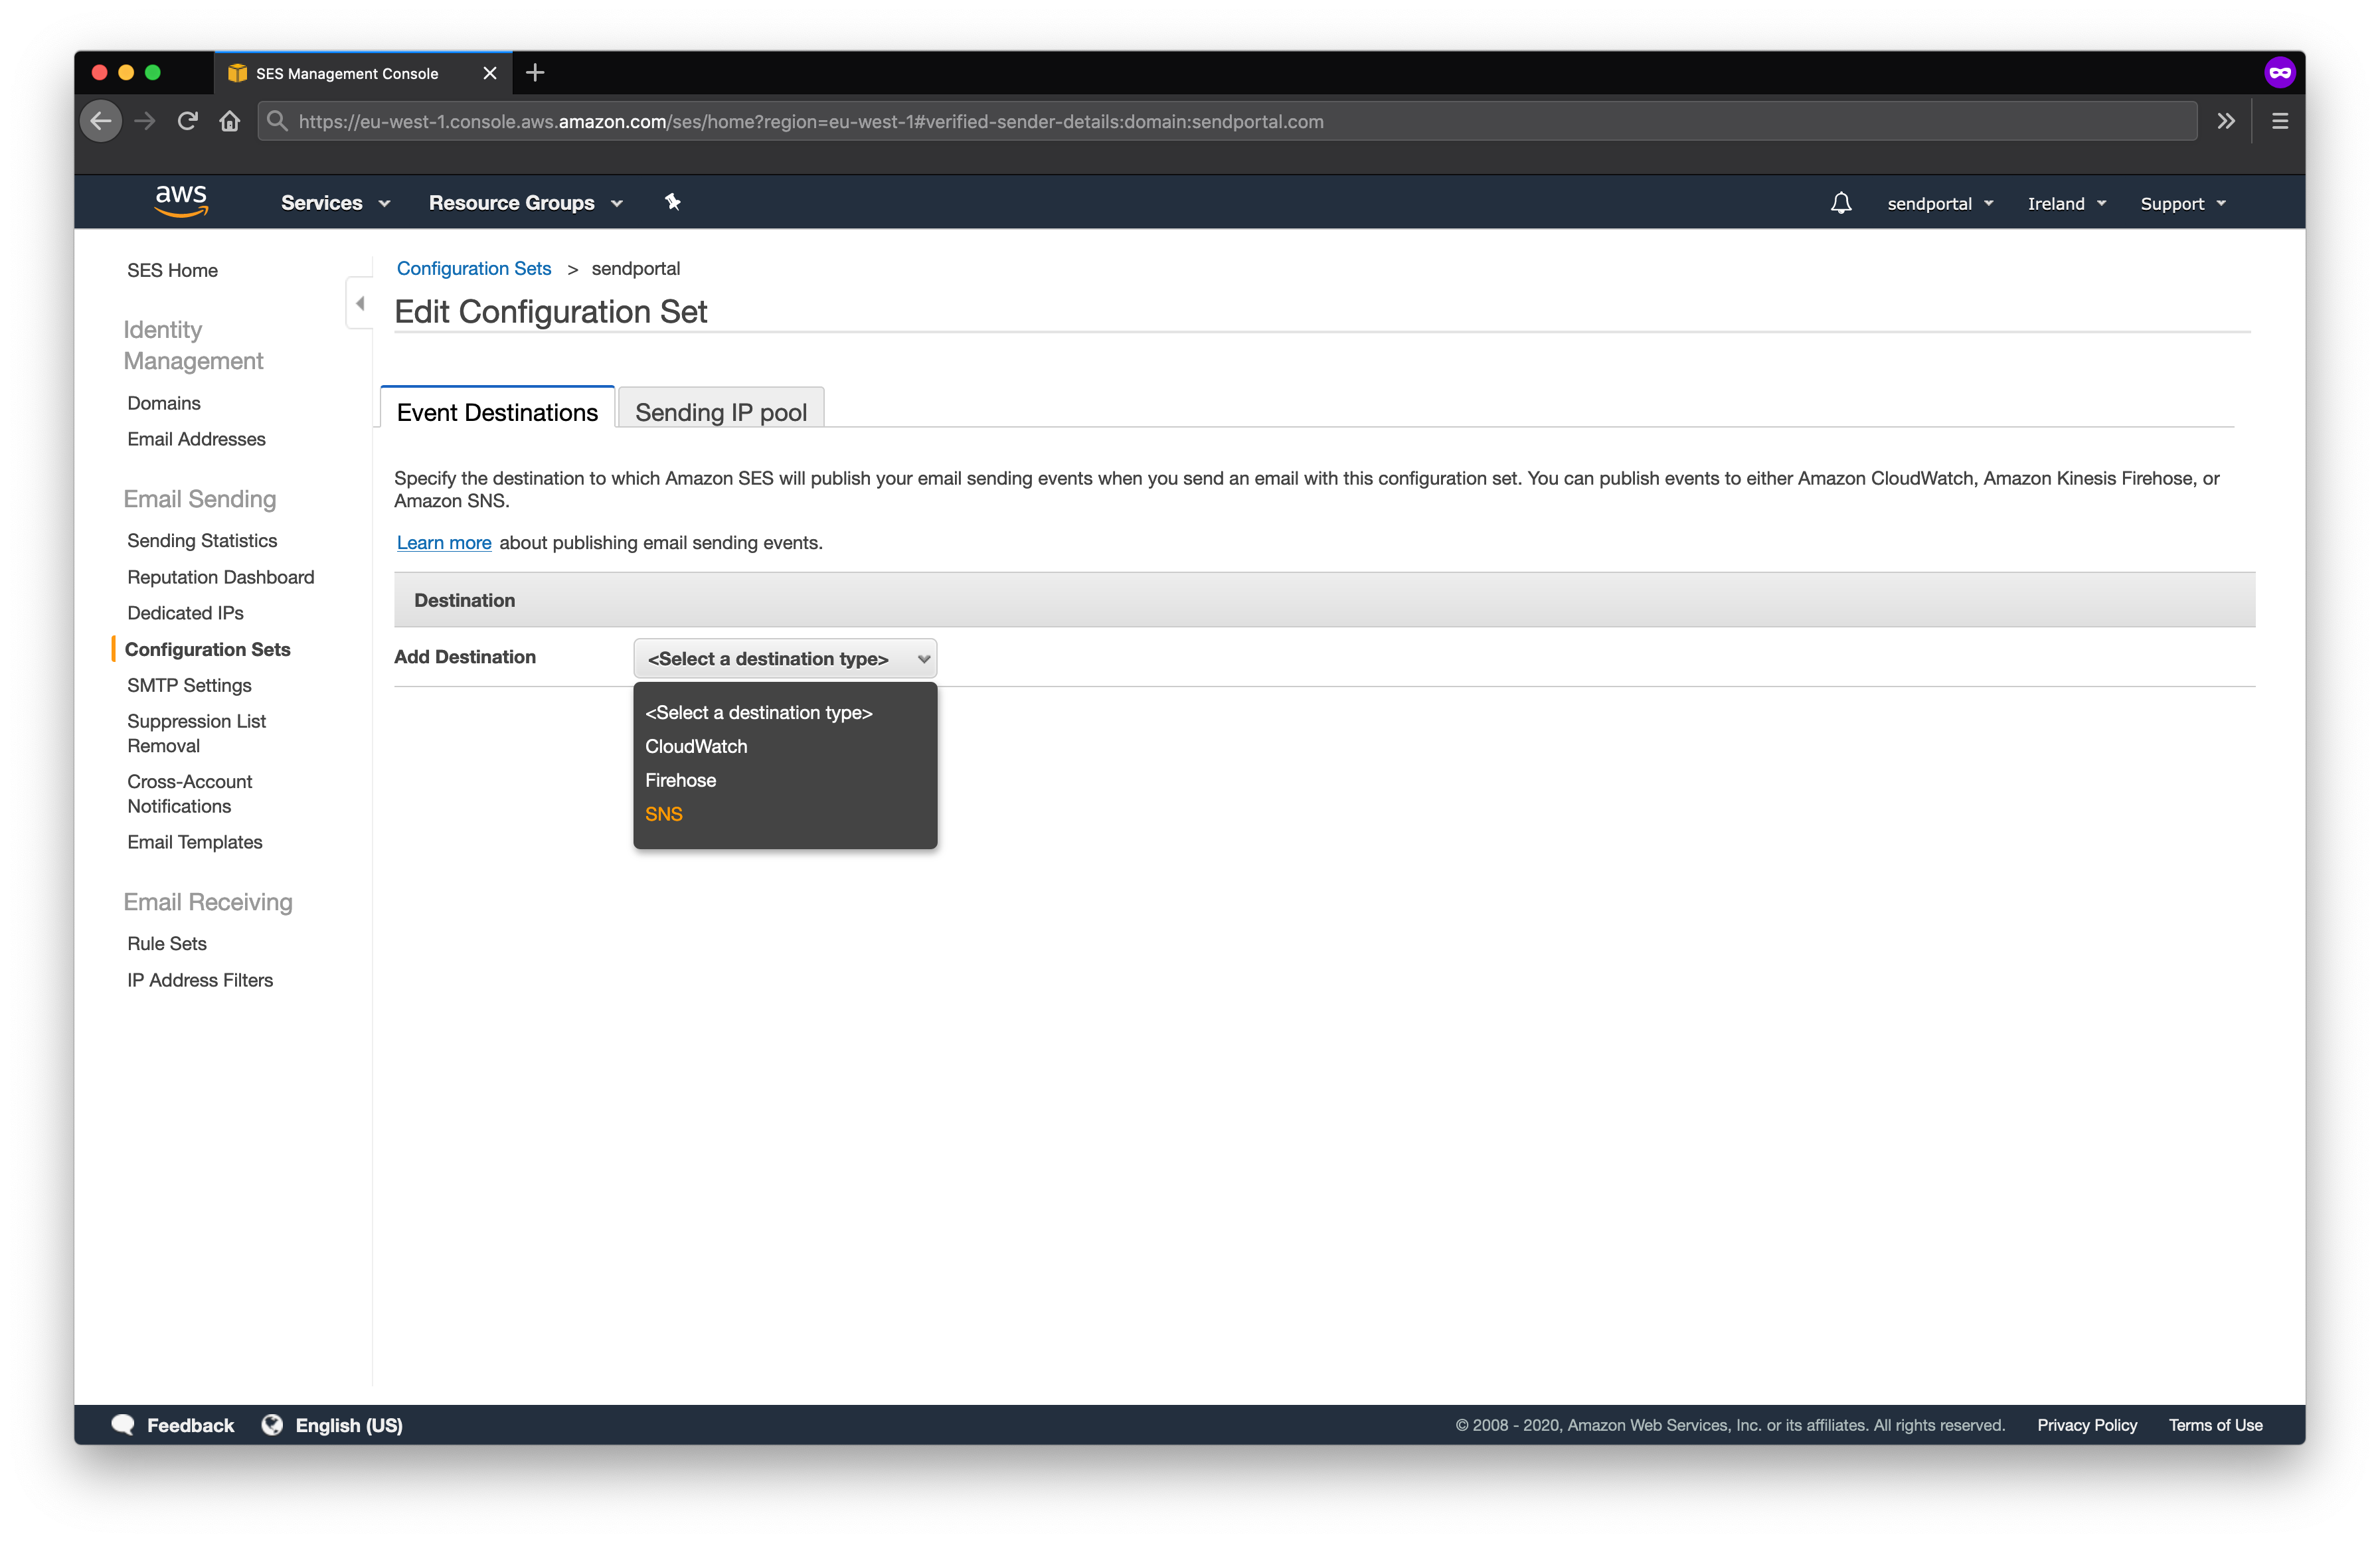
Select all the notification types you wish to receive (excluding Send and Rendering Failure), and select the Topic from the list.
Phew! That's it folks! You should now be setup to send and track e-mails using Amazon AWS.
For more information on Amazon SNS, visit the official documentation.
For more information on configuring SNS notifications for SES, visit the developer guide.
Throttling
AWS throttles the sending of e-mails via the SES API. Requests are limited to 1 per second by default, but you can apply to have this rate increased.
For this reason you need to have a cache configured when using AWS. For a small mailing list the file driver is sufficient, but for medium or large mailing lists we recommend implementing redis.
For more information on SES throttling, see the official documentation here.